Tips In Managing Customers/Vendors in Dynamics 365 Business Central
Merging Customer/Vendor Accounts
Reasons for Merging
When the customer/vendor master list is initially created, the unique customer/vendor code ensures that the same account will not be duplicated. However, there may be situations when two customer/vendor accounts need to be “combined”, for example:
-
When creating a new account, the code is unique, but the name already exists (e.g. when the customer/vendor list is long and no search is performed on name before a new account is created)
-
When independent customer/vendor businesses have been acquired (e.g. corporate merger)
For the above reasons, two separate customer/vendor accounts need to be merged. If there are historical transactions (e.g. invoices) in any account, these can also be merged (as in the case of a corporate merger).
Merging Accounts
The steps and outcomes for merging customer or vendor accounts are similar. In merging one account with another, a key step is to resolve the default dimension value used in both accounts.
Customers
If there are 2 duplicate customers (i.e. same name but different customer code) or customer entities have undergone a merger/acquisition process, the separate customer accounts can be merged into one.
Pre-merger Data
For example, Customer A and Customer B are to be merged, where Customer B will merge with Customer A.
Scenario: Customer B acquires Customer A, and Customer A’s details must be replaced by Customer B’s, with both account balances combined.
Review the historical transactions before the merge process.
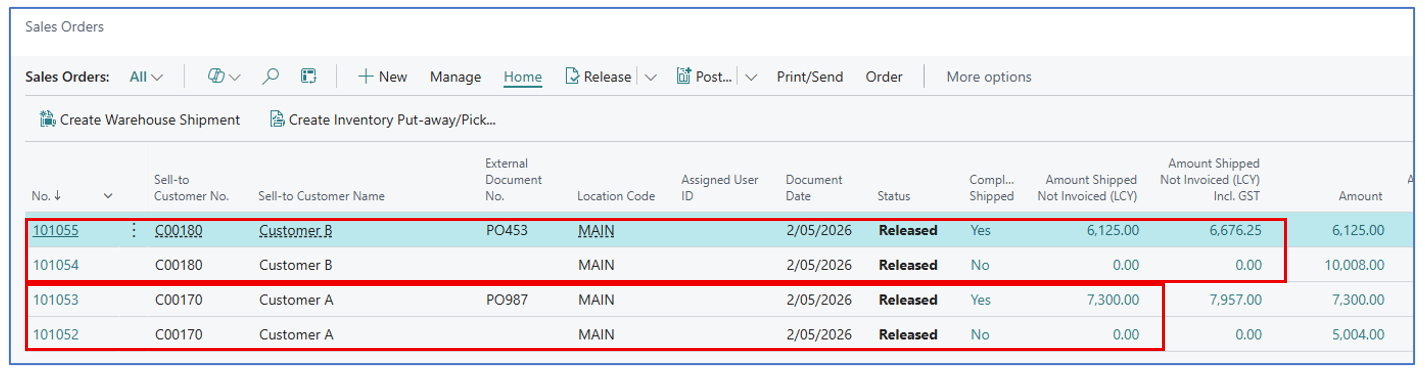
Open Transactions (Sales Orders) in Customer A and Customer B:
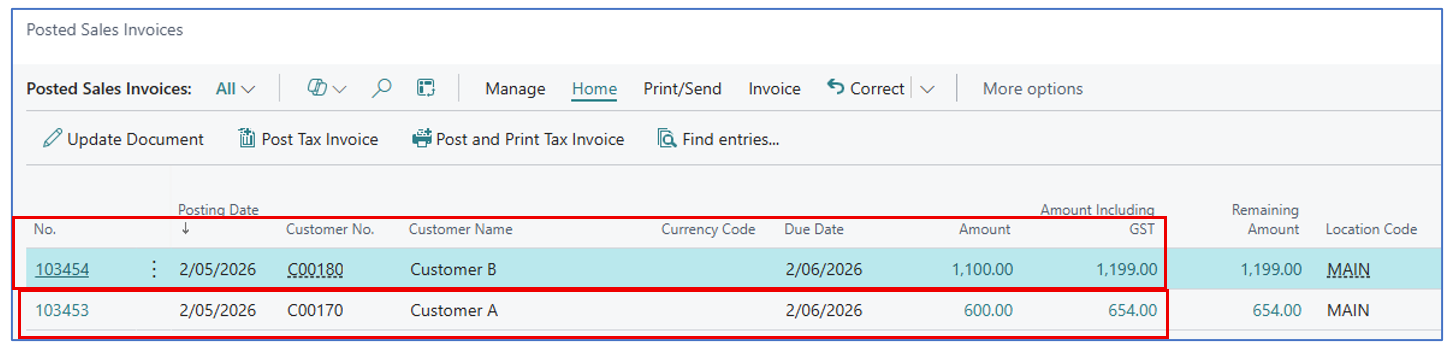
Posted Transactions (Posted Sales Invoice and Posted Sales Shipment) in Customer A and Customer B:

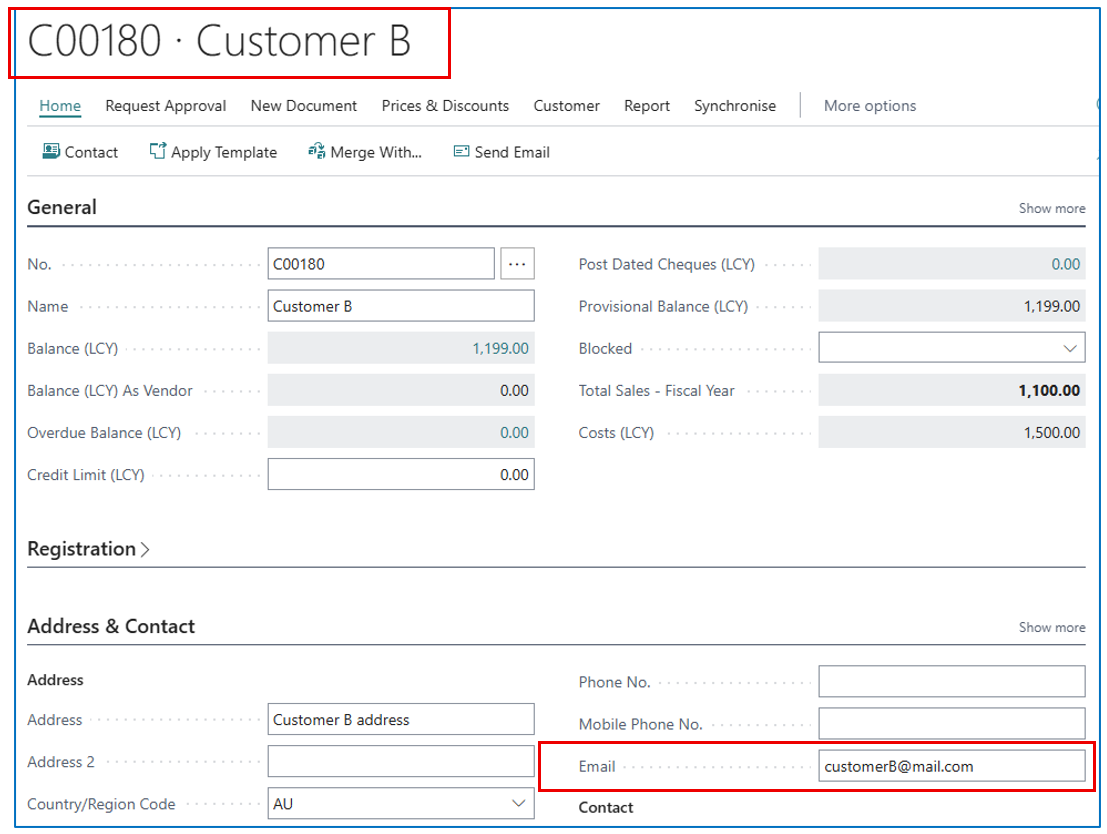
Navigate to Customer list to view both Customer A and Customer B:
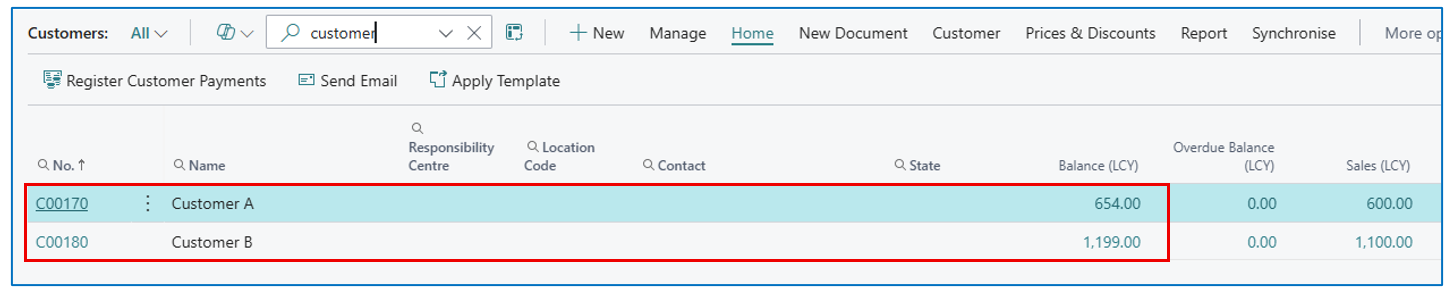
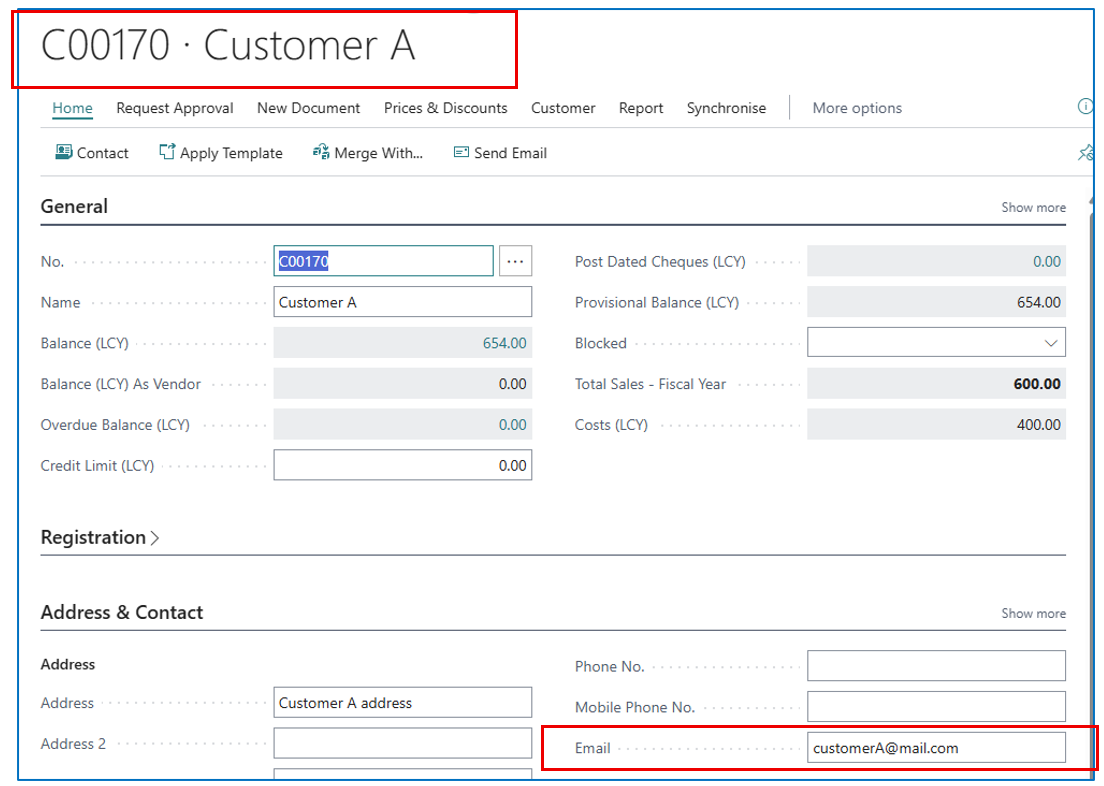
Open the customer cards to view balances:
Steps to Merge Accounts
On the Customer A card, select menu option Merge With.. (i.e. the account to remain after the merger).
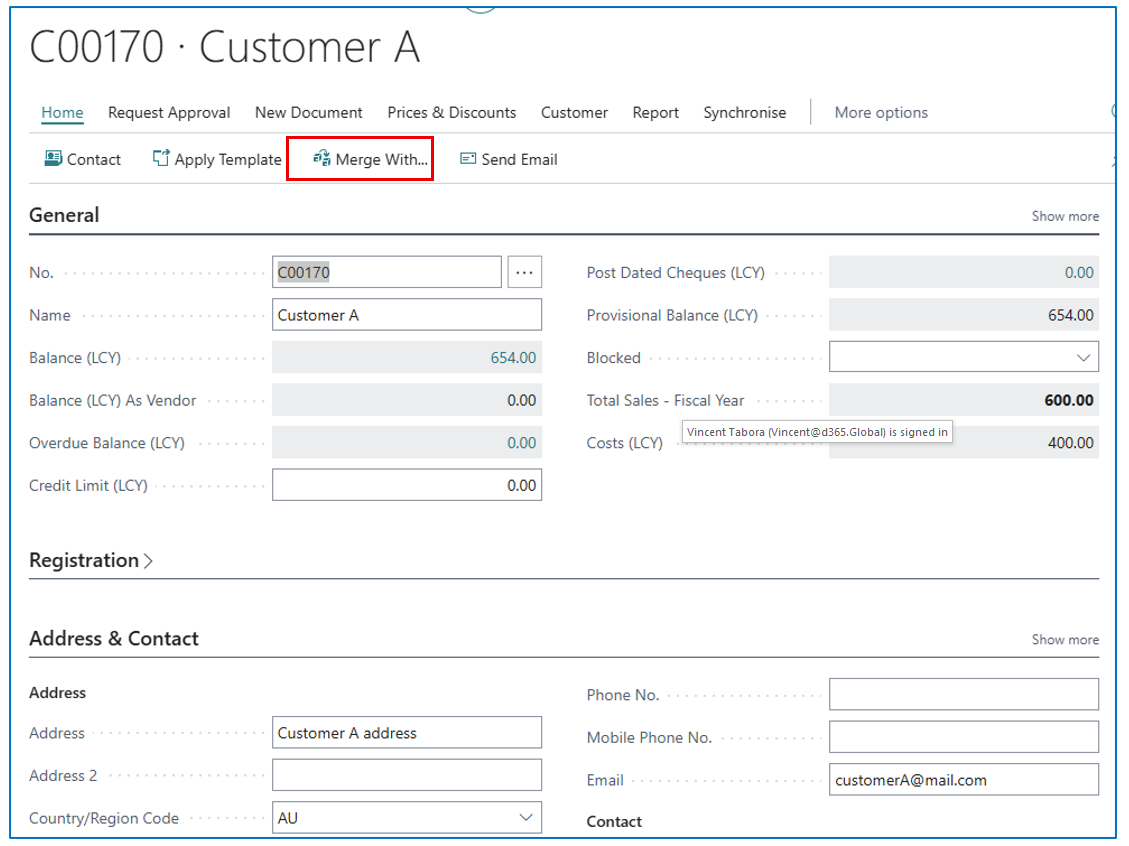
This will open the Merge Duplicate page and display the customer code (example C00170).
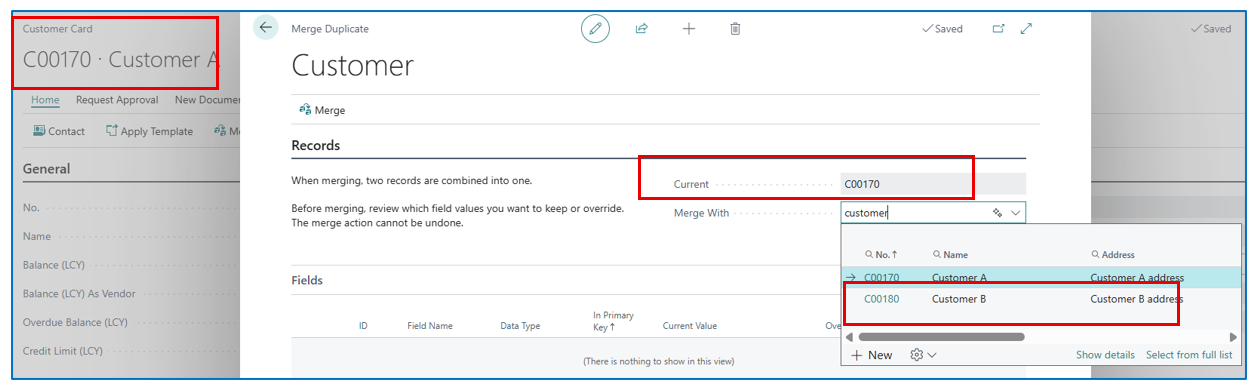
In the Merge With field, select the customer code to be merged into Customer A (example Customer B code is C00180)
The page will then display the list of fields and 2 columns of values from the 2 companies to be considered in the merge process:
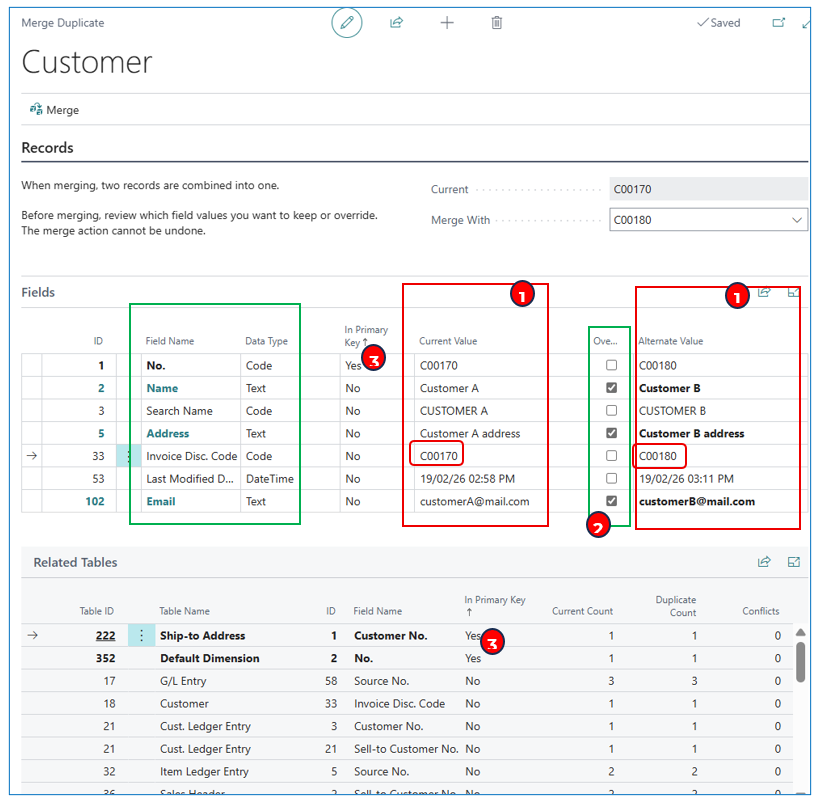
-
By default, the system will merge the values of these key 7 fields in the customer master — the right column of values (customer to be merged) will be replaced by the left column values (main customer).
-
To enable the values from the right column to replace the value in the left column, tick the Override column
(example, Customer B is the acquiring company and will replace the address of Customer A except for the customer code C00170)
- The value in the Primary Key field cannot be overwritten since the system will auto-replace the value of the account being merged with the value of the current account.
NB: if there are default dimensions, the merge will handle these as “warnings”
Click on Merge to carry out the merging of both accounts (values in the right column will be replaced by values in the left column, unless the override flag is enabled). Example confirmation message:
Post-Merge Review
After the two accounts are successfully merged, let’s check and compare with data before the process.
Open Transactions (Sales Orders) in Customer A and Customer B:
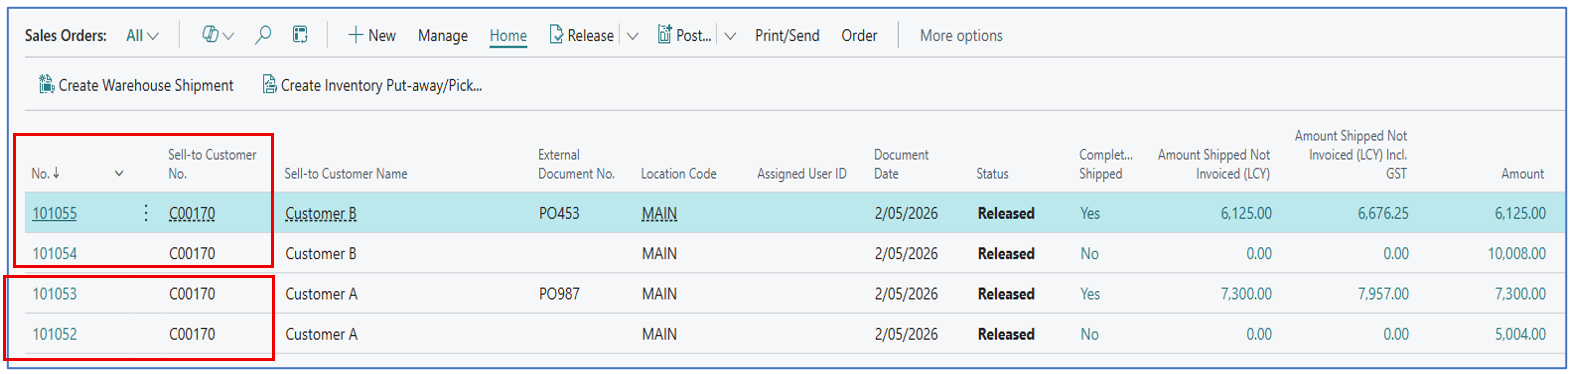
The open transactions belonging to the merged customer account will have the customer code updated (e.g. from C00180 to C00170)
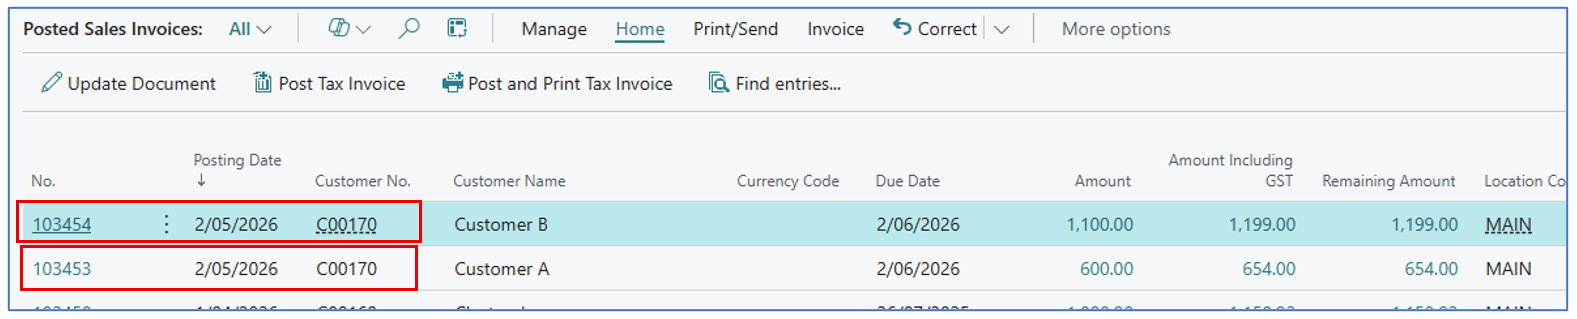
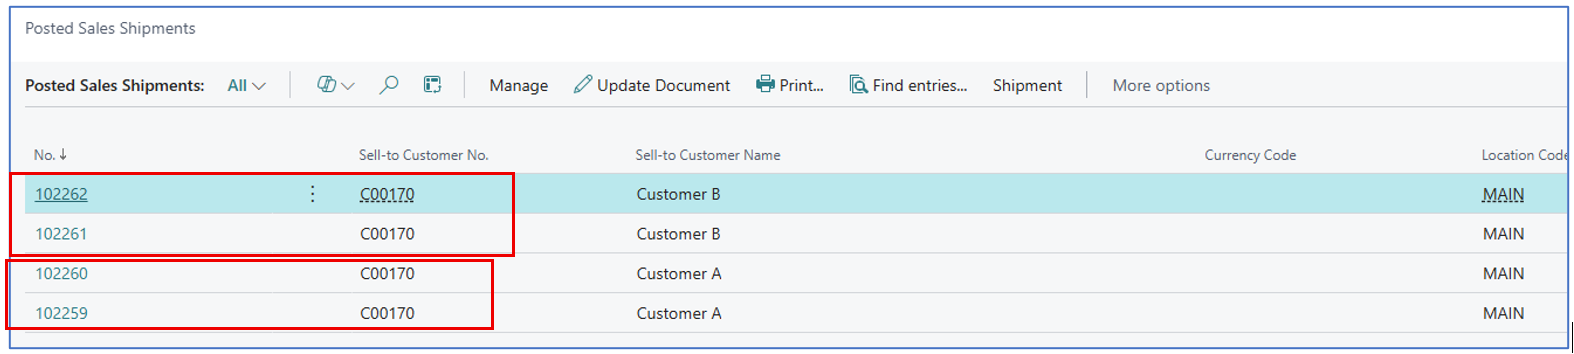
Posted Transactions (Posted Sales Invoice and Posted Sales Shipment) in Customer A and Customer B:
Navigate to Customer list to view both Customer and Customer B, but only Customer A (code) exists and the total balance is now $1,853 (combining balances from both accounts).

Open the customer card to view balances — only Customer A (code) exists but the customer’s name has been overwritten by Company B’s name, with a combined balance amount.
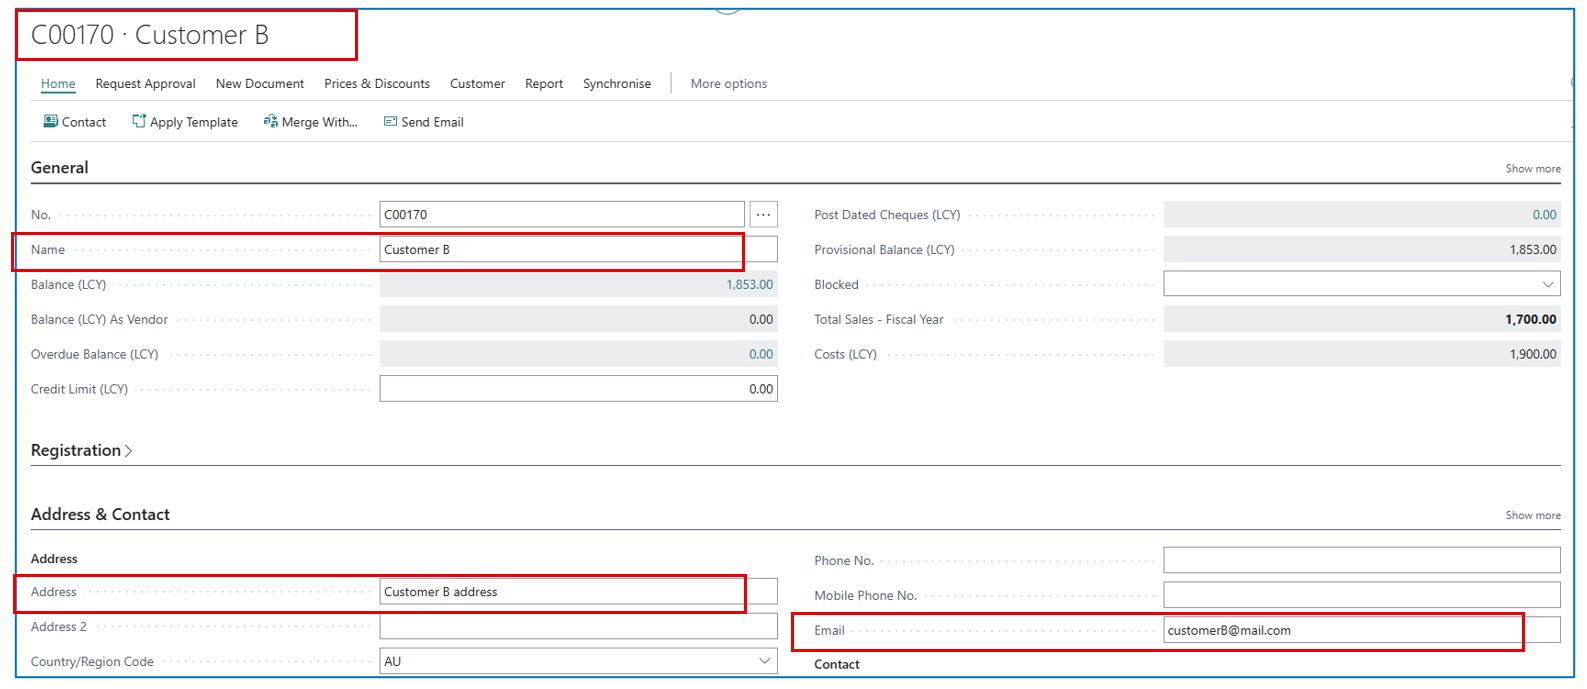
NB: the address of Customer B overrides Customer A
Vendors
If there are 2 duplicate vendors (i.e. same name but different vendor code) or vendor entities have undergone a merger/acquisition process, the separate vendor accounts can be merged into one.
Pre-Merger Data
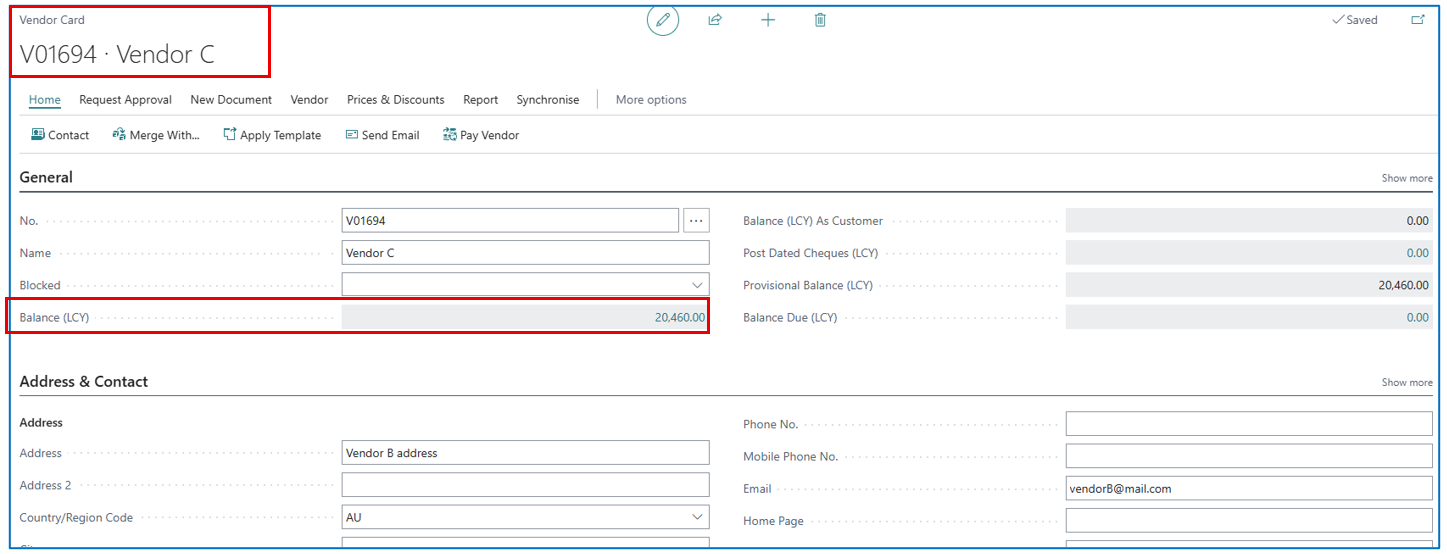
For example, Vendor A and Vendor C are to be merged, where Vendor C will merge into Vendor A.
Review the historical transactions before the merge process.
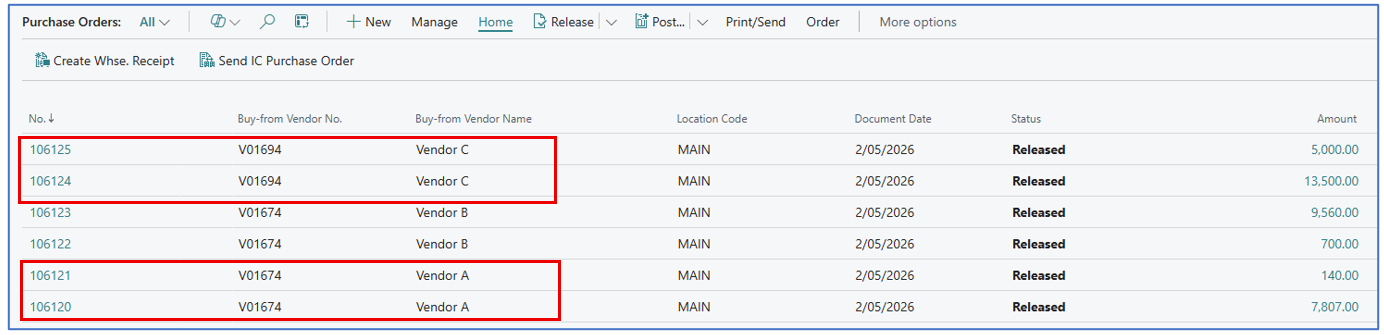
Open Transactions (Purchase Orders) in Vendor A and Vendor C:
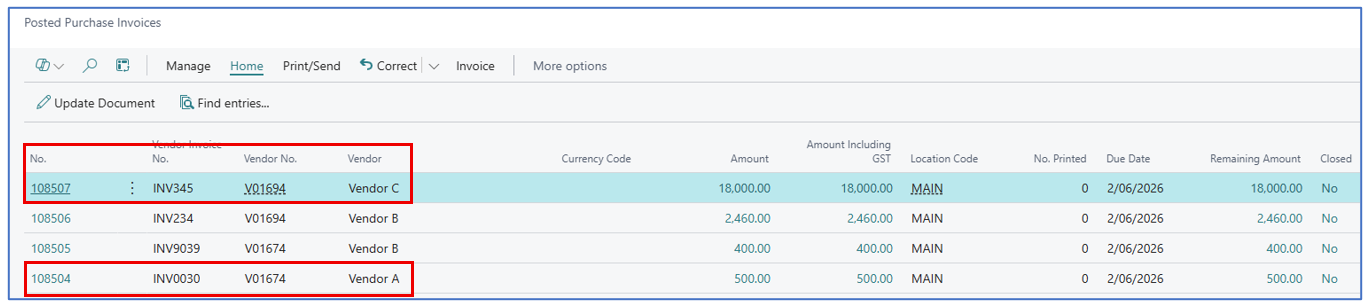
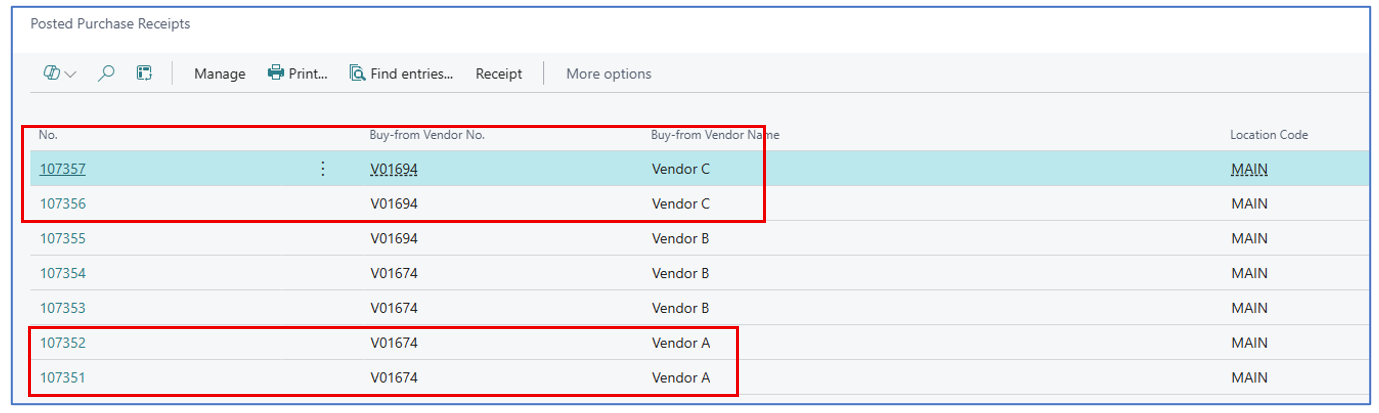
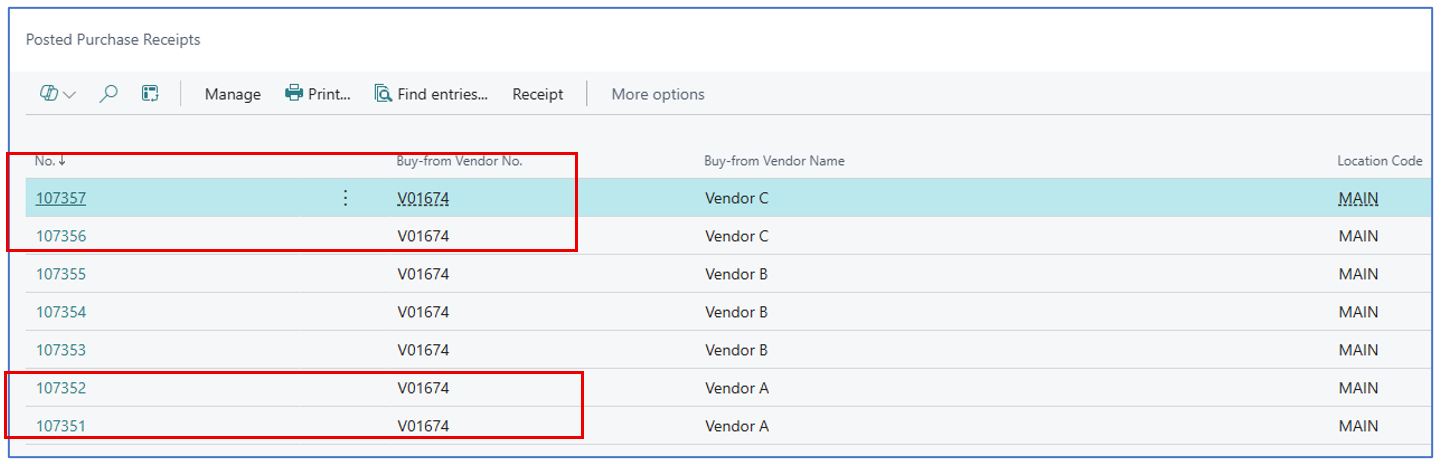
Posted Transactions (Posted Purchase Invoice and Posted Purchase Receipt) in Vendor A and Vendor C:
Navigate to Vendor list to view both Vendor A and Vendor B:

Open the vendor cards to view balances:

Steps to Merge Accounts
On the Vendor A card, select menu option Merge With.. (i.e. the account to remain after the merger).
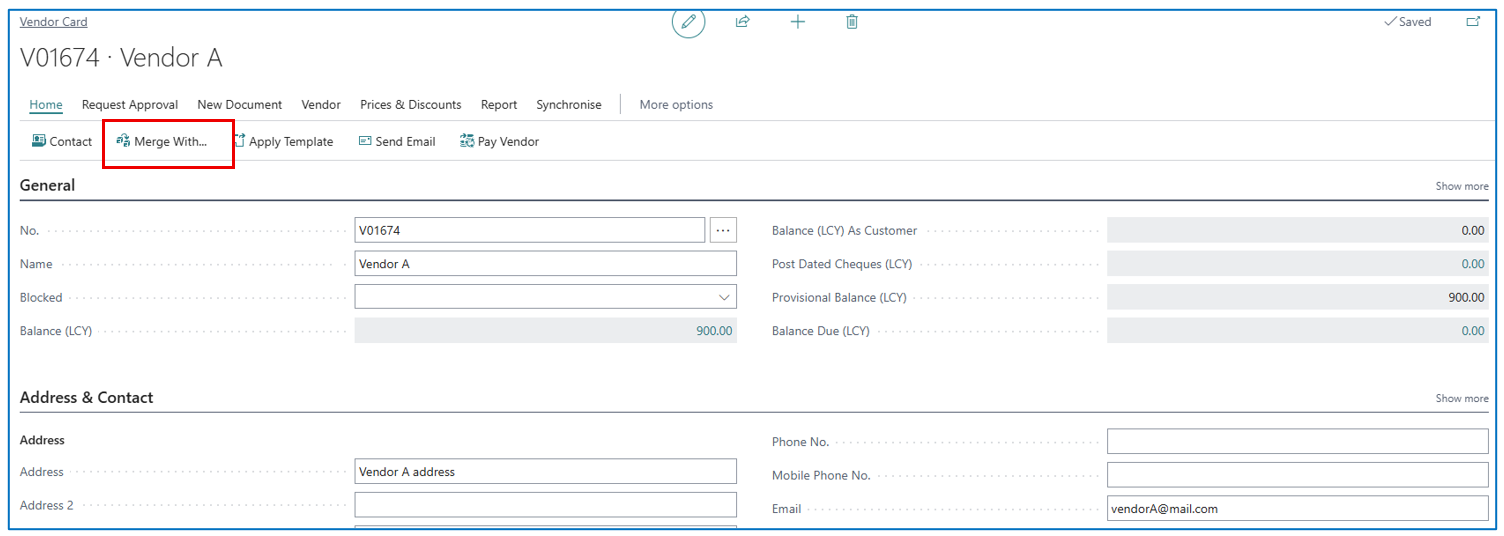
This will open the Merge Duplicate page and display the vendor code (example V01674).
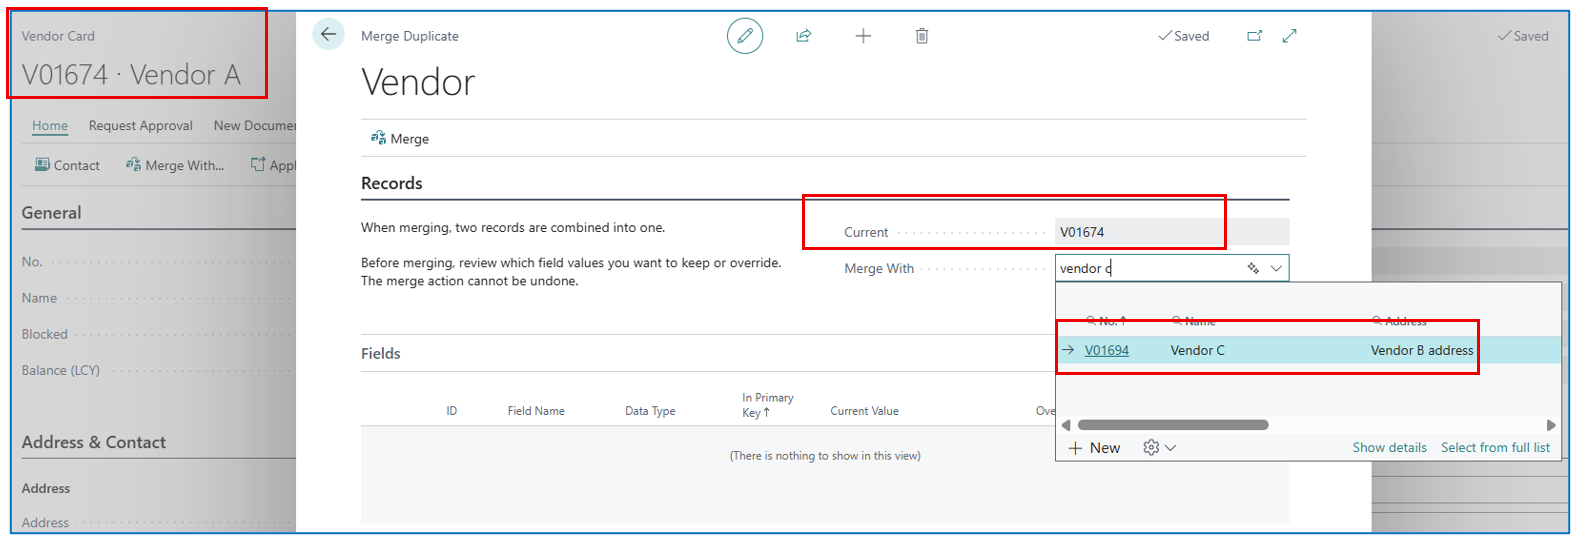
In the Merge With field, select the vendor code to be merged into Vendor A (example Vendor C code is V01694)
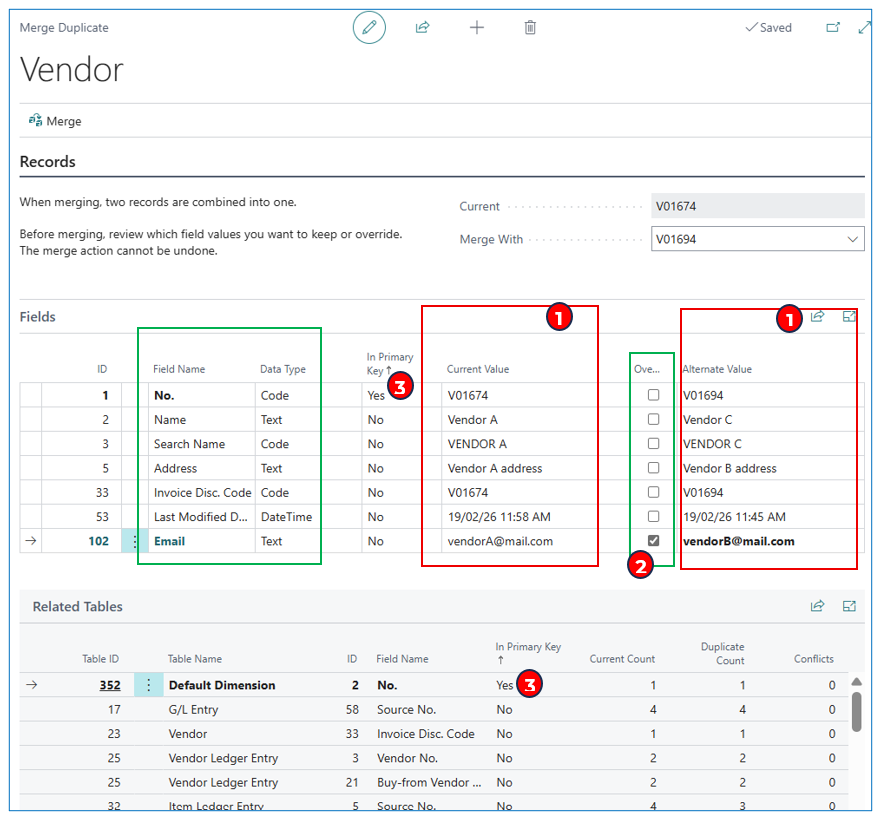
The page will then display the list of fields and 2 columns of values from the 2 companies to be considered in the merge process:
-
By default, the system will merge the values of these key 7 fields in the vendor master — the right column of values (vendor to be merged) will be replaced by the left column values (main vendor).
-
To enable the values from the right column to replace the value in the left column, tick the “Override” column (example, the email vendorA@mail.com will be replaced by vendorB@mail.com)
-
NB: The value in the Primary Key field cannot be overwritten since the system will replace the value of the account being merged, with the value of the current account.
NB: if there are default dimensions, the merge will handle these as “warnings”
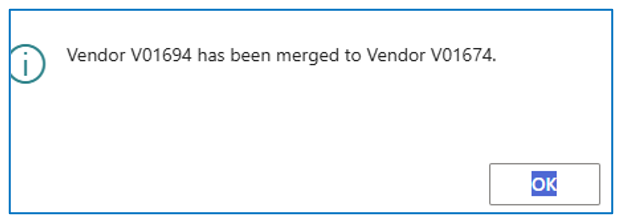
Click on Merge to carry out the merging of both accounts (values in the right column will be replaced by values in the left column, unless the override flag is enabled). Example confirmation message:

Post-Merge Review
After the two accounts are successfully merged, let’s check and compare with data before the process.
Open Transactions (Purchase Orders) in Vendor A and Vendor C:

The open transactions belonging to the merged vendor account will have the vendor code updated (e.g. from V01694 to V01674).
Posted Transactions (Posted Purchase Invoice and Posted Purchase Receipt) in Vendor A and Vendor C:
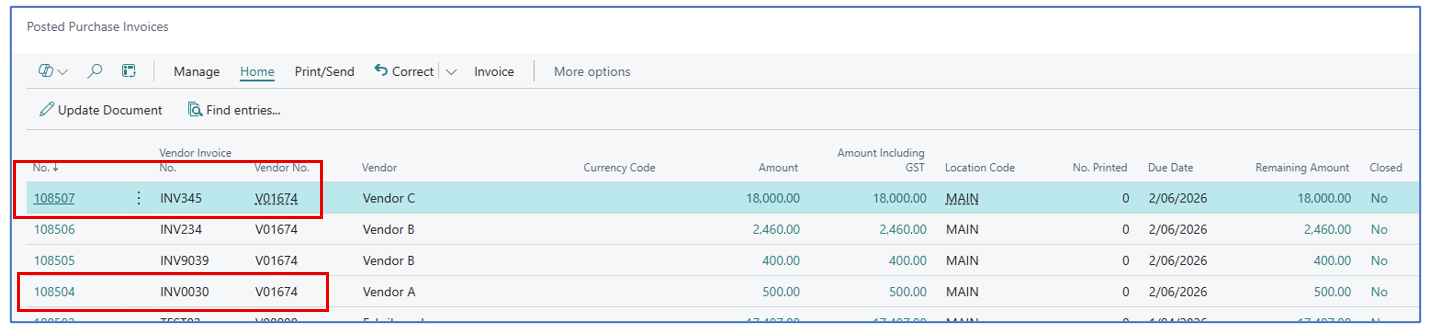
Navigate to Vendor list to view both Vendor A and Vendor B, but only Vendor A exists and the total balance is now $21,360 (combining balances from both accounts).

Open the vendor card to view balances — only Vendor A exists and has a merged balance amount.
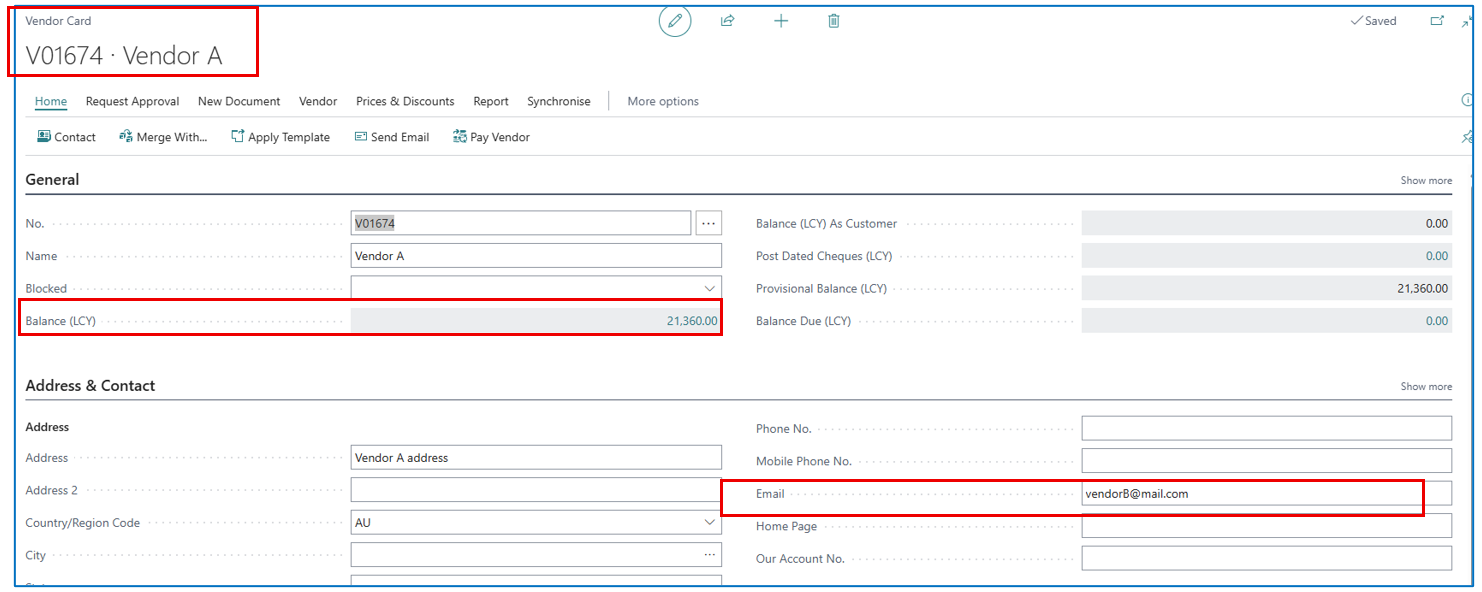
NB: the email for Vendor A has been overwritten in the merged.
Exceptions Handling
Merging Primary Key in Related Tables
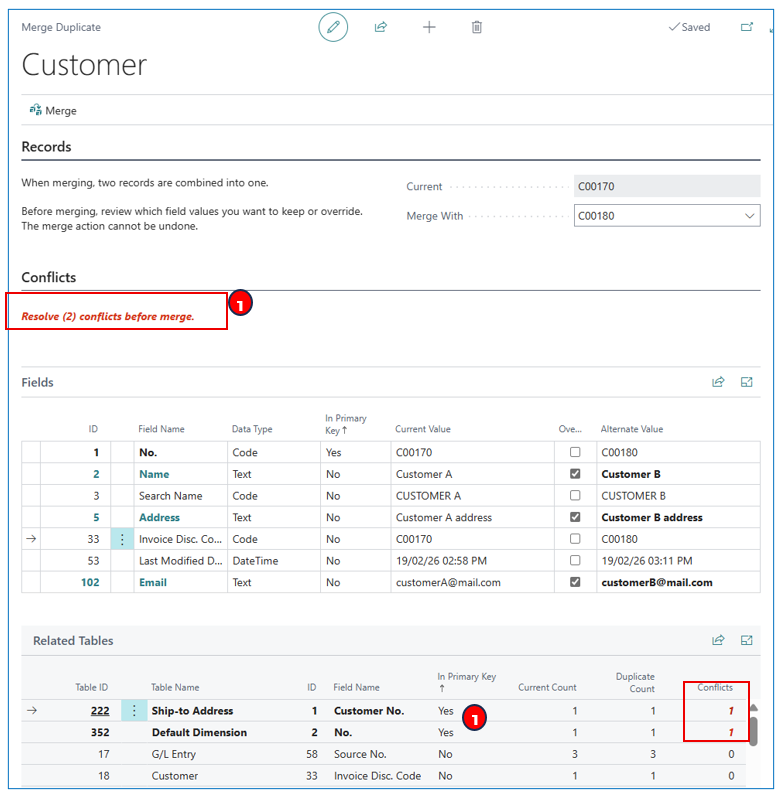
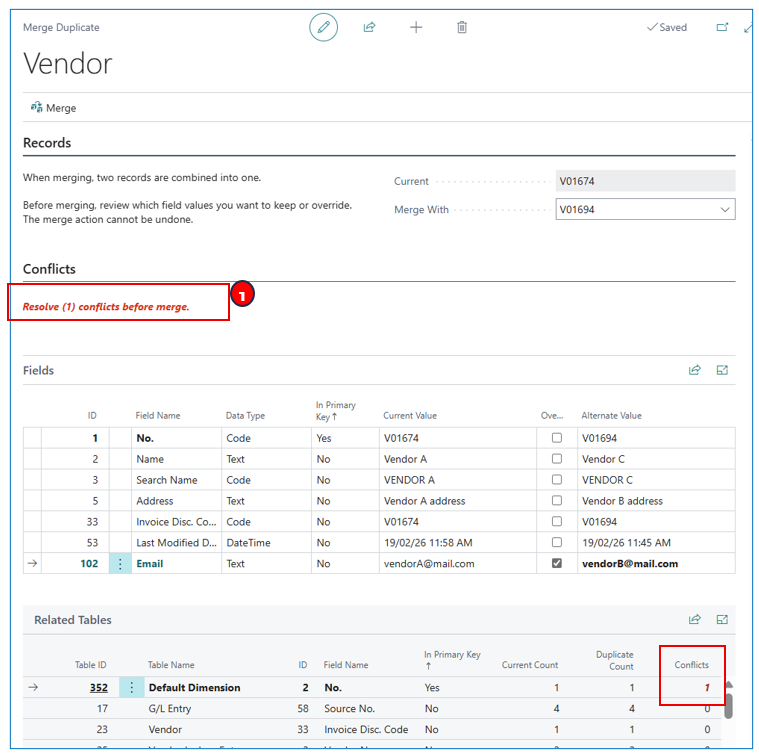
When the customer/vendor account has related table fields that are primary, the merge process will need a manual step to resolve the “conflict” (e.g. Dimension)
To resolve:
- Click on the warning message to open the Merge Duplicate Conflicts page.
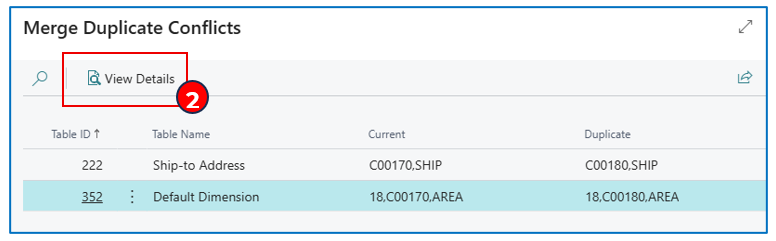
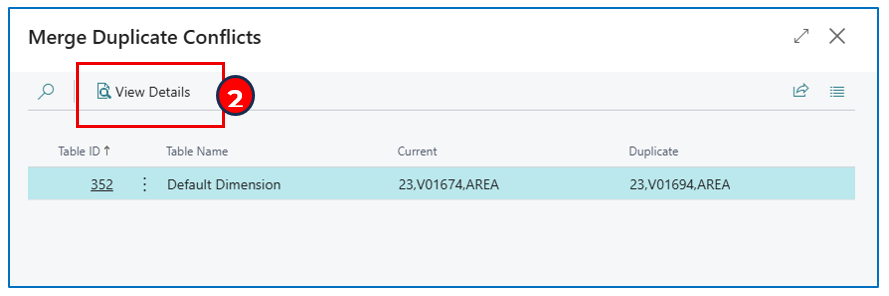
- For the highlighted warning message, click on View Details to open the Merge Duplicate page associated with the warning message. (Example — Default Dimension duplicate resolution)
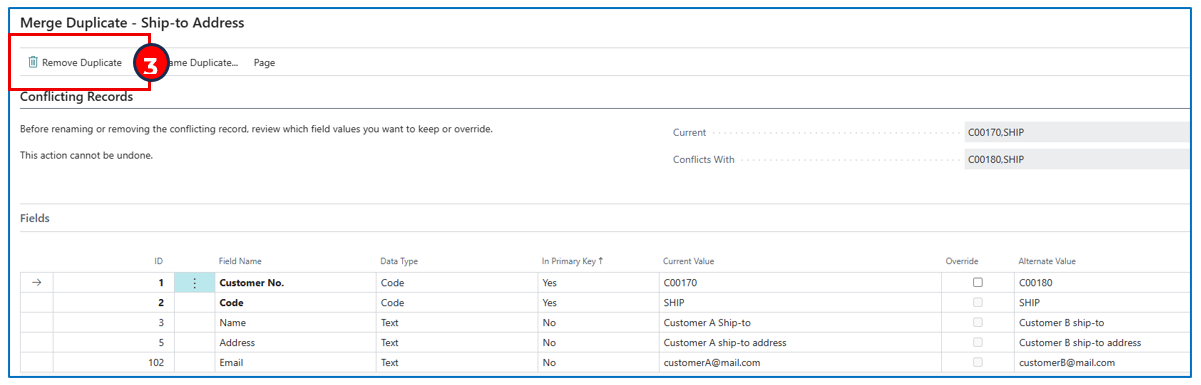
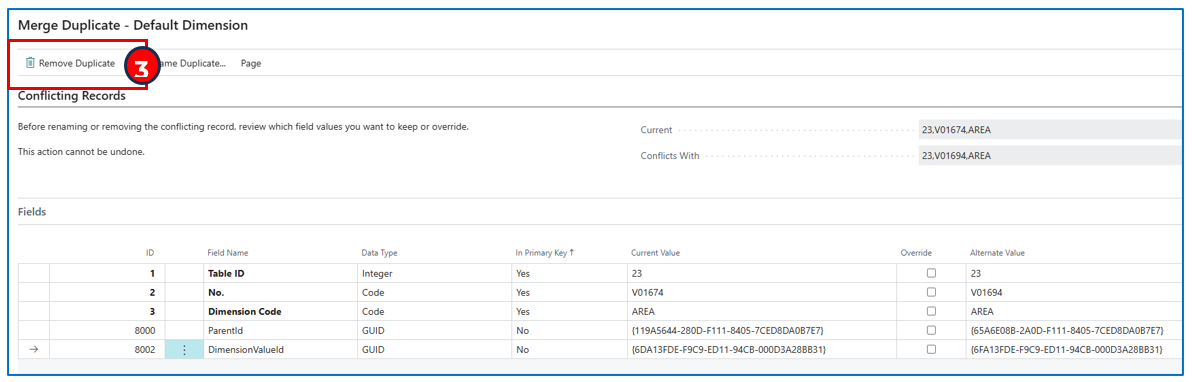
- Click on Remove Duplicate to confirm that the default value in the account to be merged will be replaced by the default value of the current account (unless the Override flag is enabled).
-
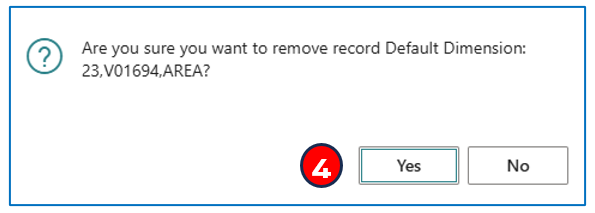
In the confirmation message prompt, acknowledge Yes to merge and replace the related primary key value in the merged account.
-
After resolving the manual merging of duplicate primary fields of related tables, you return to the Merge Duplicate page showing that the warning message is removed.
Example:
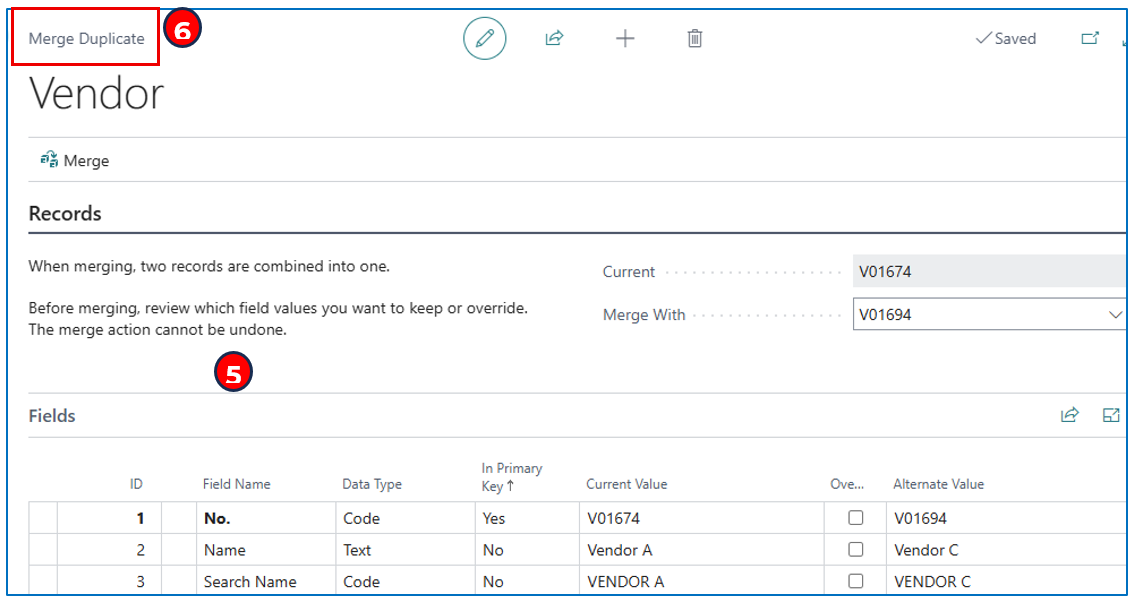
- Click on Merge to complete the process.
Written By:
Peter Loo
Team Leader, Business Central
Connect on LinkedIn