Fault Detection & Recovery for Admin Guides for Education
Introduction
Fault detection and recovery is a resilient framework designed to monitor service health, identify system failures in real-time, and automatically trigger self-healing processes to minimize downtime. It acts as a safety net that ensures high availability by isolating problematic components and restoring service without requiring manual intervention from the user.
This guide is for administrators of the Dynamics 365 for education module. Managing application modules in an education setting---such as student portals, enrollment systems, or learning management integrations---comes with unique pressures. It is best to be prepared for the unexpected and have recovery measures in place for business continuity planning.
The Dynamics environment (depending on your configuration) provides multiple tools to help administrators track changes, detect issues, and recover lost data. These include Audit History, Recycle Bin, and Flow Monitoring. Together, they give admins visibility into system behavior and safeguard against accidental data loss.
Enabling and Using Audit History
The auditing feature logs changes made to customer records and user access so administrators can review activities later.
What Audit Logs Can Answer
The following are the features of using audit logs.
-
Which user accessed the system and when.
-
Who updated a field value on a record, and when.
-
What the previous field value was before it was updated.
-
What actions a particular user has taken recently.
-
Who deleted a record.
-
What locale was used when the update was made.
What Operations Can Be Audited
Here is a list of operations that you can audit.
-
Create, update, deactivate, and delete operations on records.
-
Changes to the sharing privileges of a record.
-
The N:N association or disassociation of records.
-
Changes to security roles.
-
Audit changes at the entity (table), attribute (field), and organization (environment) level.
-
Deletion of audit logs.
-
For fields that can be localized (e.g., Product Name), the locale ID (LCID) is also captured.
How to Enable Auditing
Auditing must be enabled at multiple levels.
Environment Level
-
In the Power Platform Admin Center (https://admin.powerplatform.microsoft.com ), select Manage in the left navigation pane → select Environments under Manage pane.
-
Select the environment you want to audit, then select Settings from the top navigation bar → Audit and logs → Audit Settings.
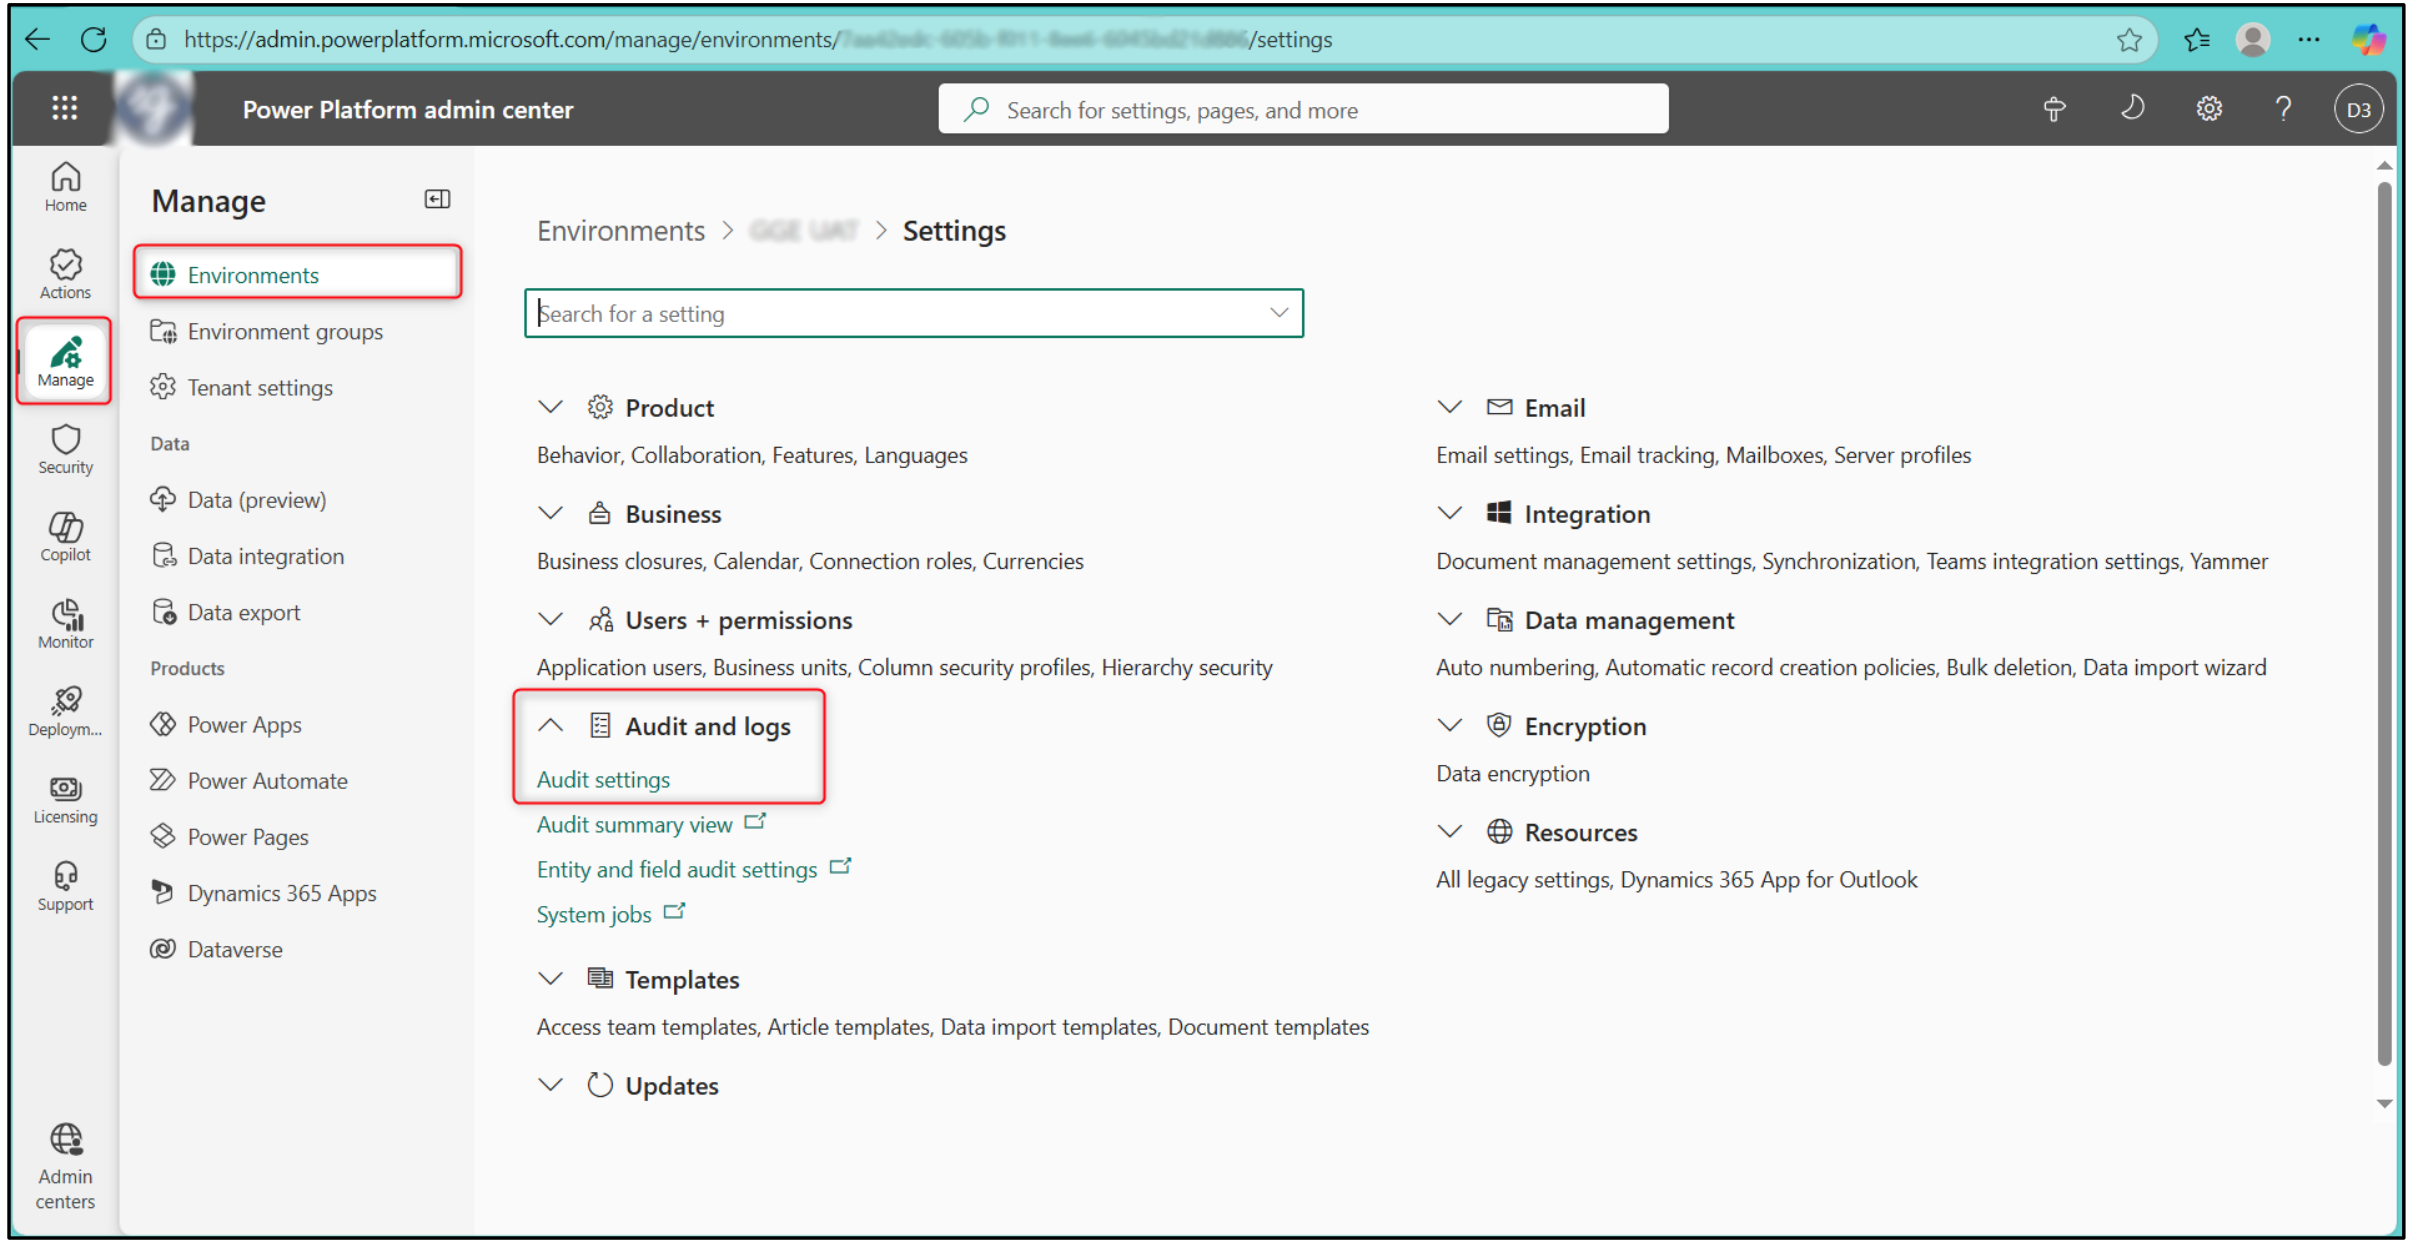
- On the Audit Settings page, click Start Auditing to enable organization-wide auditing. This turns on auditing for the environment.
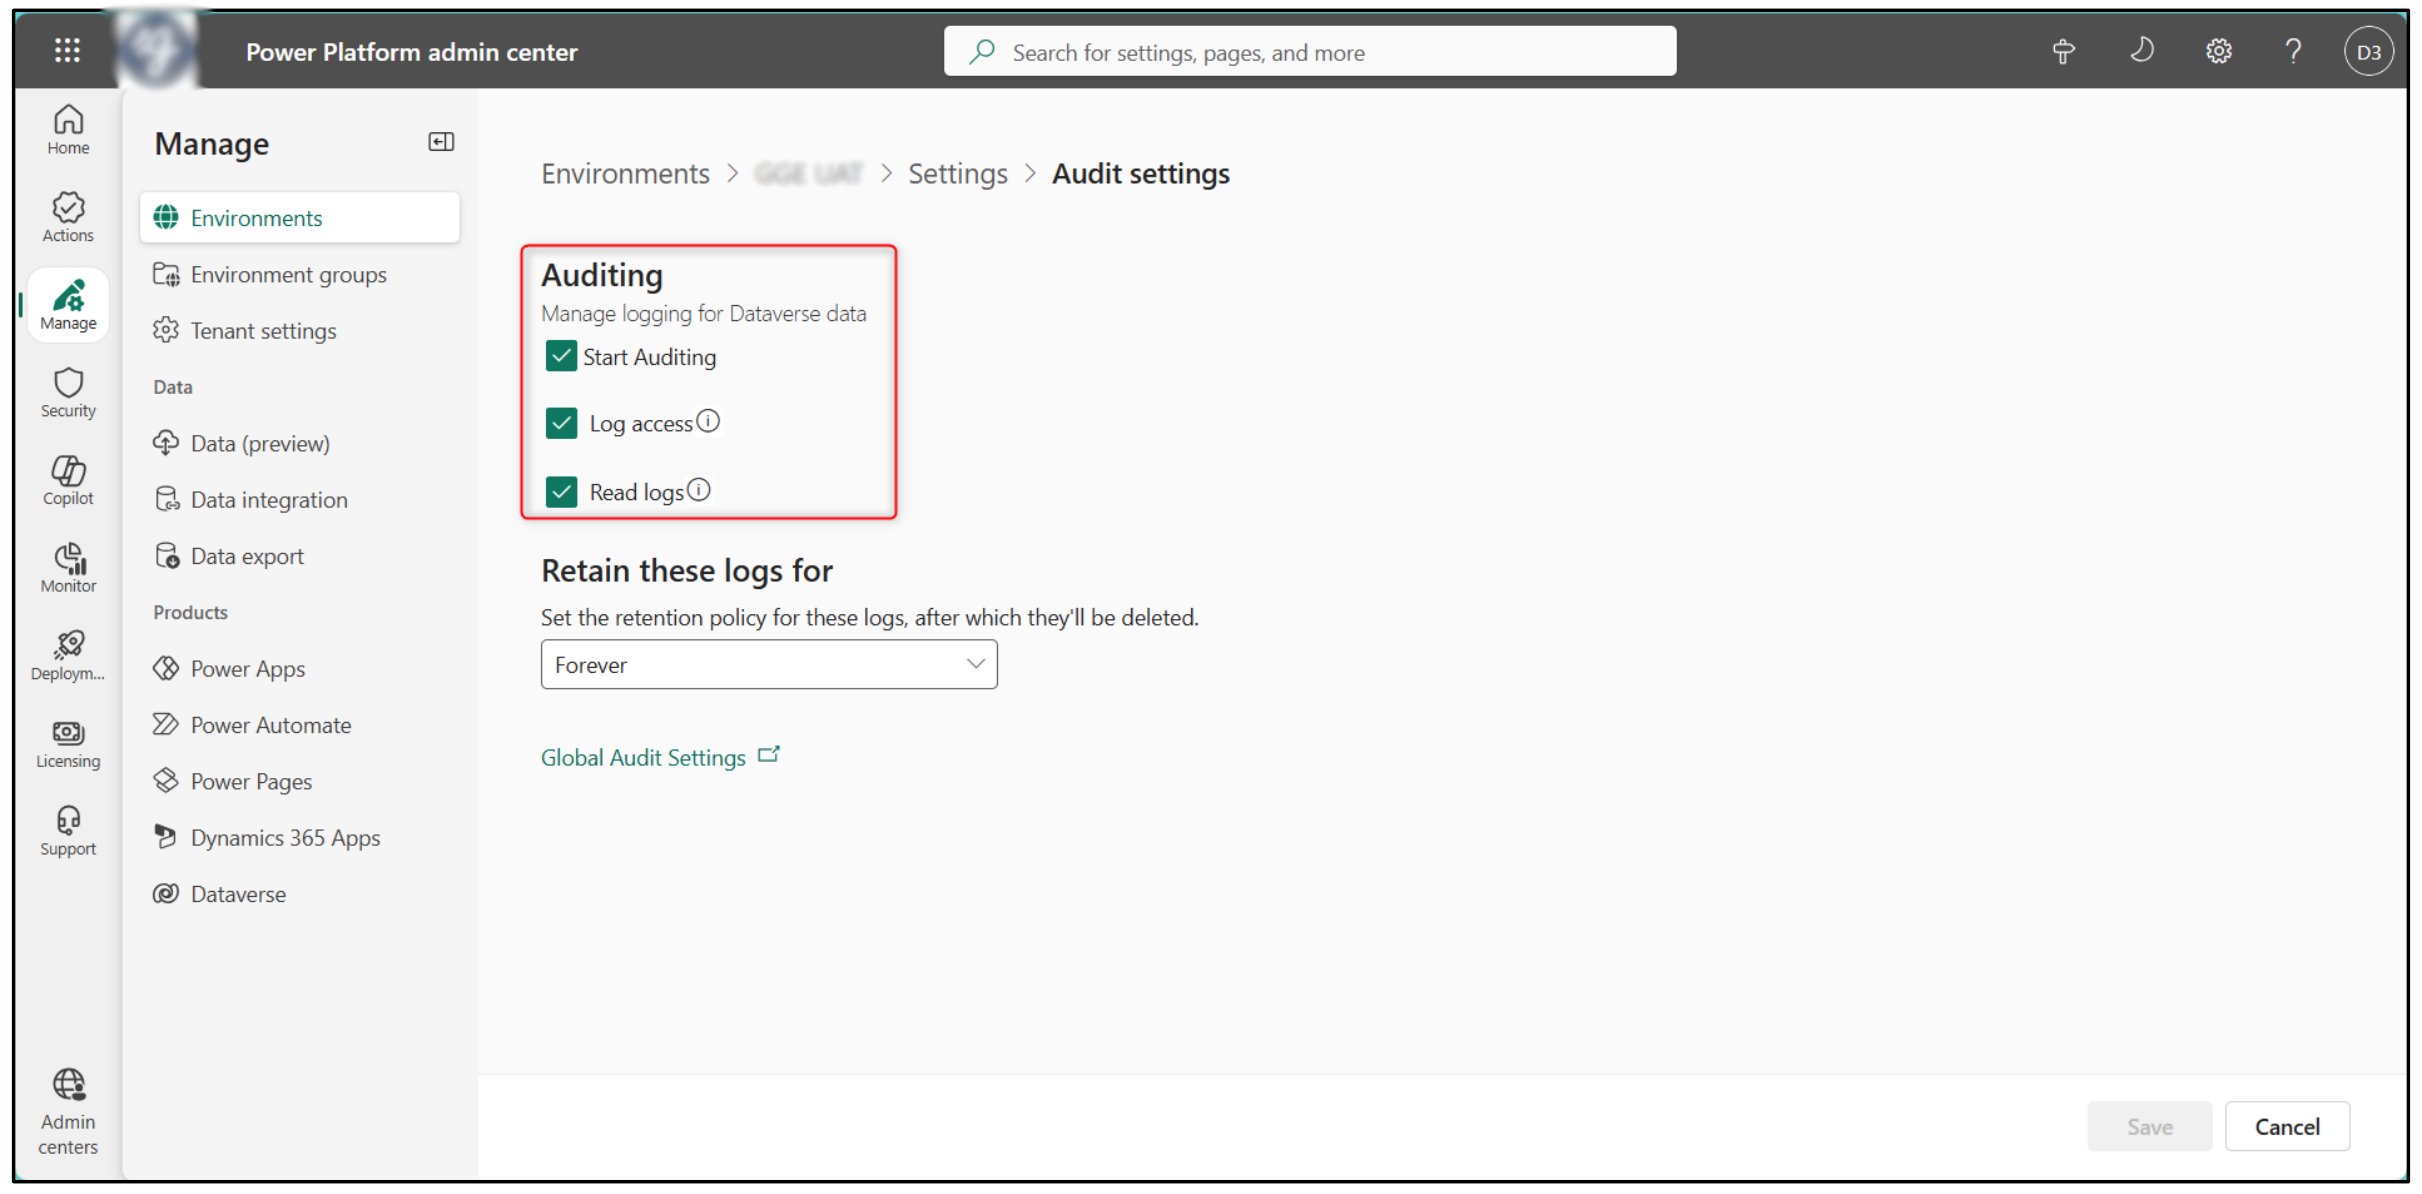
Table Level
- In https://make.powerapps.com , go to Tables → select the table (e.g., Contact) → Properties.
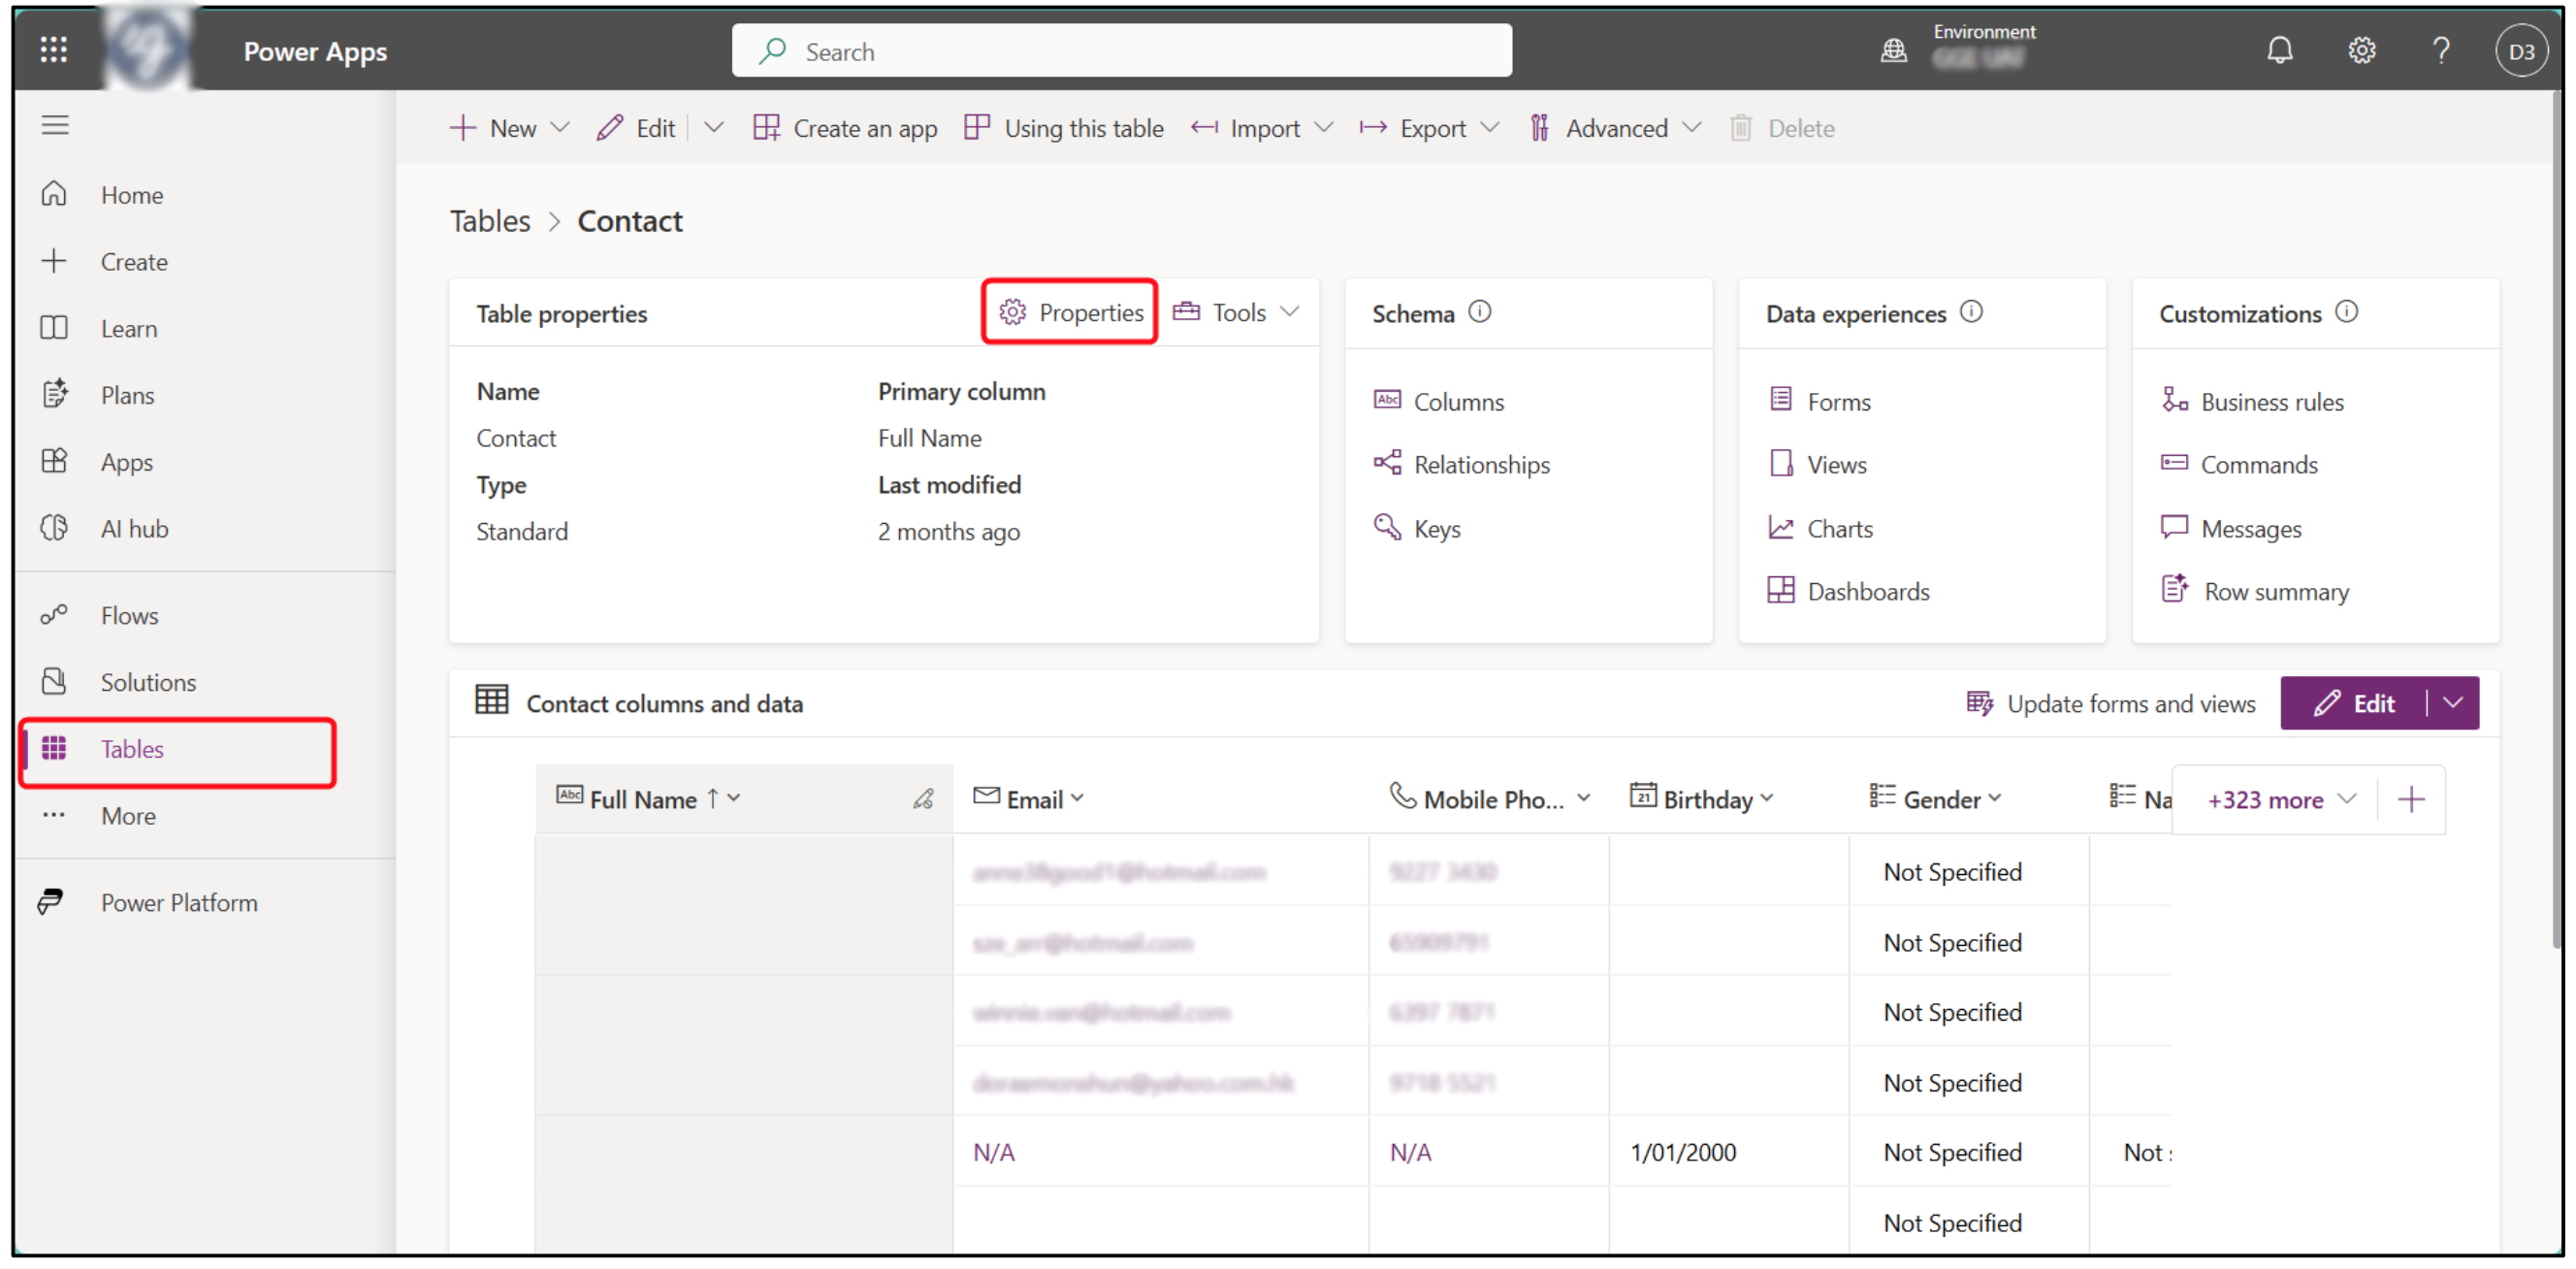
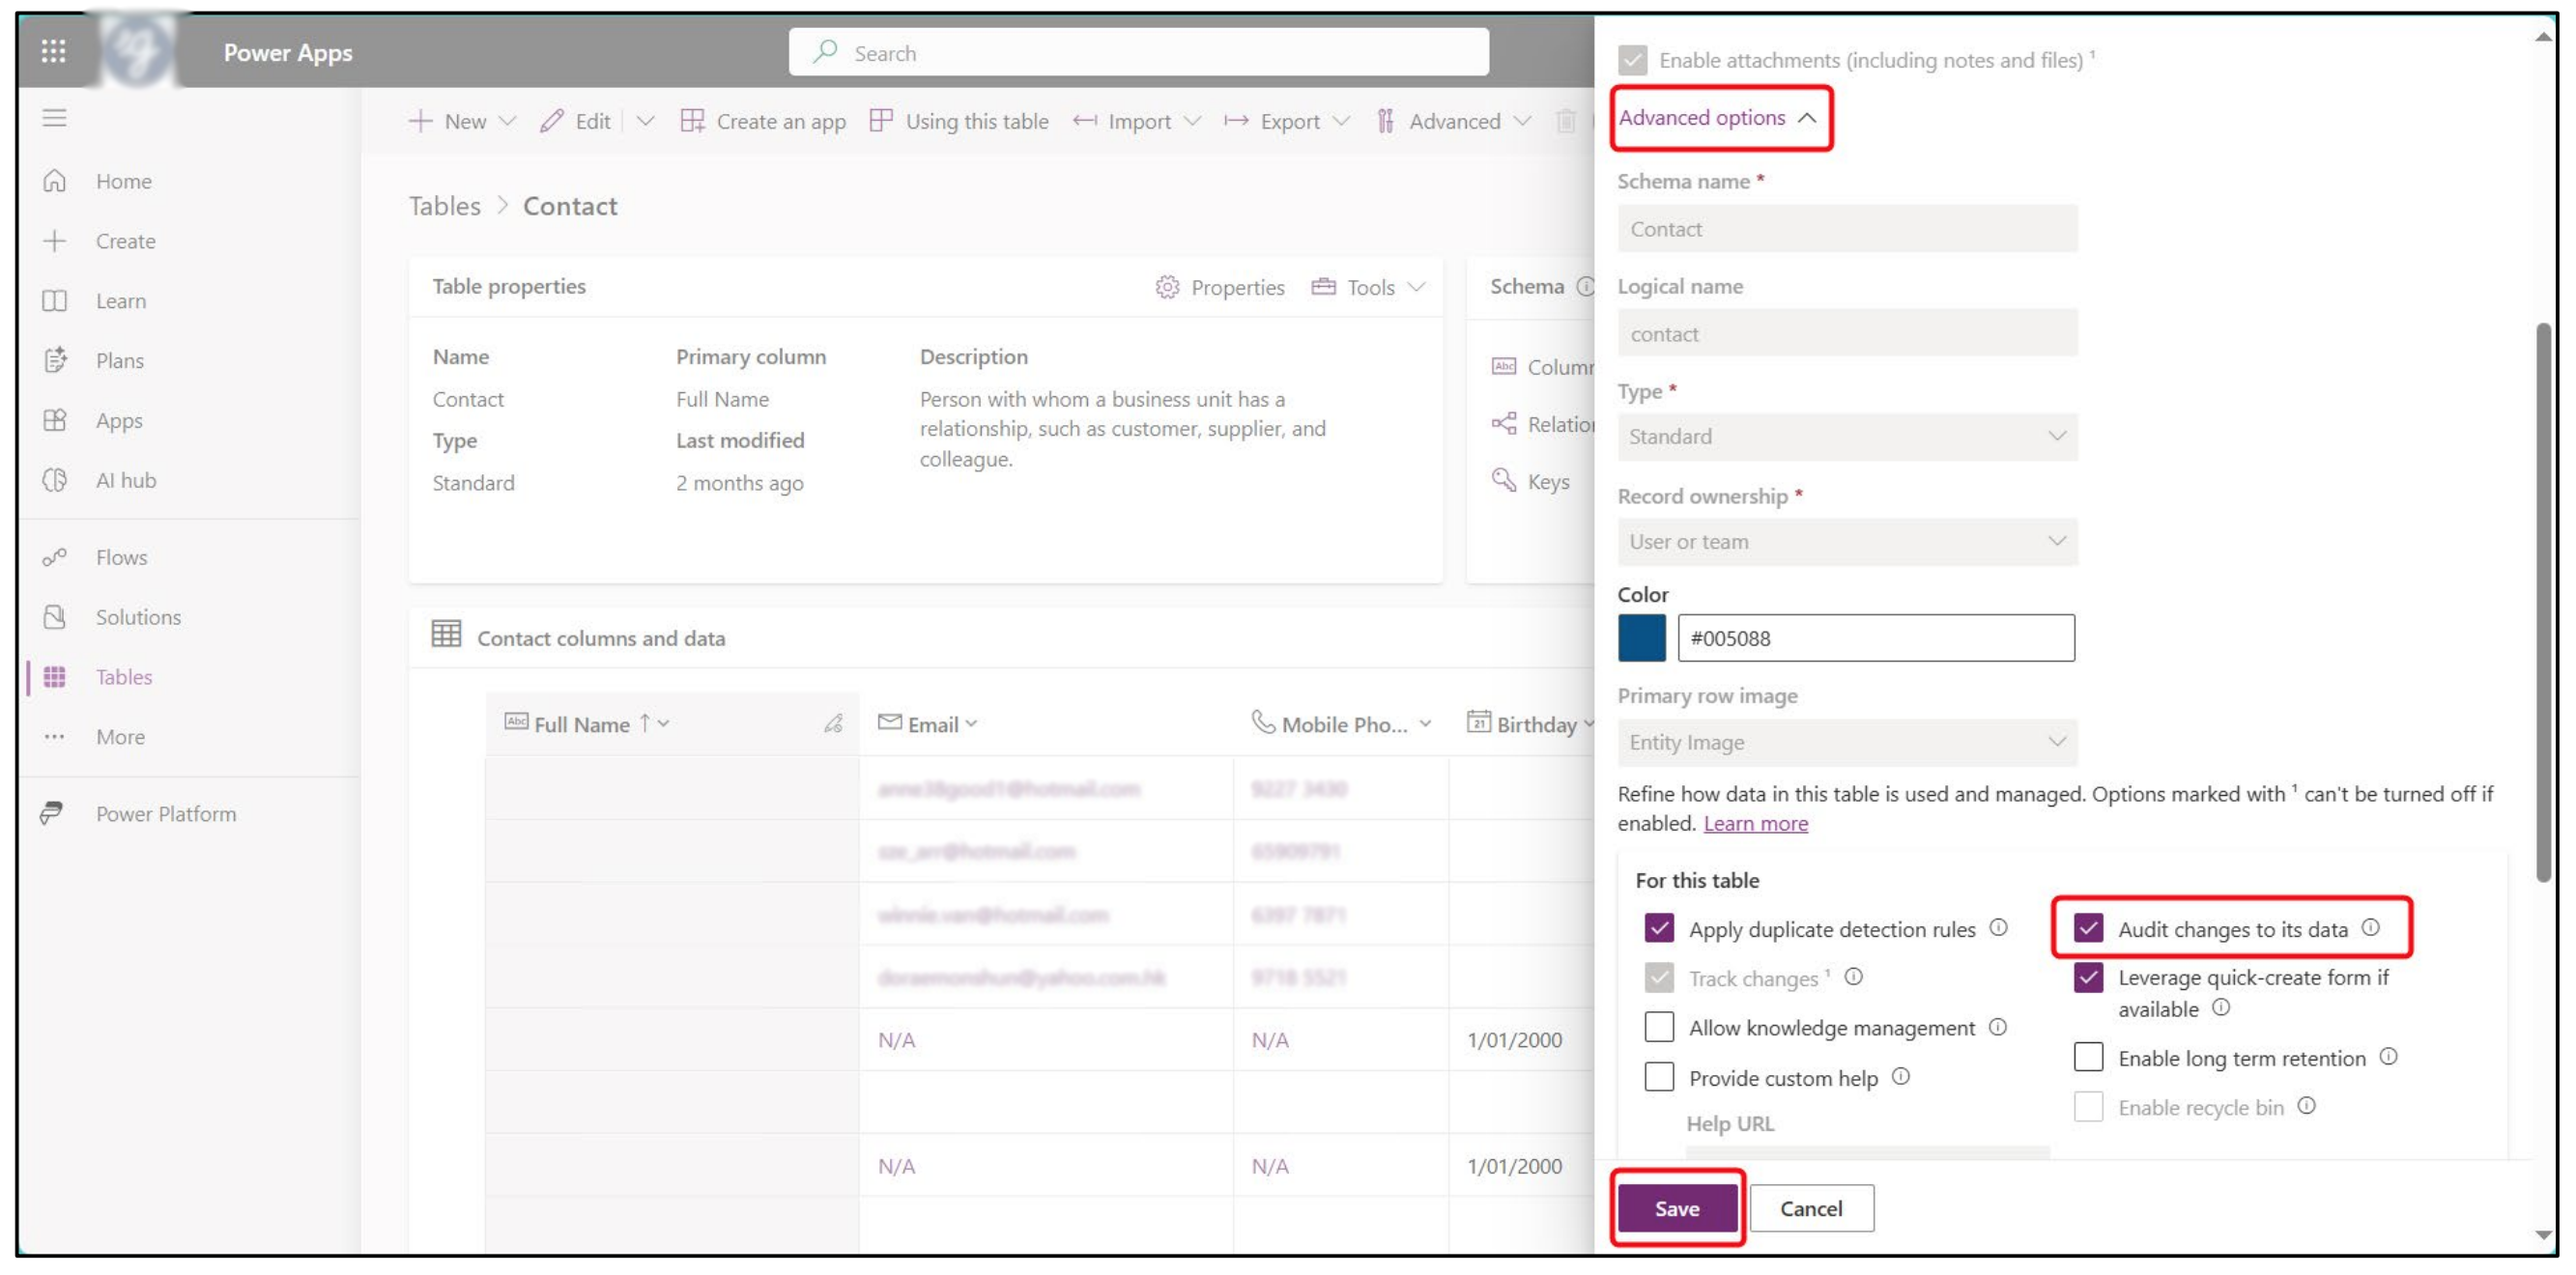
- Under Properties → Advanced options, tick Audit changes to its data. This ensures the system tracks create/update/delete for that table.
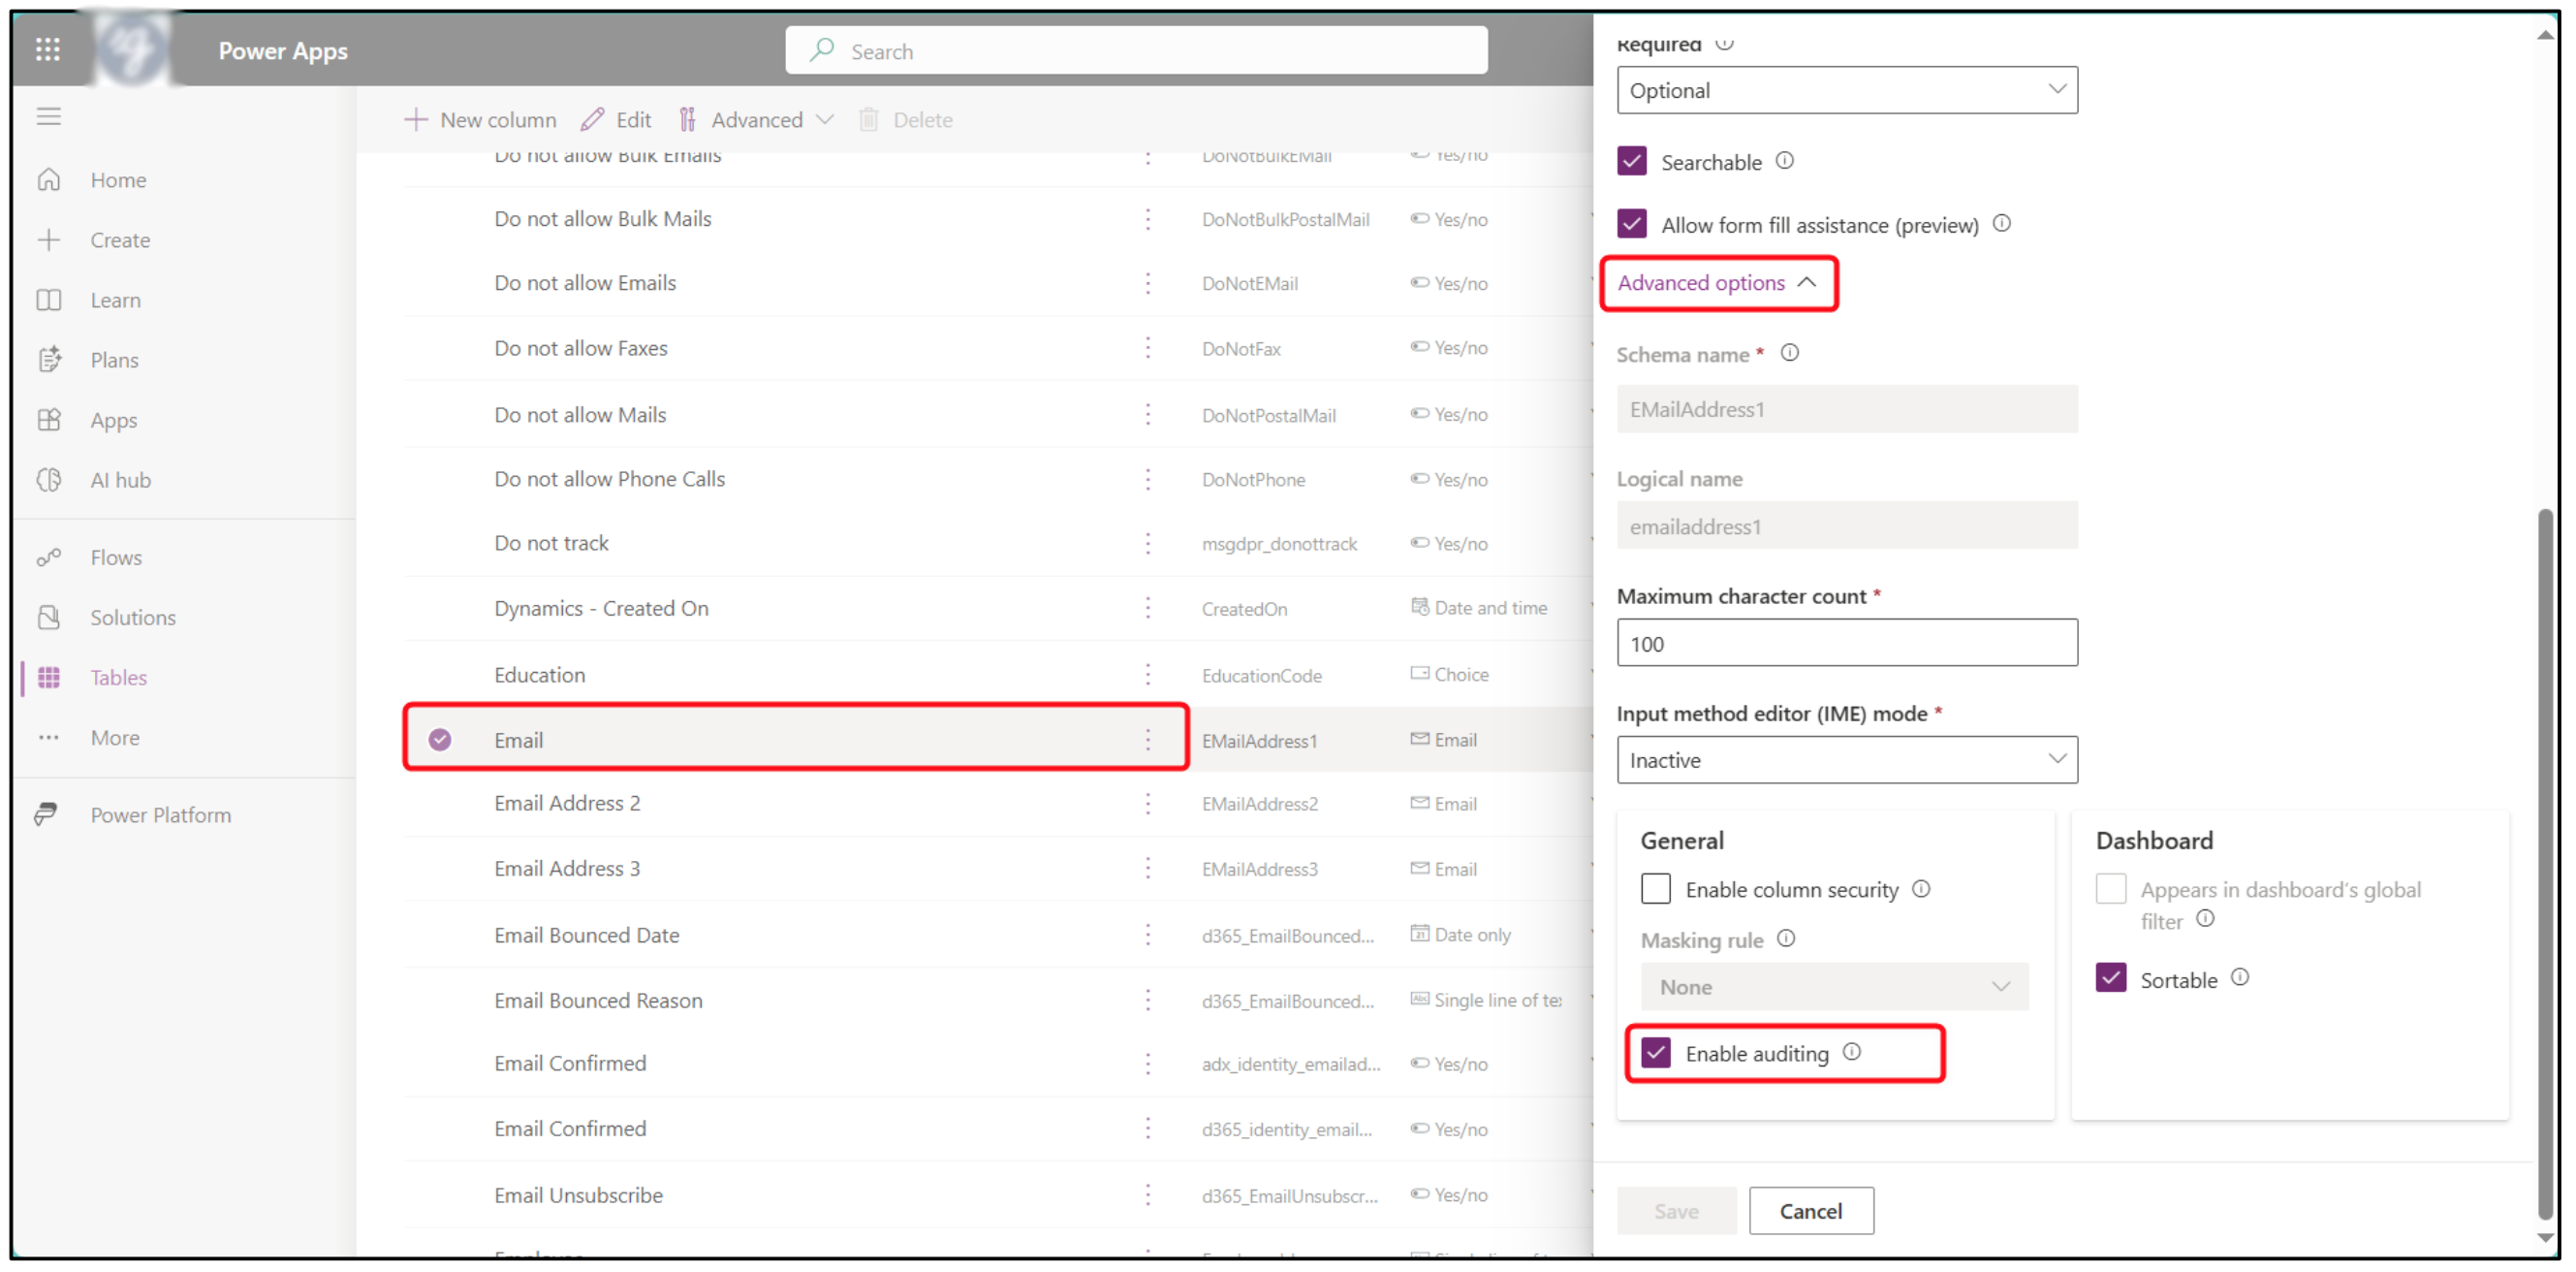
Field Level
Within the same table, go to Columns.
-
Open the field you want to audit.
-
In Advanced options, set Enable Auditing = On.
Note: Only fields with this enabled will be logged.
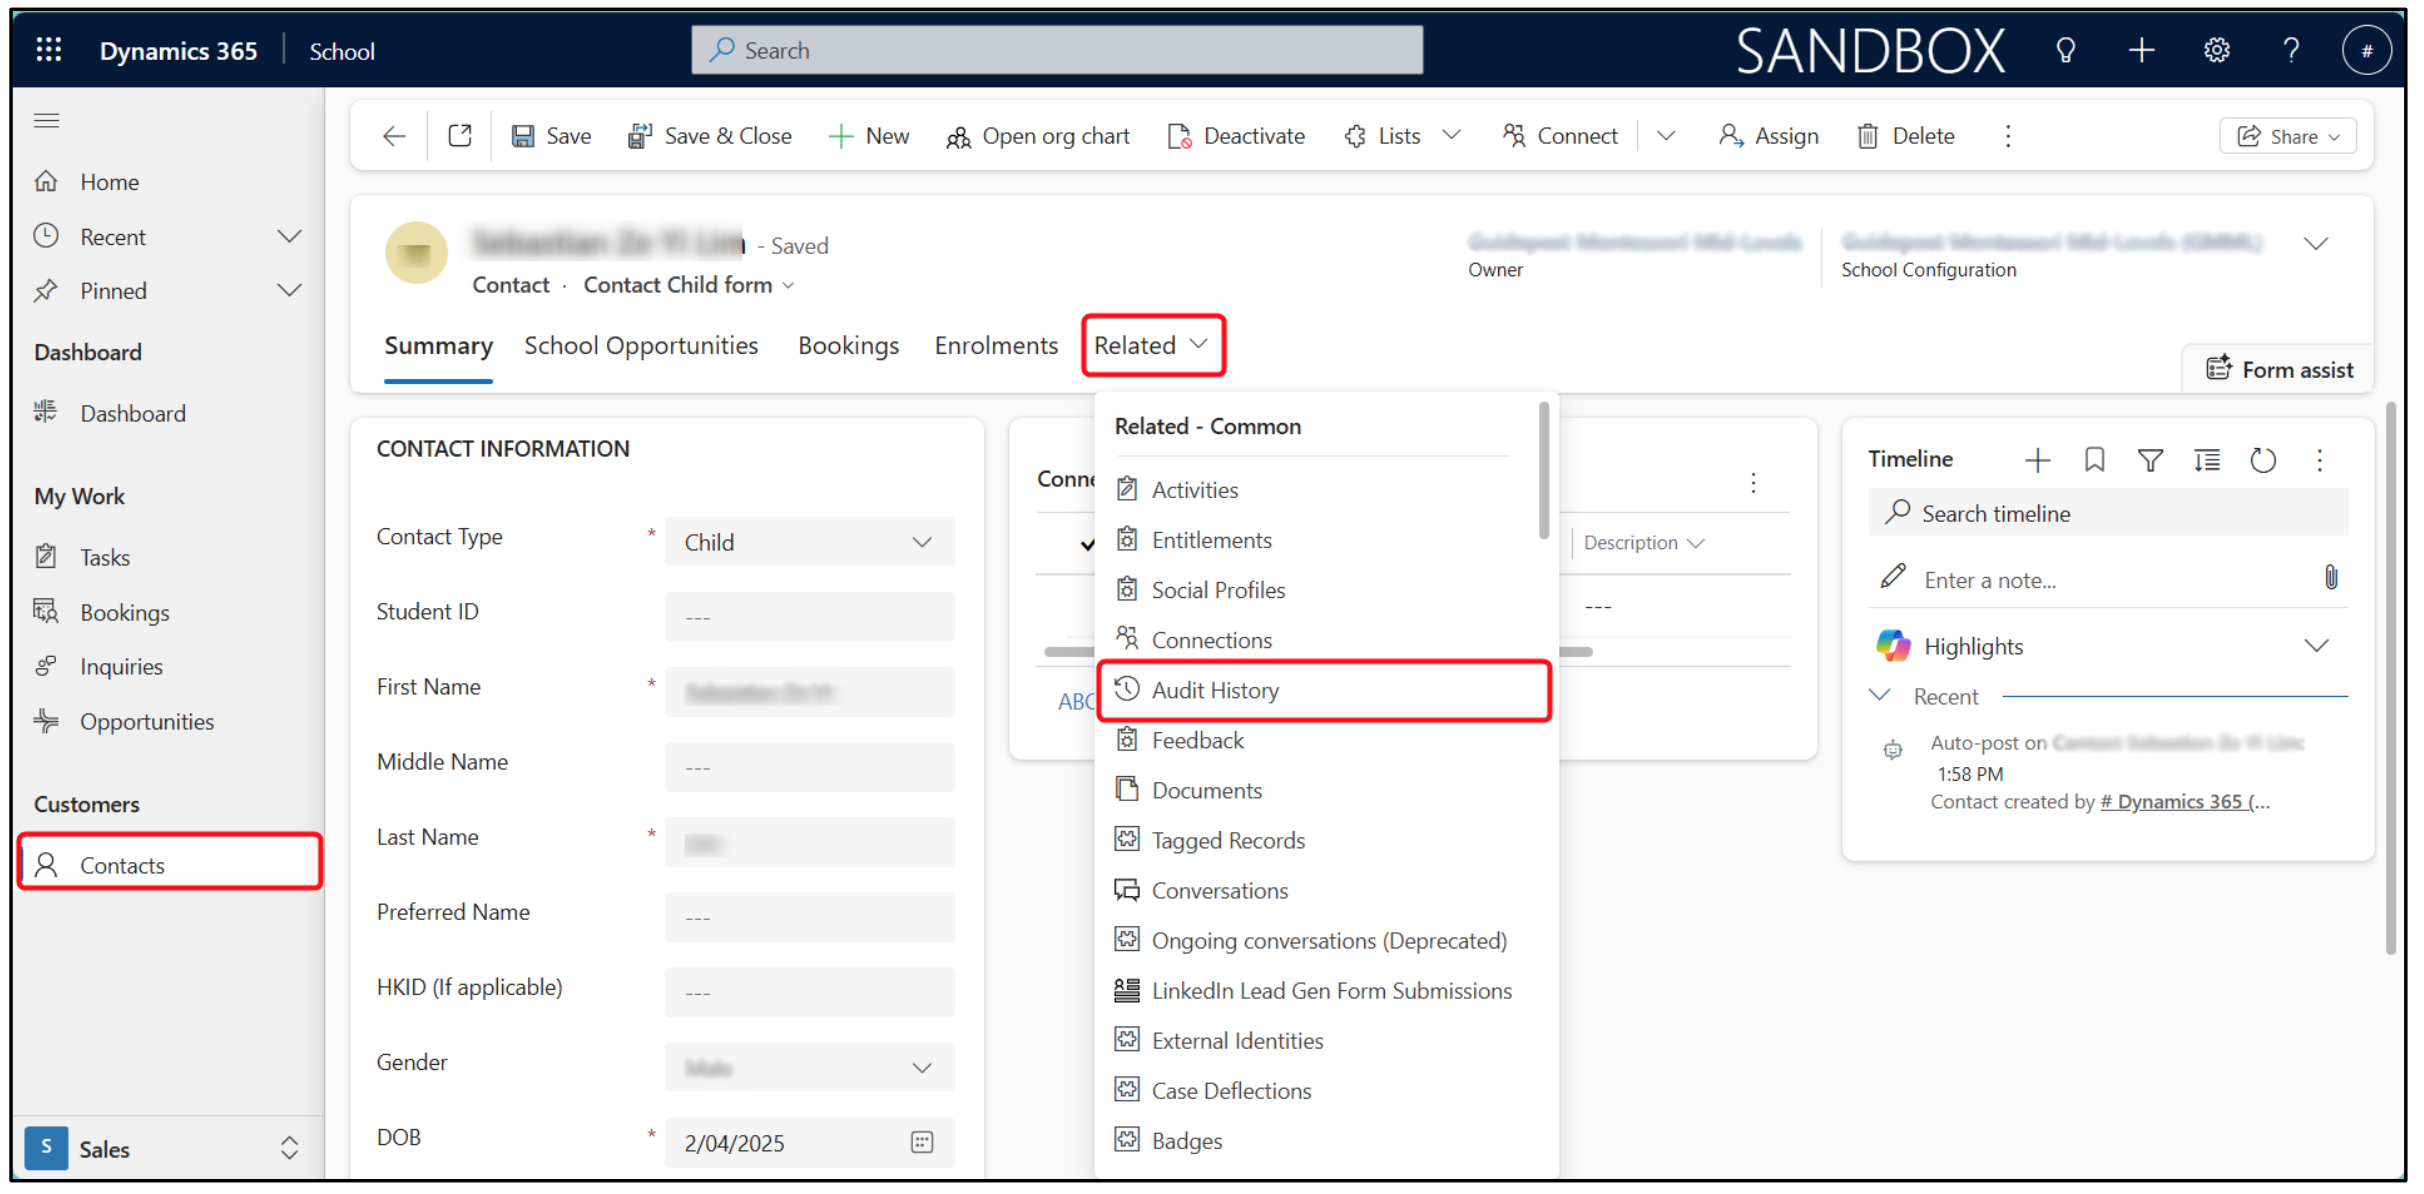
How to View Audit History
-
Open a record (e.g., Contact, Opportunity, Booking).
-
On the Tab Bar, select Related → Audit History.
-
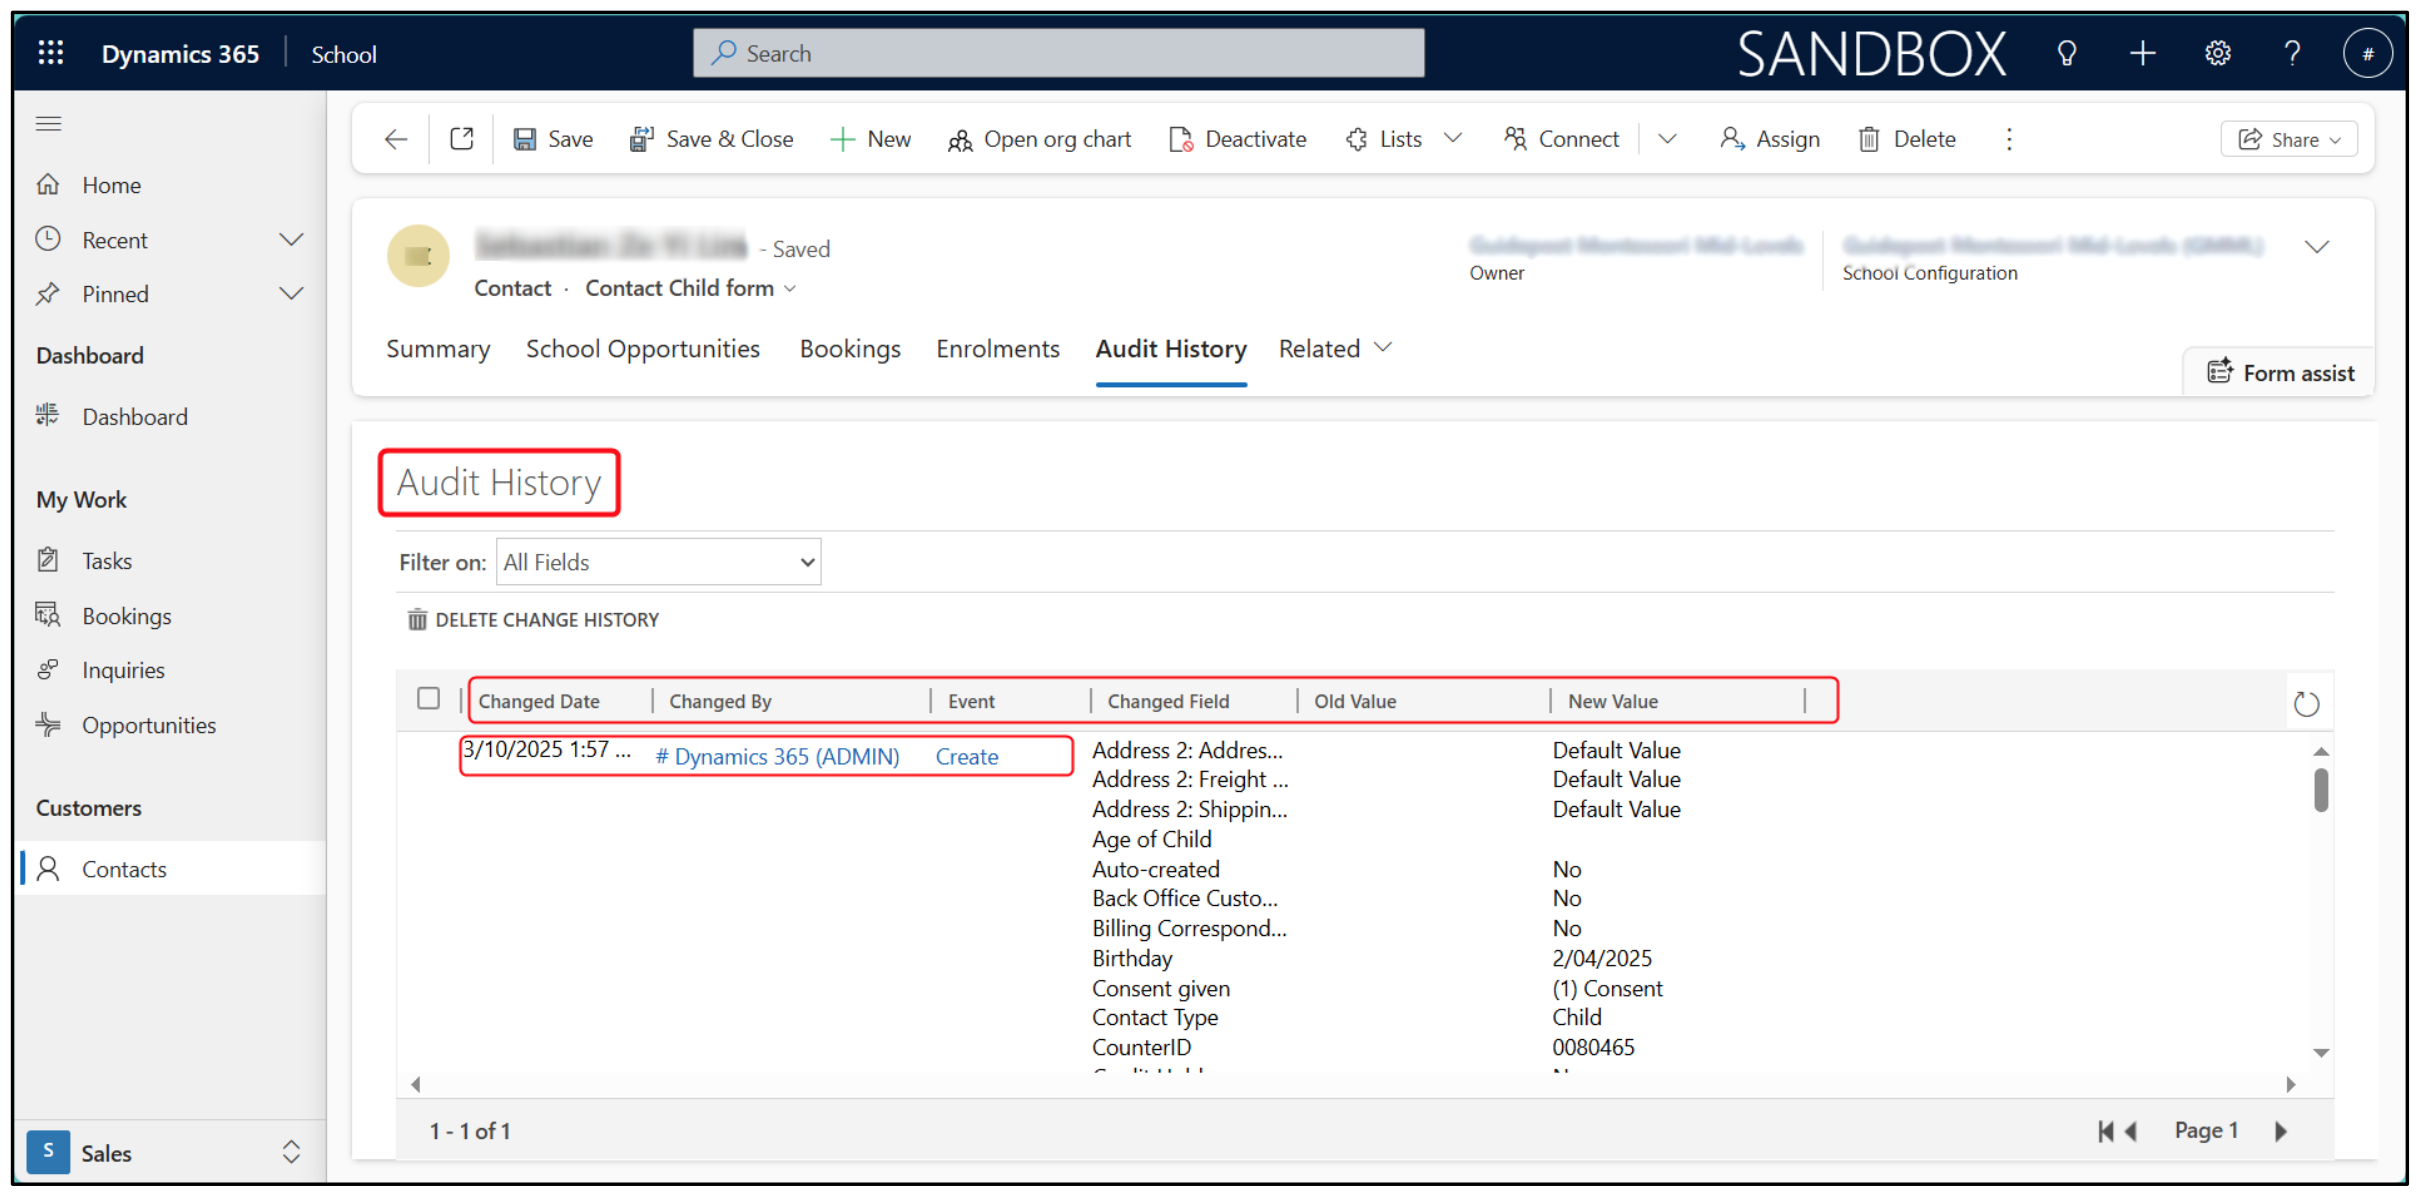
When you open the Audit History tab on a record, you’ll see a table with multiple columns. These correspond to:
-
When → Changed Date (timestamp of the change)
-
Who → Changed By (the user or system account that made the change)
-
What → Event (the type of action: Create, Update, Delete, Deactivate, etc.)
-
Changed Fields → the specific fields that were updated
-
Before / After Values → Old Value and New Value column
-
Best Practice: Use Audit History as your first step in troubleshooting. It can provide admins with the following information:
-
Shows exactly when something changes.
-
Who made the change(s).
-
What type of action it was.
-
What are the values before and after.
Using the Recycle Bin for Record Recovery
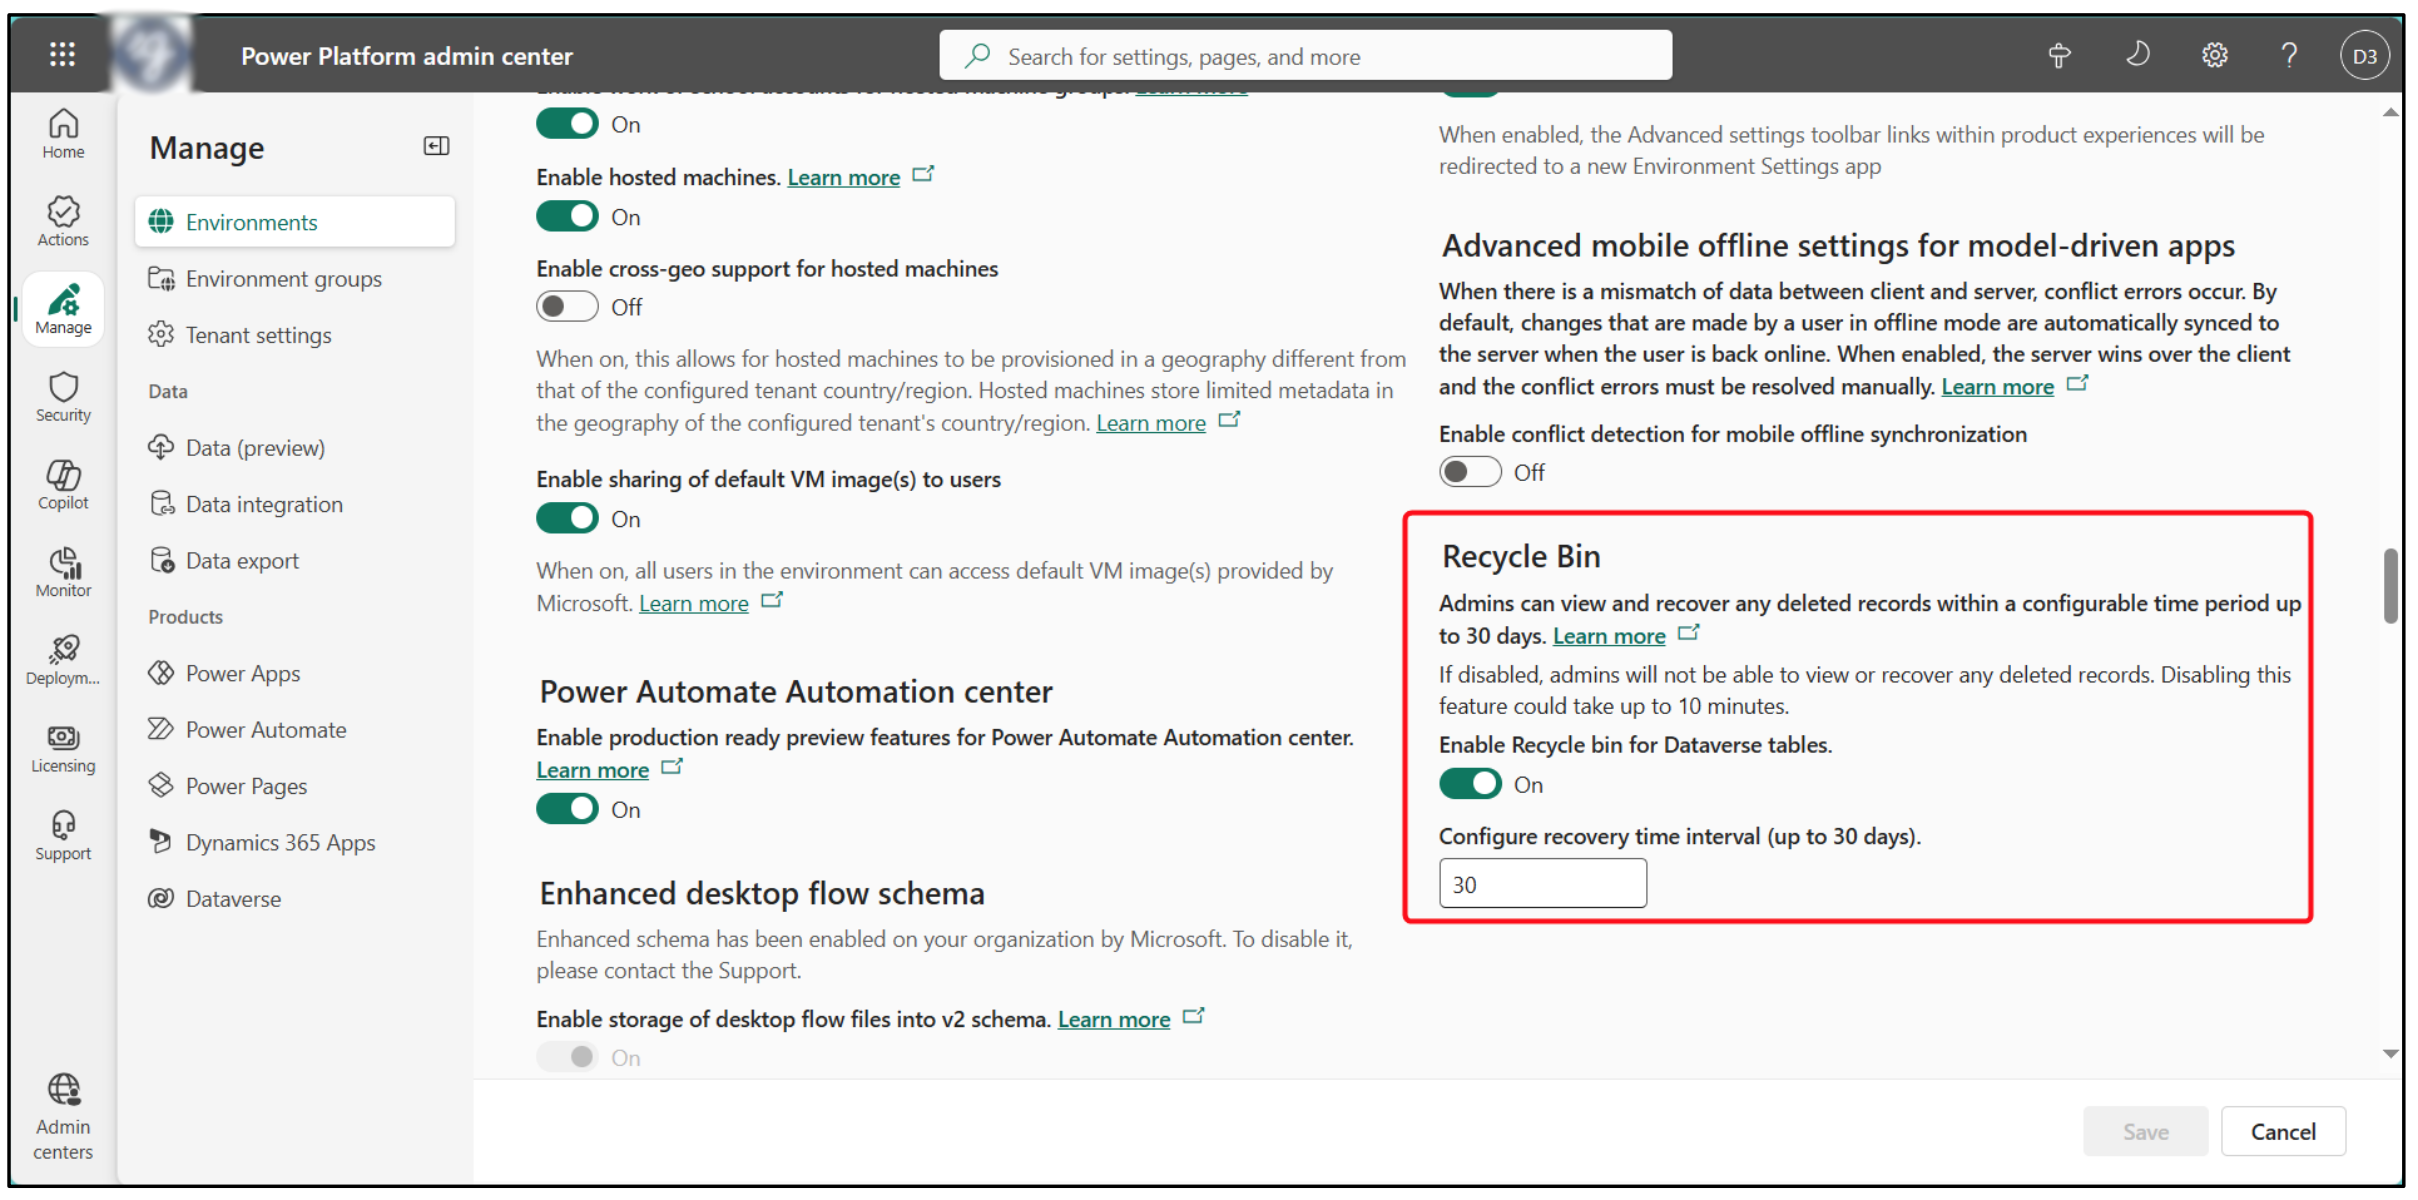
The Recycle Bin is a feature of the Power Platform Admin Center that allows administrators to temporarily store deleted records before they are permanently removed. The Recycle Bin feature can be enabled and set to the default retention period of 30 days. This means any record deleted in Dynamics can be recovered within a 30-day time period.
Enable (or Verify) Recycle Bin
-
Open Power Platform Admin Center (https://admin.powerplatform.microsoft.com/ ) and go to Manage → Environments → Select the environment → Settings.
-
Under Products, choose Features.
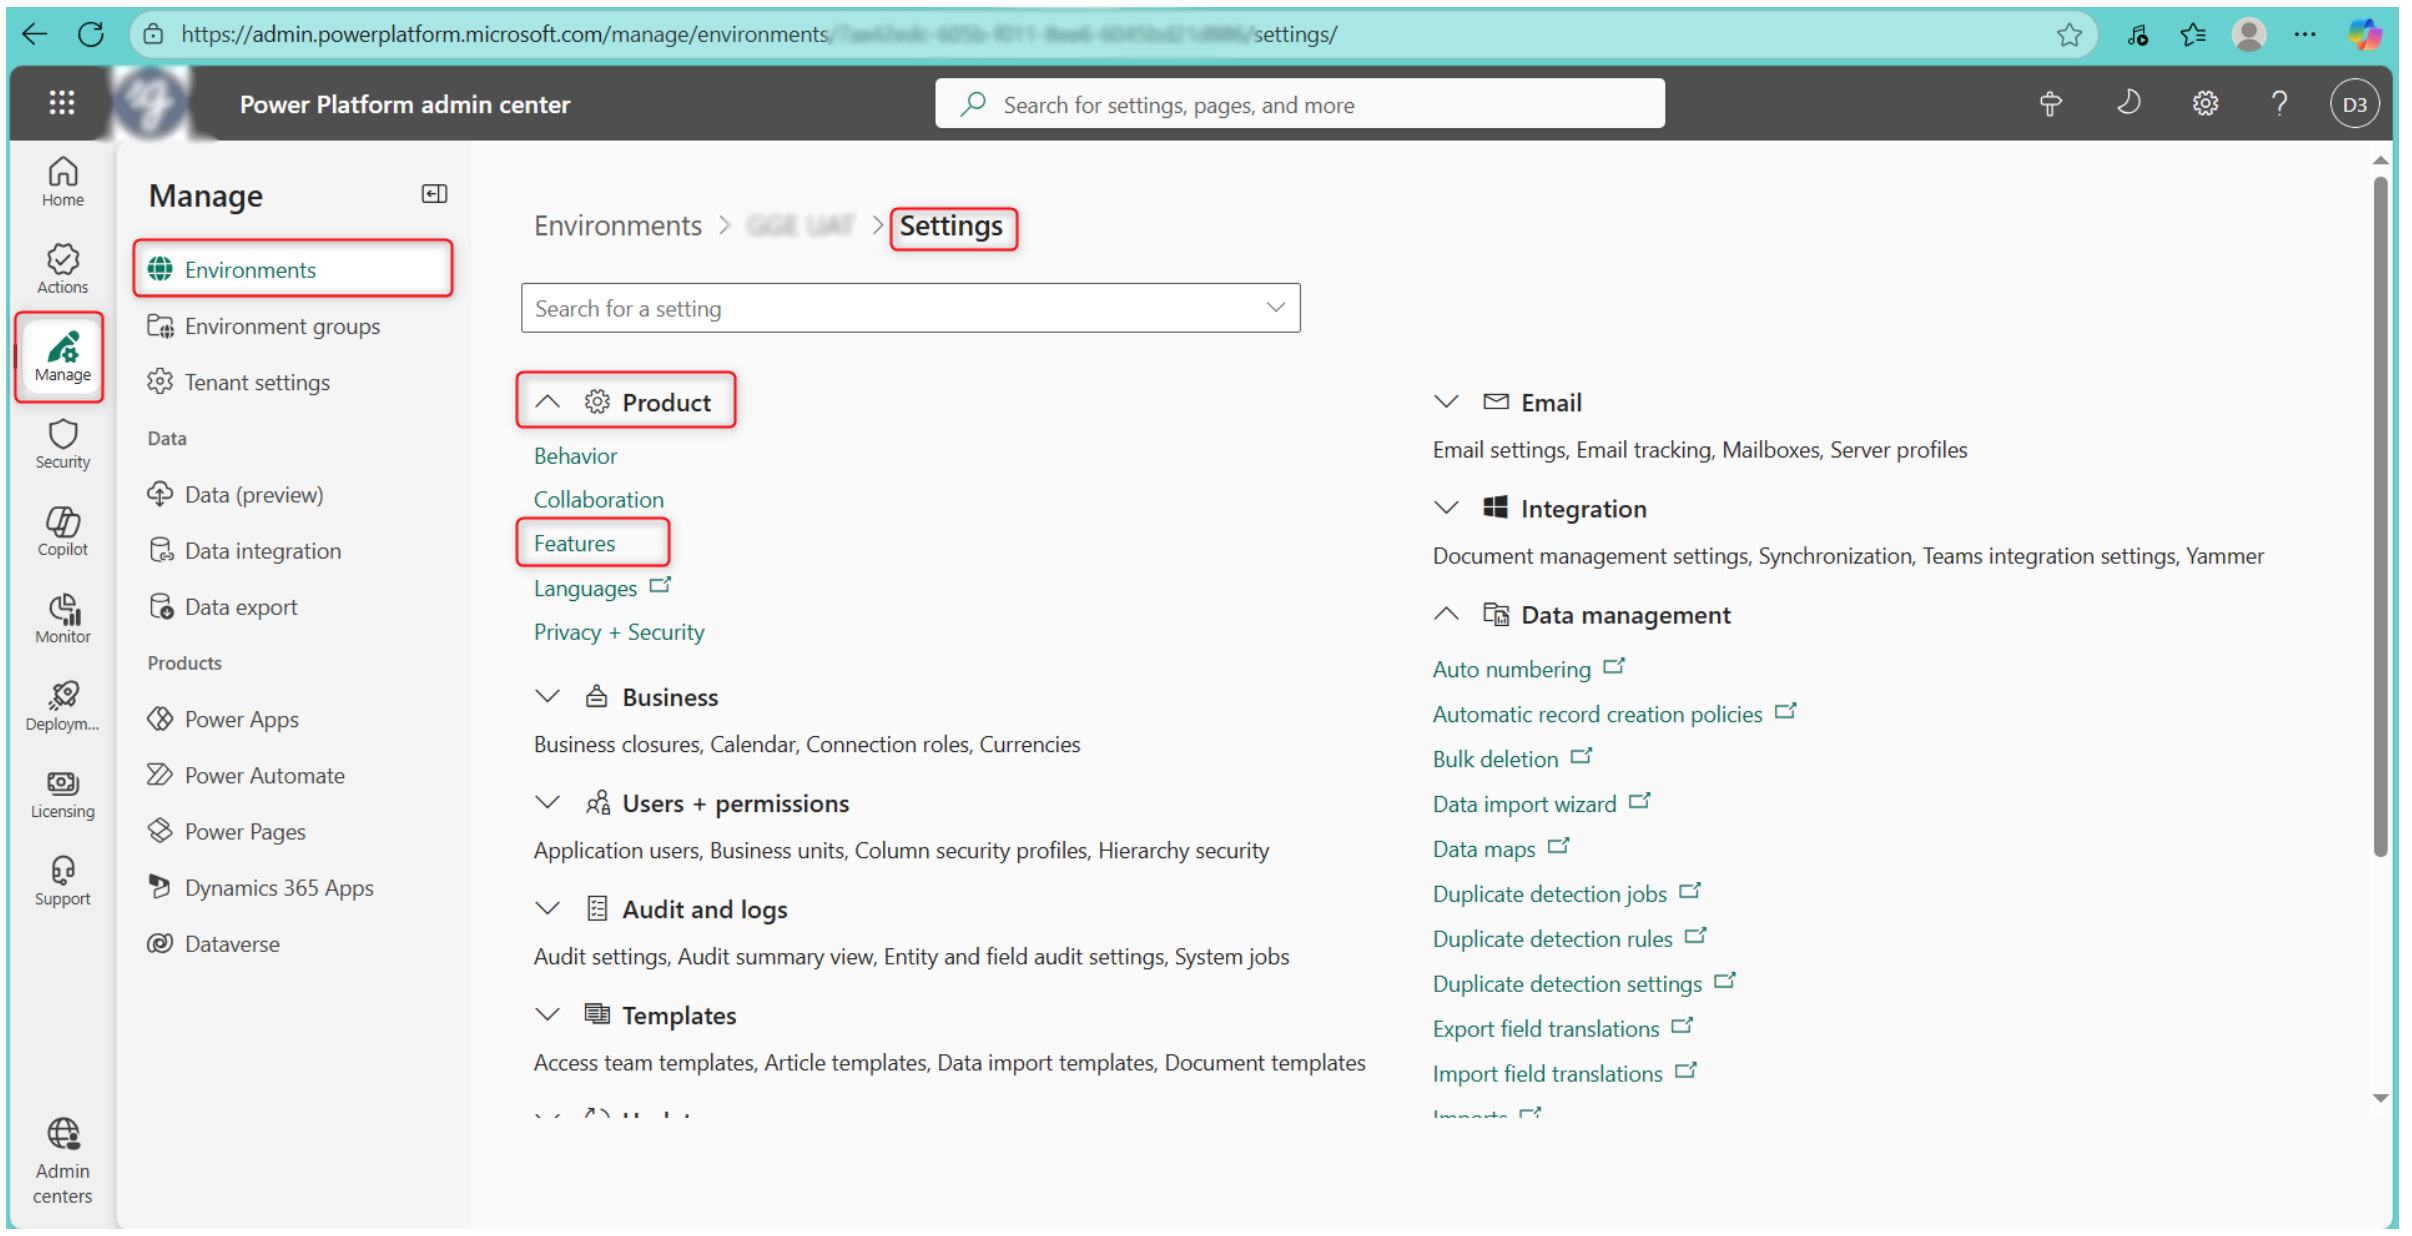
- Turn Recycle Bin On and set Retention (30 days or you can change the value).
Restore Deleted Records
-
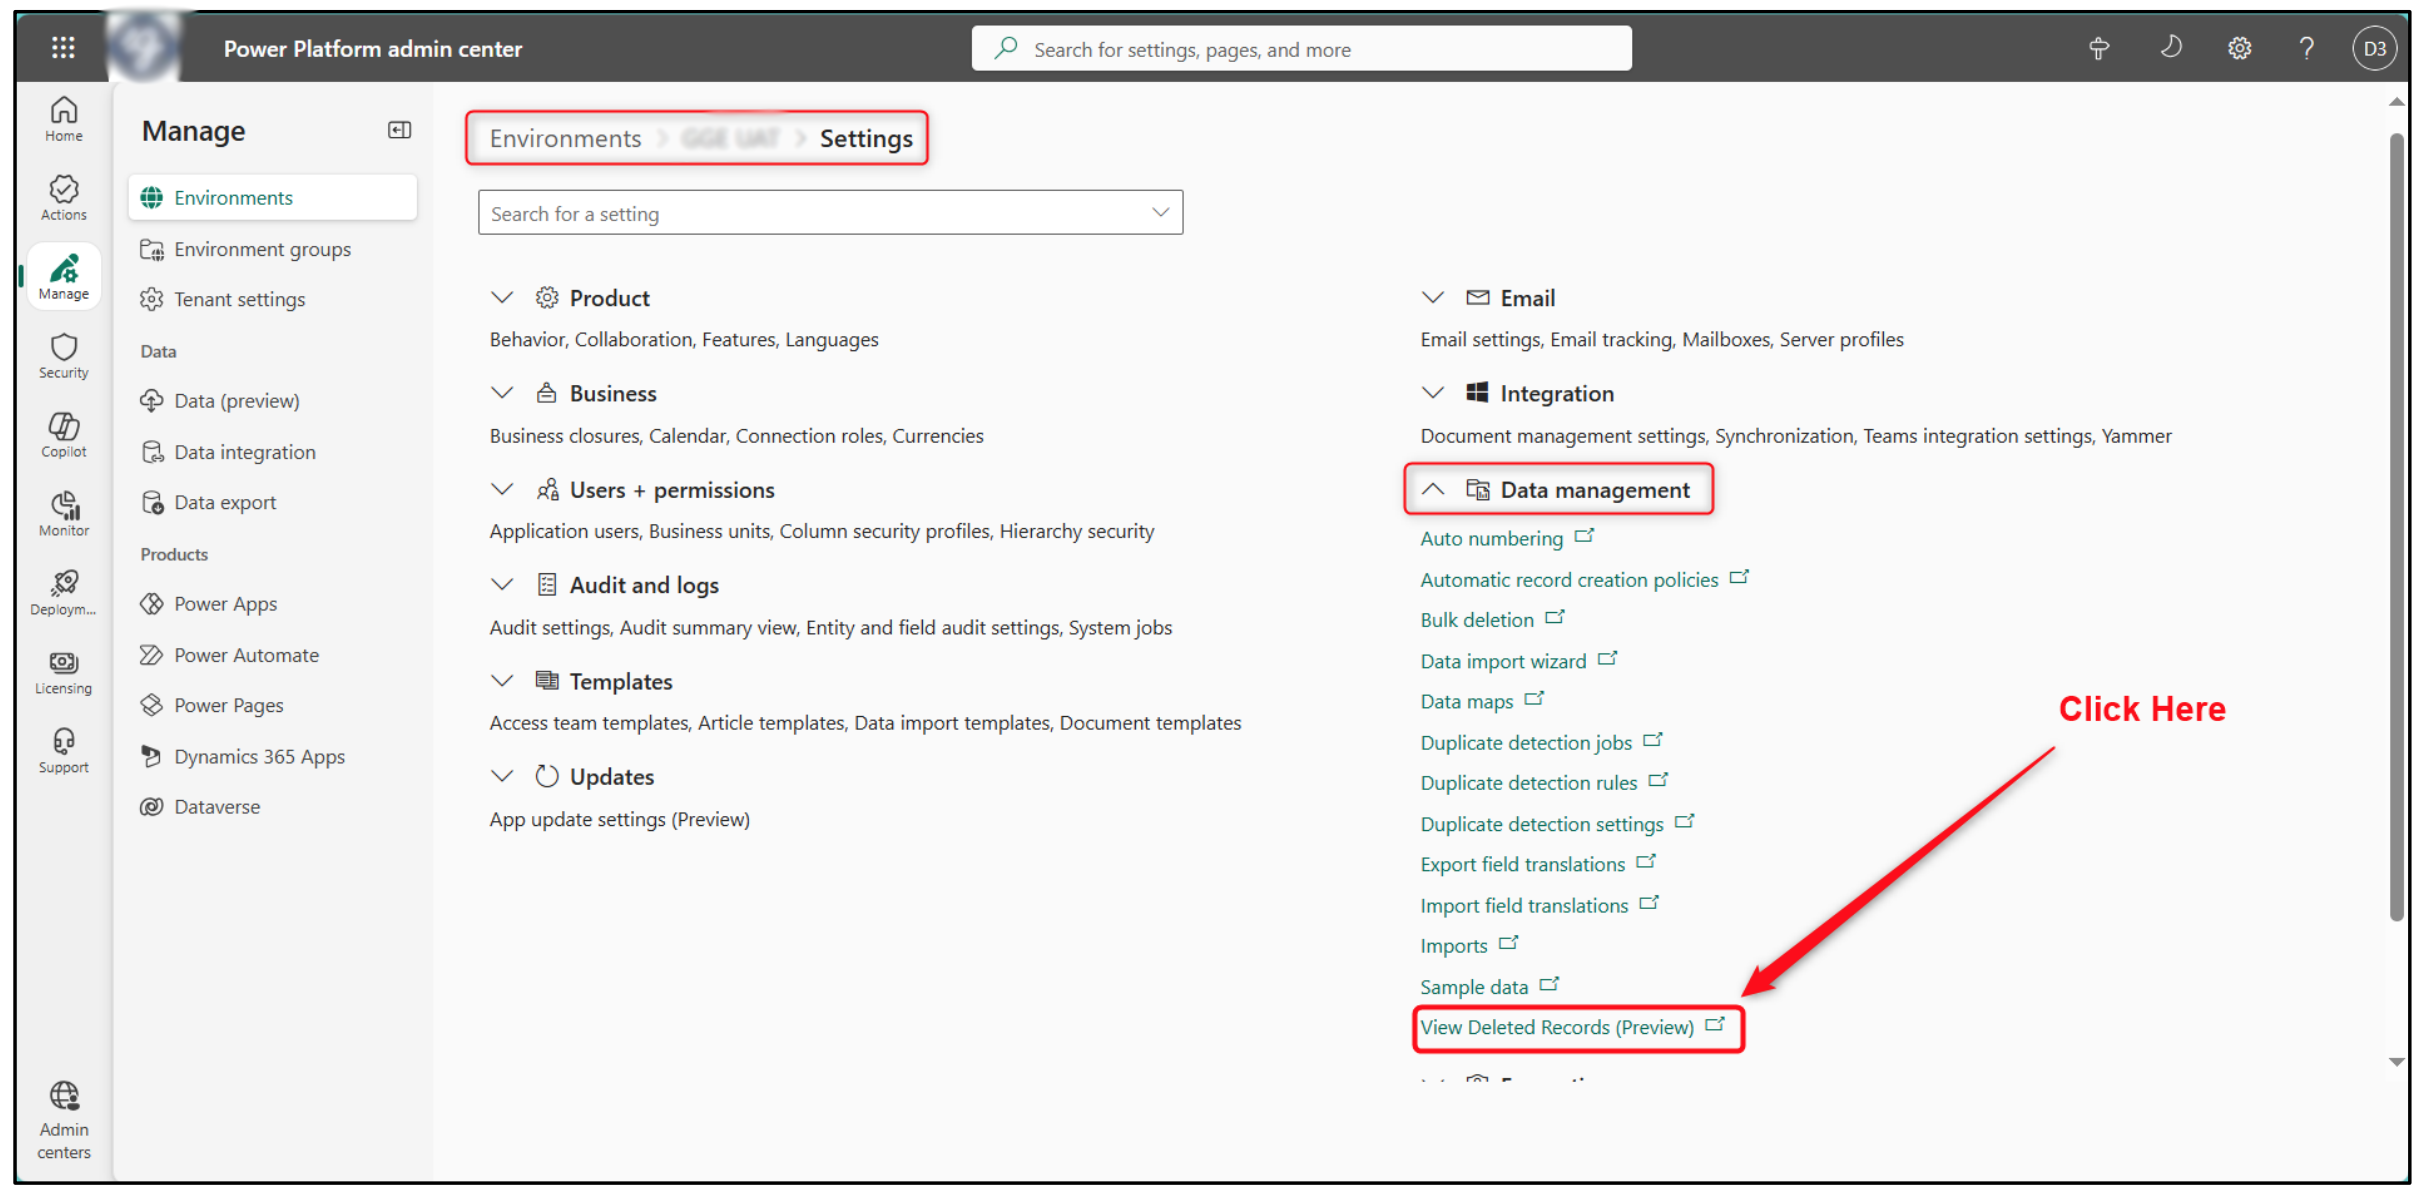
In the same environment’s Settings, open Data management.
-
Select View deleted records.
-
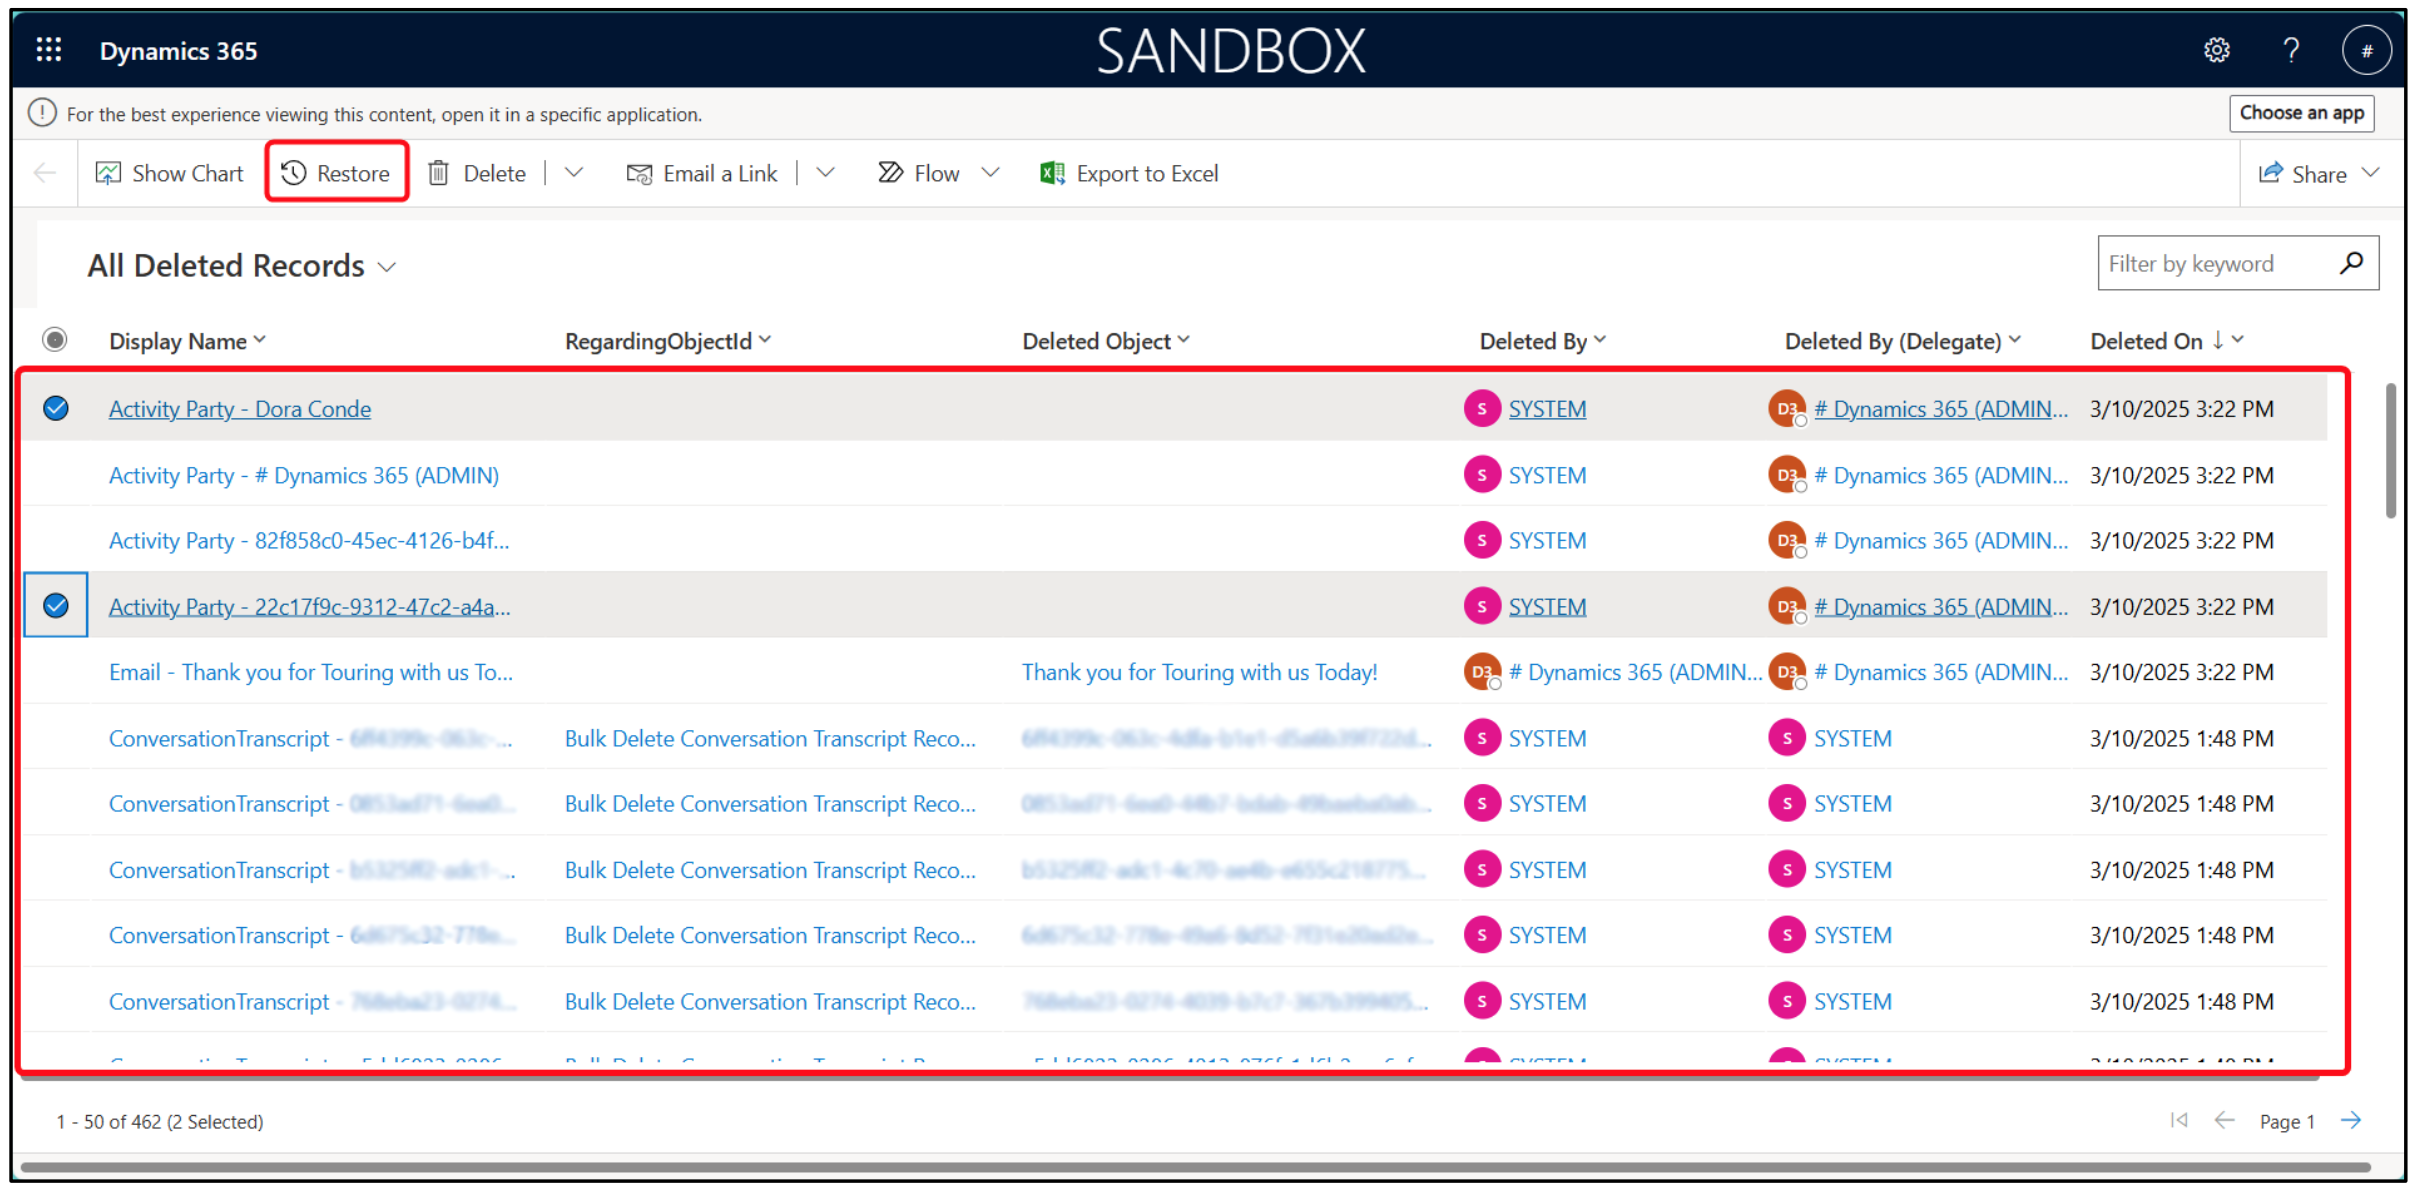
Search/filter for the item(s) you need.
-
Select the record(s) → click Restore (top bar).
-
The record is reinstated to its original state in Dynamics.
Best Practice: Always check the Recycle Bin before attempting to recreate a deleted record manually. This ensures you don’t introduce duplicates or lose audit history.
Flow Monitoring and Error Handling
Since many core processes are powered by Power Automate, monitoring flows is essential for fault detection. Admins should regularly review Run History, configure error handling, and add alerting for critical flows.
Viewing Run History
-
Go to Power Automate (https://make.powerapps.com/ ).
-
From the left menu, select Solutions and open the solution that contains the flow.
-
Select the flow you want to inspect.
-
Open the Run History tab.
-
Review recent runs:
-
Status → shows Succeeded or Failed.
-
Click a run to see step-by-step details, including which action failed and the error message returned.
-
Configuring Error Handling
-
Open the flow in Edit mode.
-
For any action step, click the ellipsis (…) → Configure run after.
-
Define what happens if the previous step fails (e.g., send a Teams message, send an email).
-
For actions prone to network or API delays, set up a Retry Policy (automatic retries on transient failures).
Setting Up Alerts
For critical flows (such as Illumine integrations or Registration forms), configure an error branch that:
-
Send email to admins.
-
Posts a Teams notification.
You can also create a monitoring flow that checks for failed runs daily and notifies admins.
Use Cases
Here are some use cases applicable to fault detection and recovery:
-
If data is incorrect → check Audit History to see what changed.
-
If records are missing → check Recycle Bin to restore them.
-
If automation didn’t run → check Flow Run History to confirm whether it failed, and review error logs.
Best Practice: Combine Audit Logs, Recycle Bin, and Flow Monitoring for a complete picture of what happened and how to recover quickly.