Microsoft Dynamics 365 Customer Self-Service Portal User Guide
Introduction
The Dynamics 365 Customer Self-Service Portal is designed to make it easy for you to manage your cases, view recent activity, and update your personal information. This guide will walk you through logging in, navigating the portal, using dashboard features, creating and managing cases, and updating your settings. If you need assistance at any stage, support resources are available to help.
Login and Access
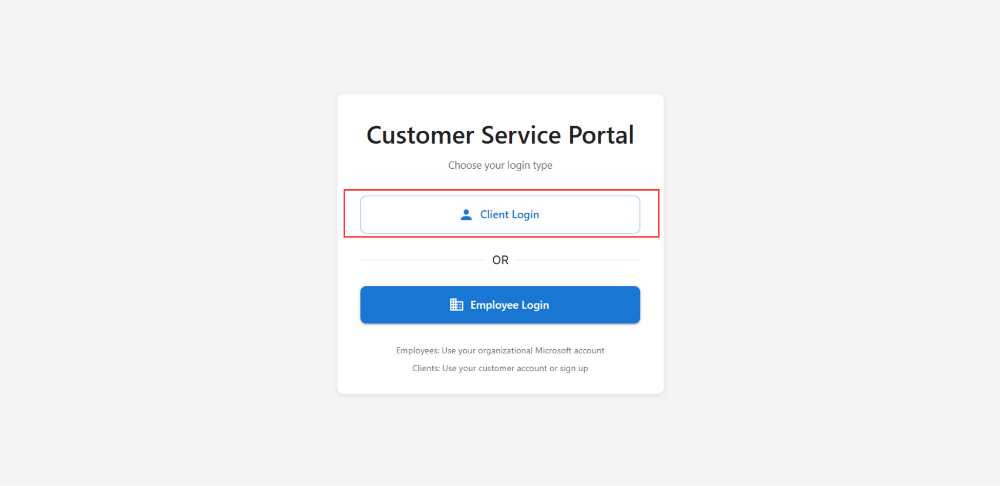
Here are the steps for signing in to the Customer Self-Service Portal.
-
Go to the portal’s website address in your web browser, https://support.d365.global/login
-
Click on the Login button.
- Enter your registered email address and password.
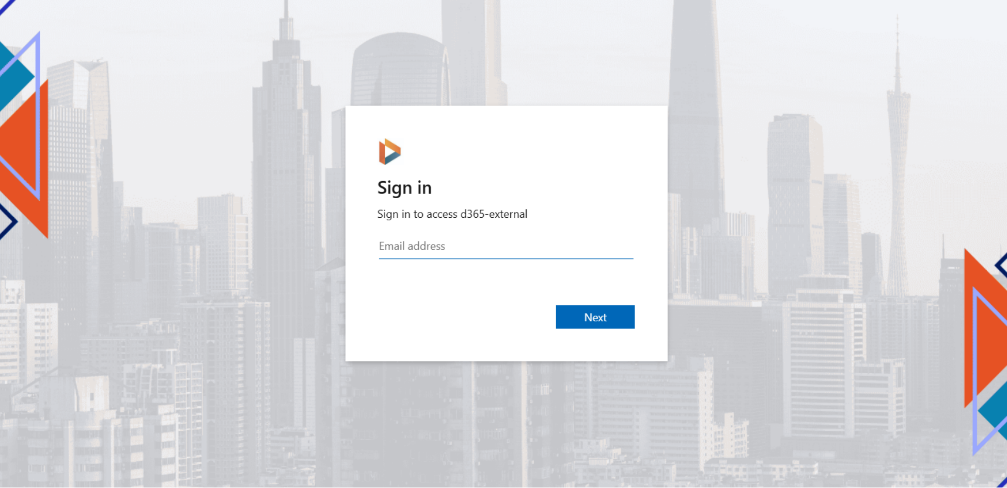
- On first login, you will be prompted to set a new password. Complete any additional security steps (such as two-factor authentication). You do not have to perform this step on your next login (sign in).

- After successful login, you will be directed to the Dashboard.
Basic Navigation
The portal has three main areas you will use.
Dashboard
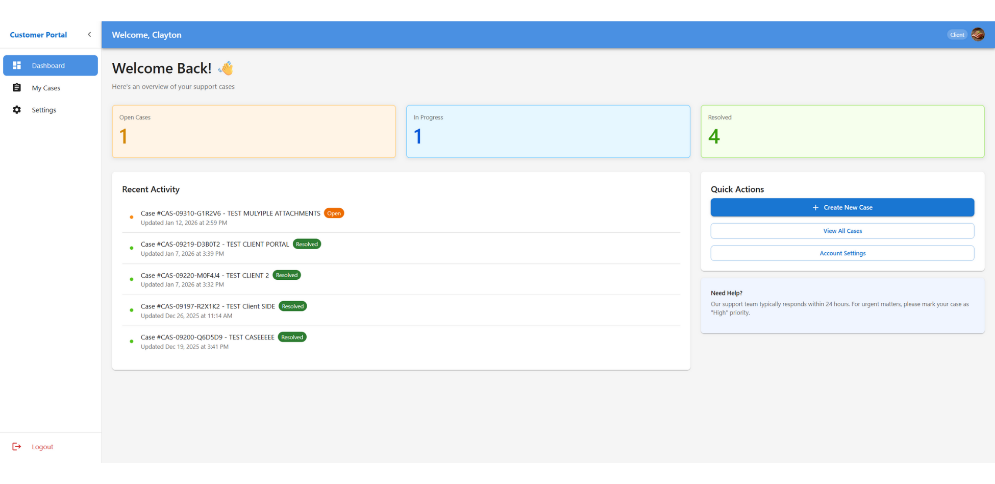
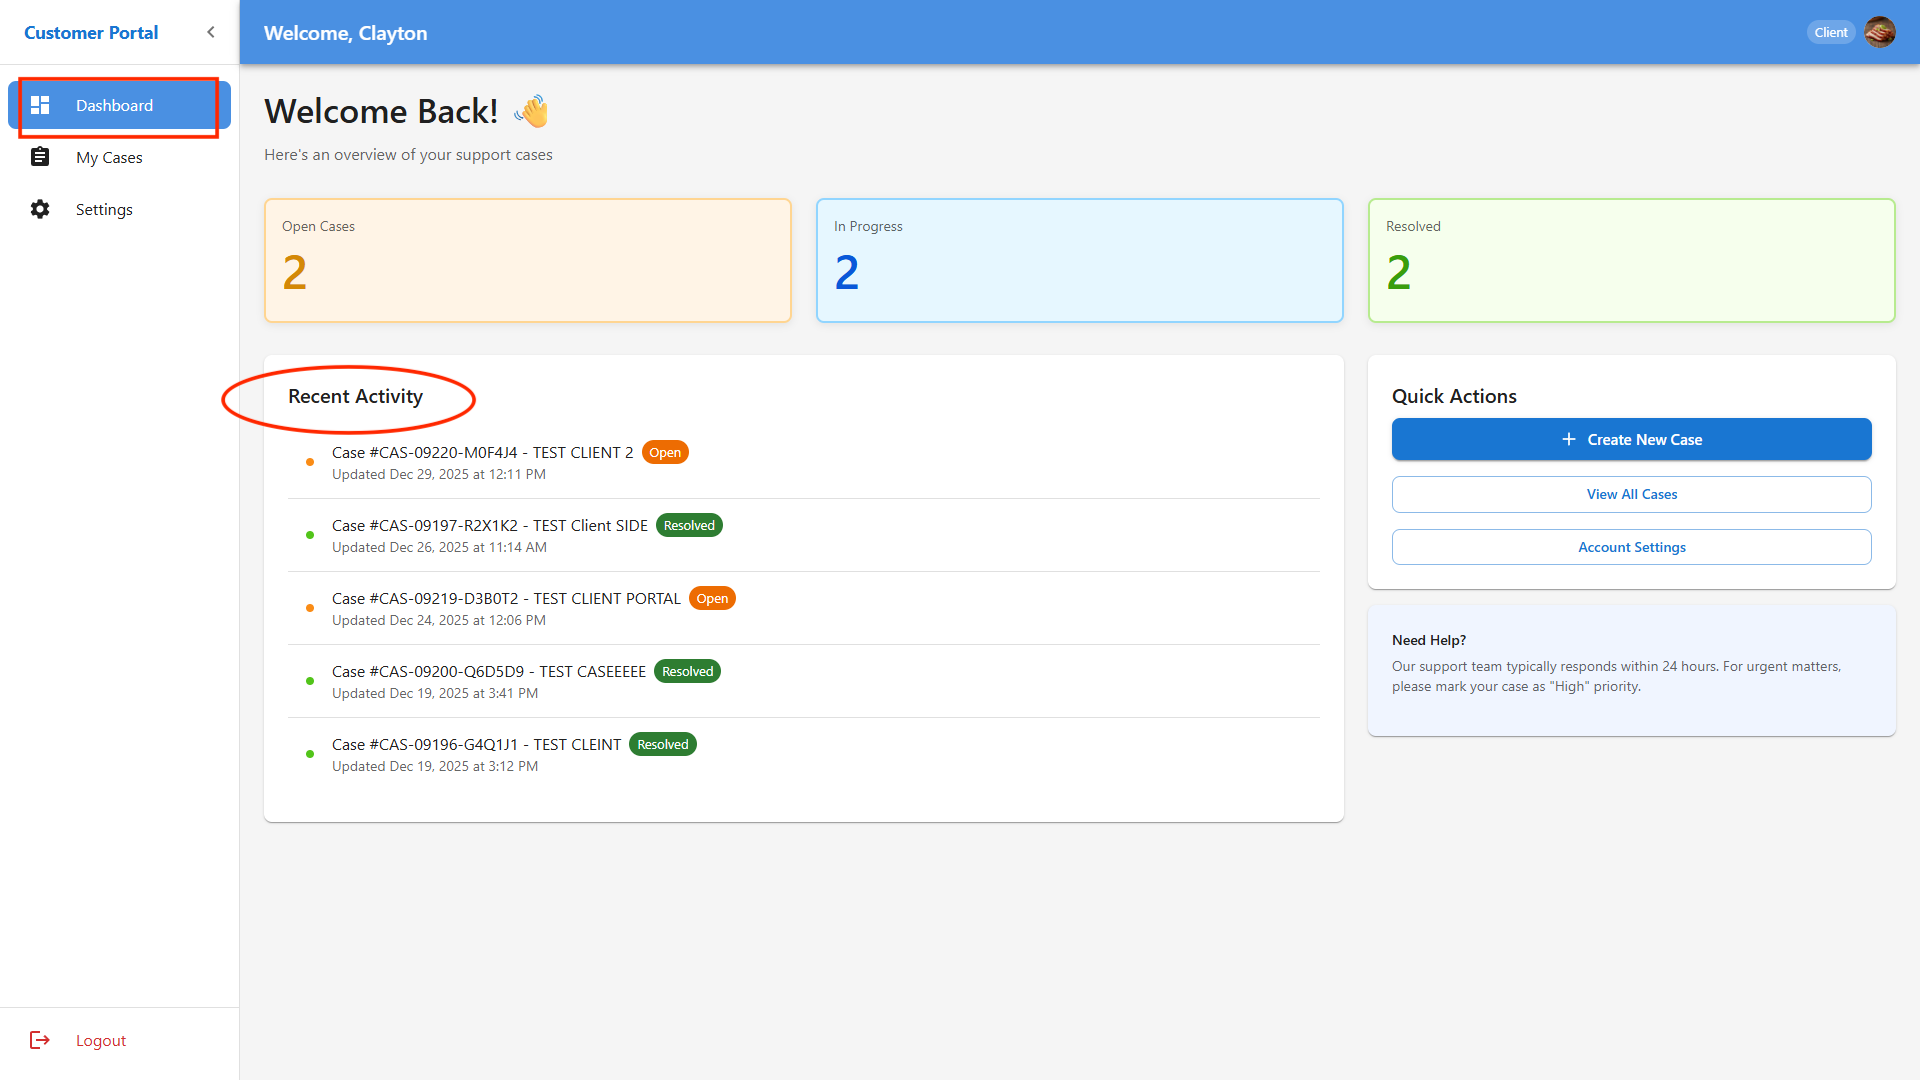
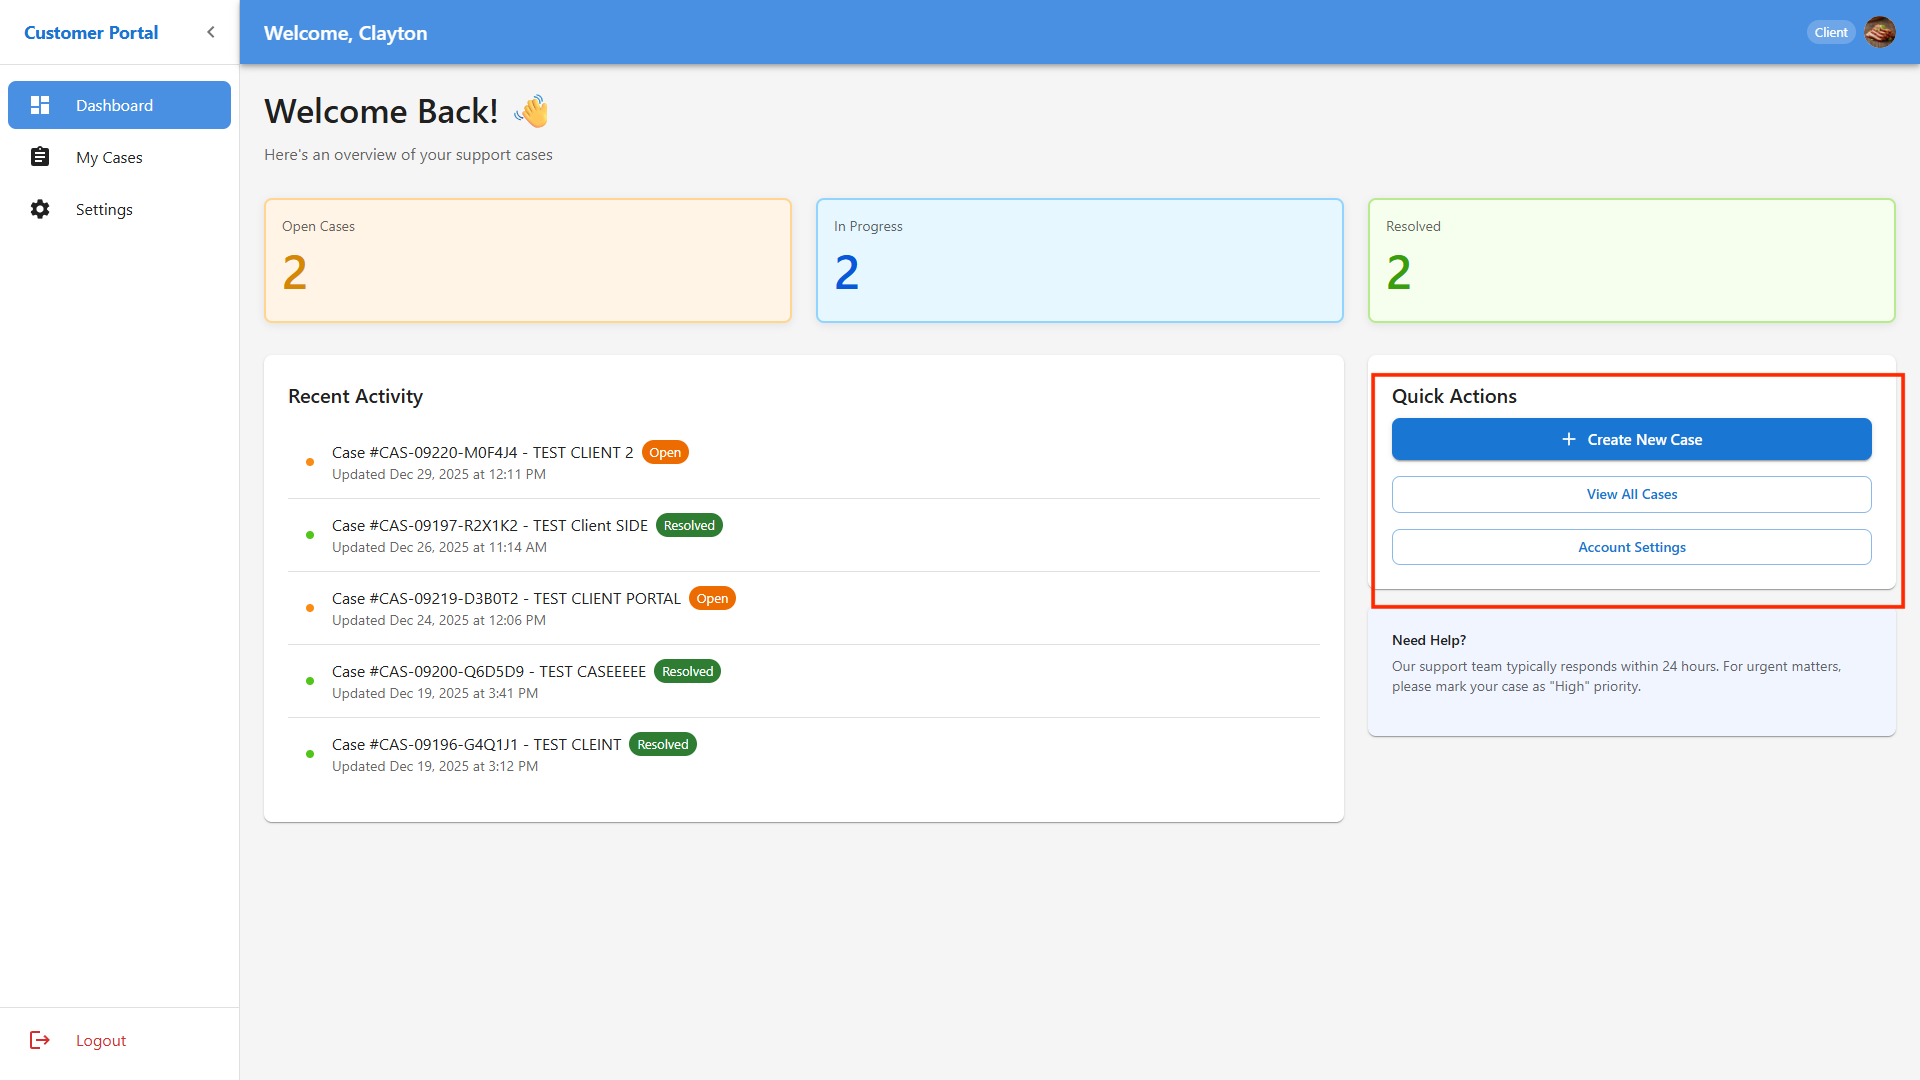
Overview of your cases and recent activity. You can use the dashboard to see an overview of your support cases, grouped by status: Open, In Progress, and Resolved. Check the Recent Activity panel for the latest updates on your cases. You can also quickly access common actions from the Quick Actions button.
My Cases
List and details of all your support cases. Each case summary on the Dashboard displays its status, case number, brief description, and last updated date. You can click on any case to view more detailed information.
Settings
This allows you to configure and manage your profile and security information. The Settings is where you can update your personal information, change your password, and manage notification preferences.
Dashboard Features
The Dashboard is your main landing page after logging in. Here is a list of features available.
-
See an overview of your support cases, grouped by status: Open, In Progress, and Resolved.
-
Check the Recent Activity panel for the latest updates on your cases.
-
Quickly access common actions from the Quick Actions button.
Each case summary on the Dashboard displays its status, case number, brief description, and last updated date. You can click on any case to view more detailed information.
Using Quick Actions
The Quick Actions button is usually found at the right side of the Dashboard. It lets you:
-
Create a New Case: Open a new support request.
-
View All Cases: Go to a complete list of your cases in the My Cases section.
-
Account Settings: Jump directly to your profile and security settings.
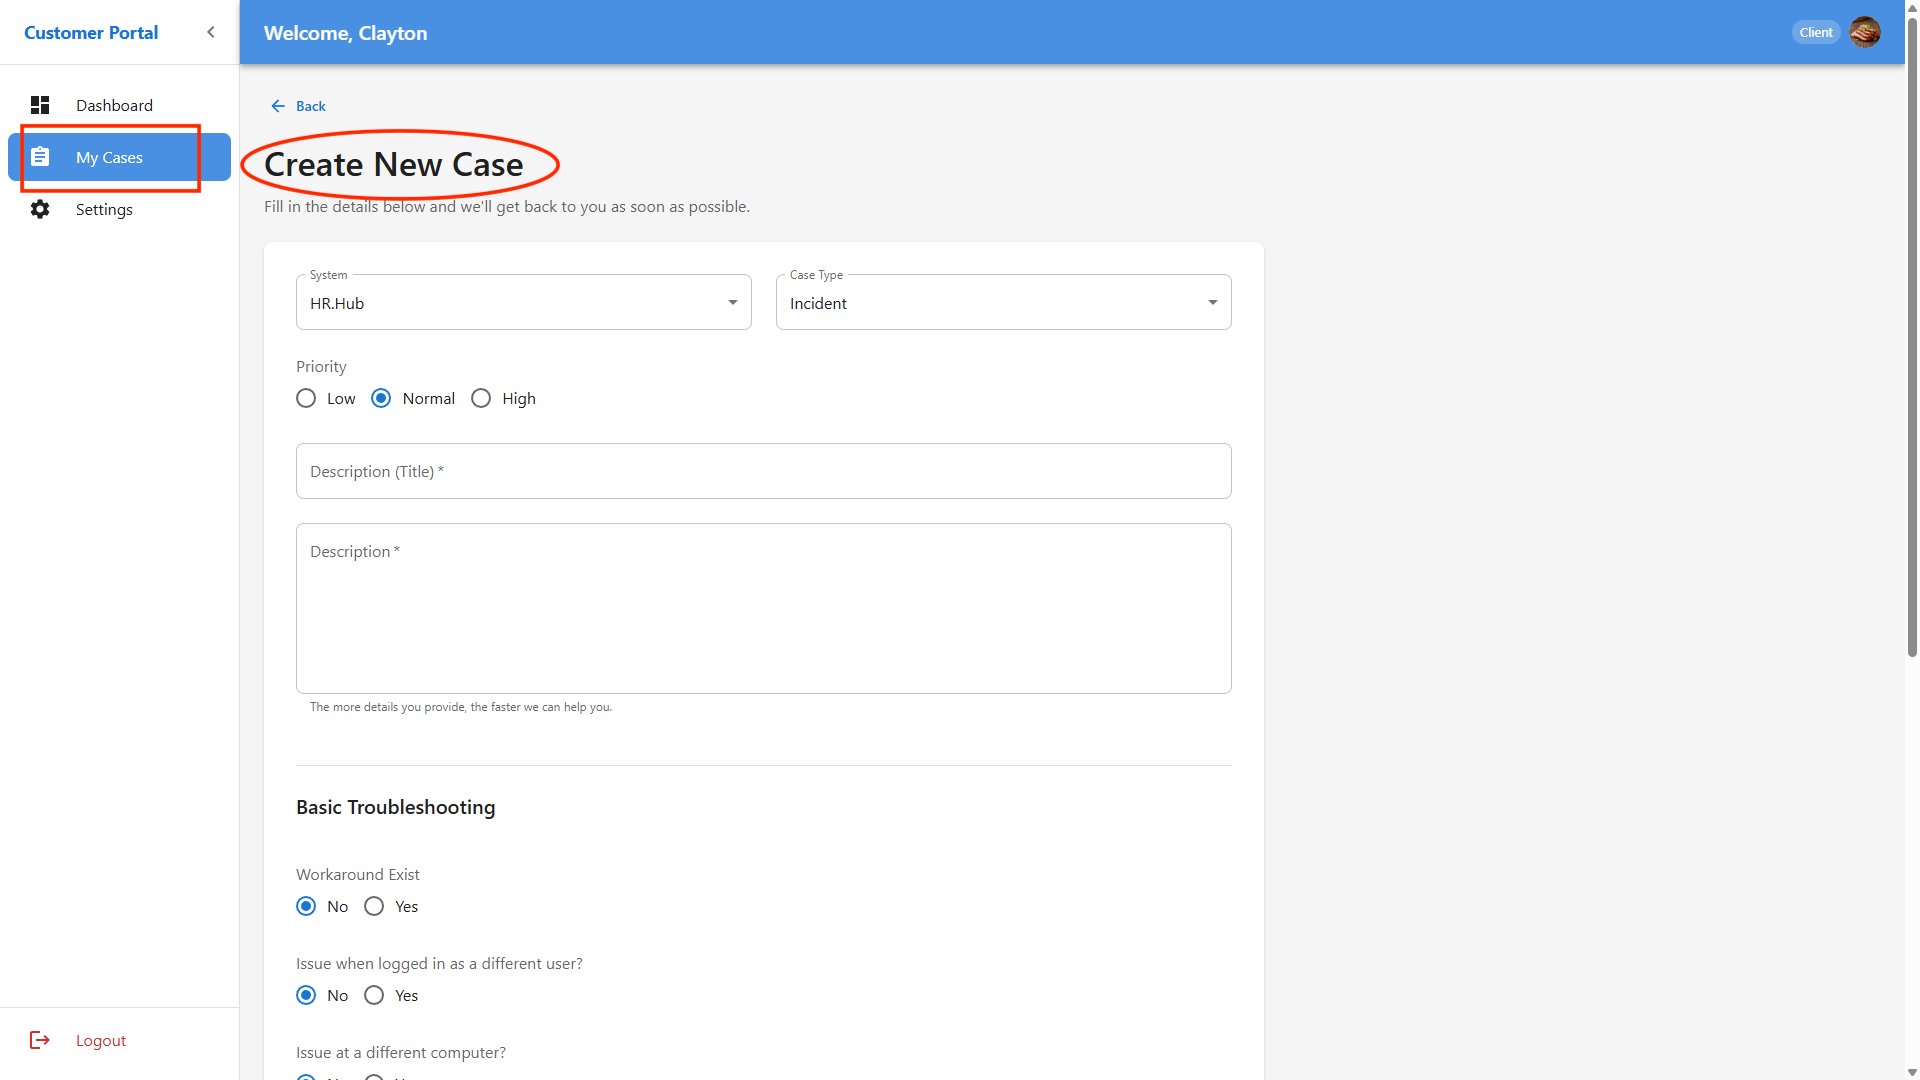
Creating a New Case
Follow these steps to create a new support case through the portal.
- Click the Quick Actions button and select Create New Case.
-
In the new case form, select the relevant System from the dropdown menu.
-
Choose the Case Type that best describes your issue or request.
-
Enter a clear Description of your problem or question.
-
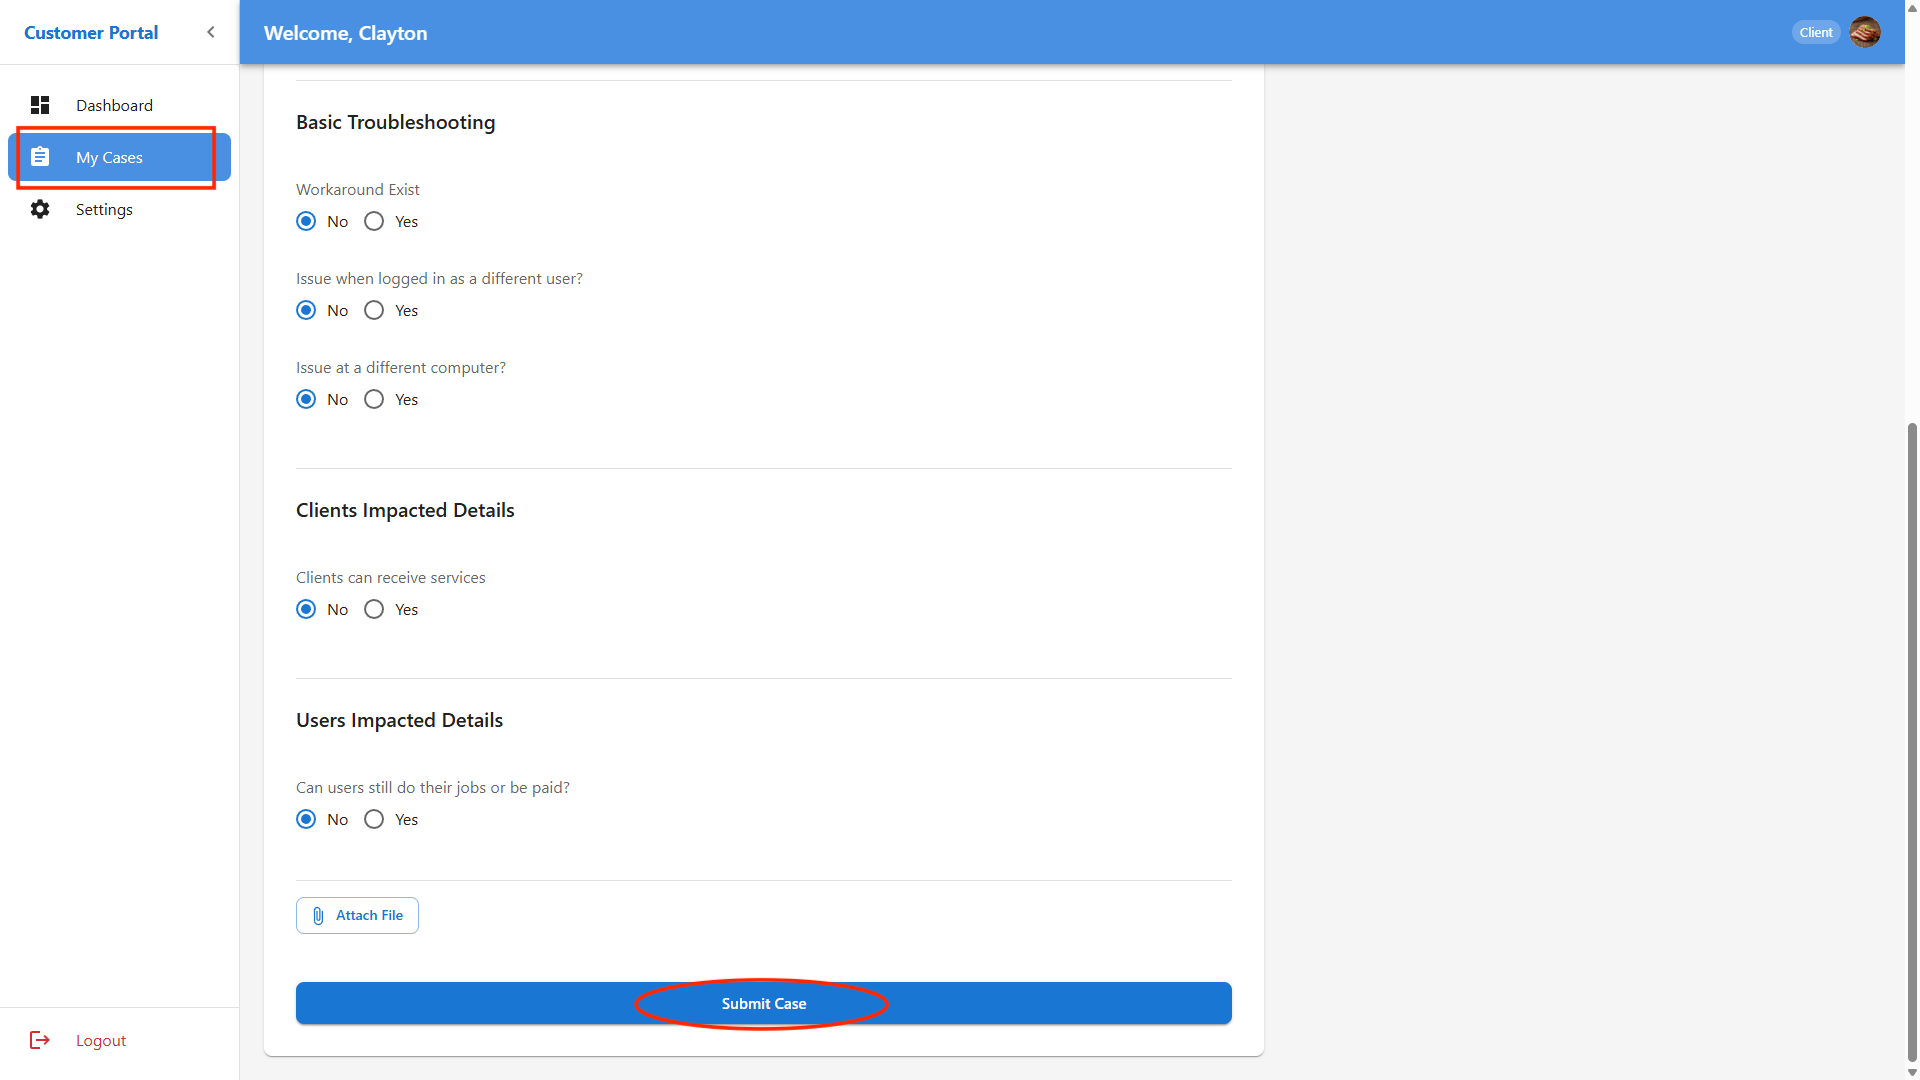
Provide any Troubleshooting Details you have already tried.
-
Describe the Impact of the issue on your work or business.
-
If needed, use the Attach Files option to upload screenshots or documents that help explain your case.
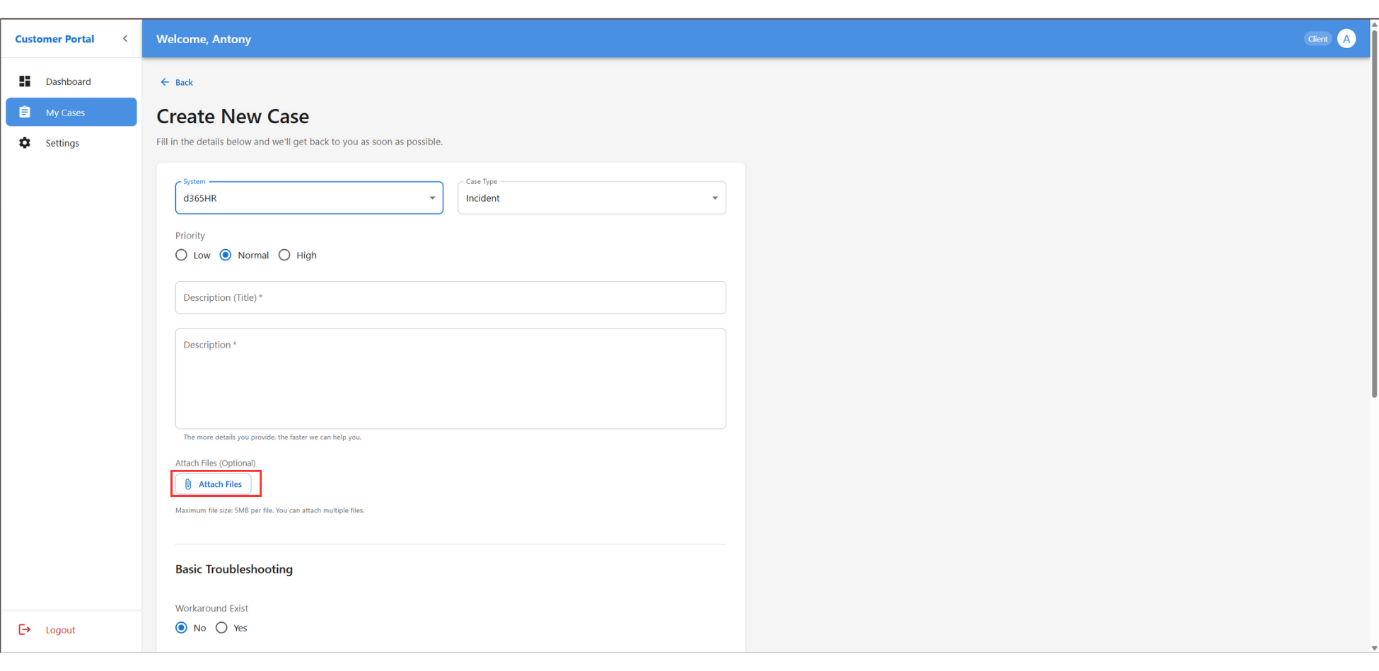
- Review your information, then click Submit to send your case to the support team.
Viewing Case Summaries and Details
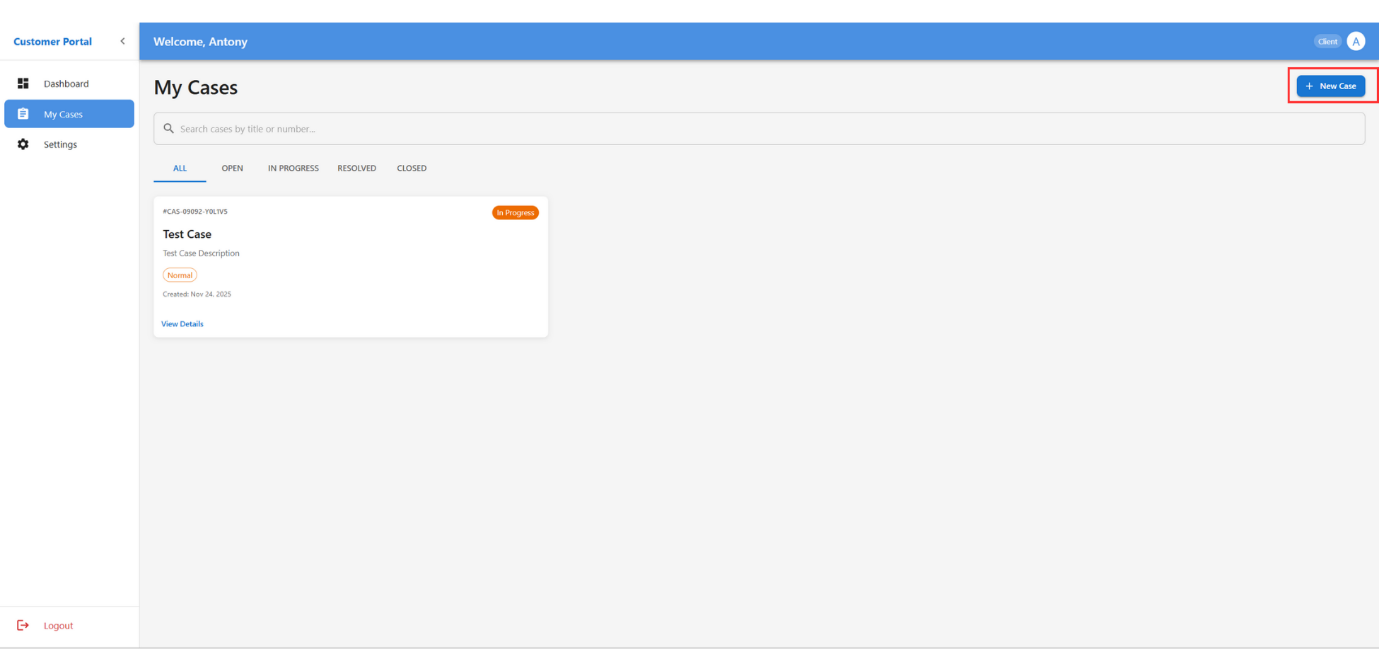
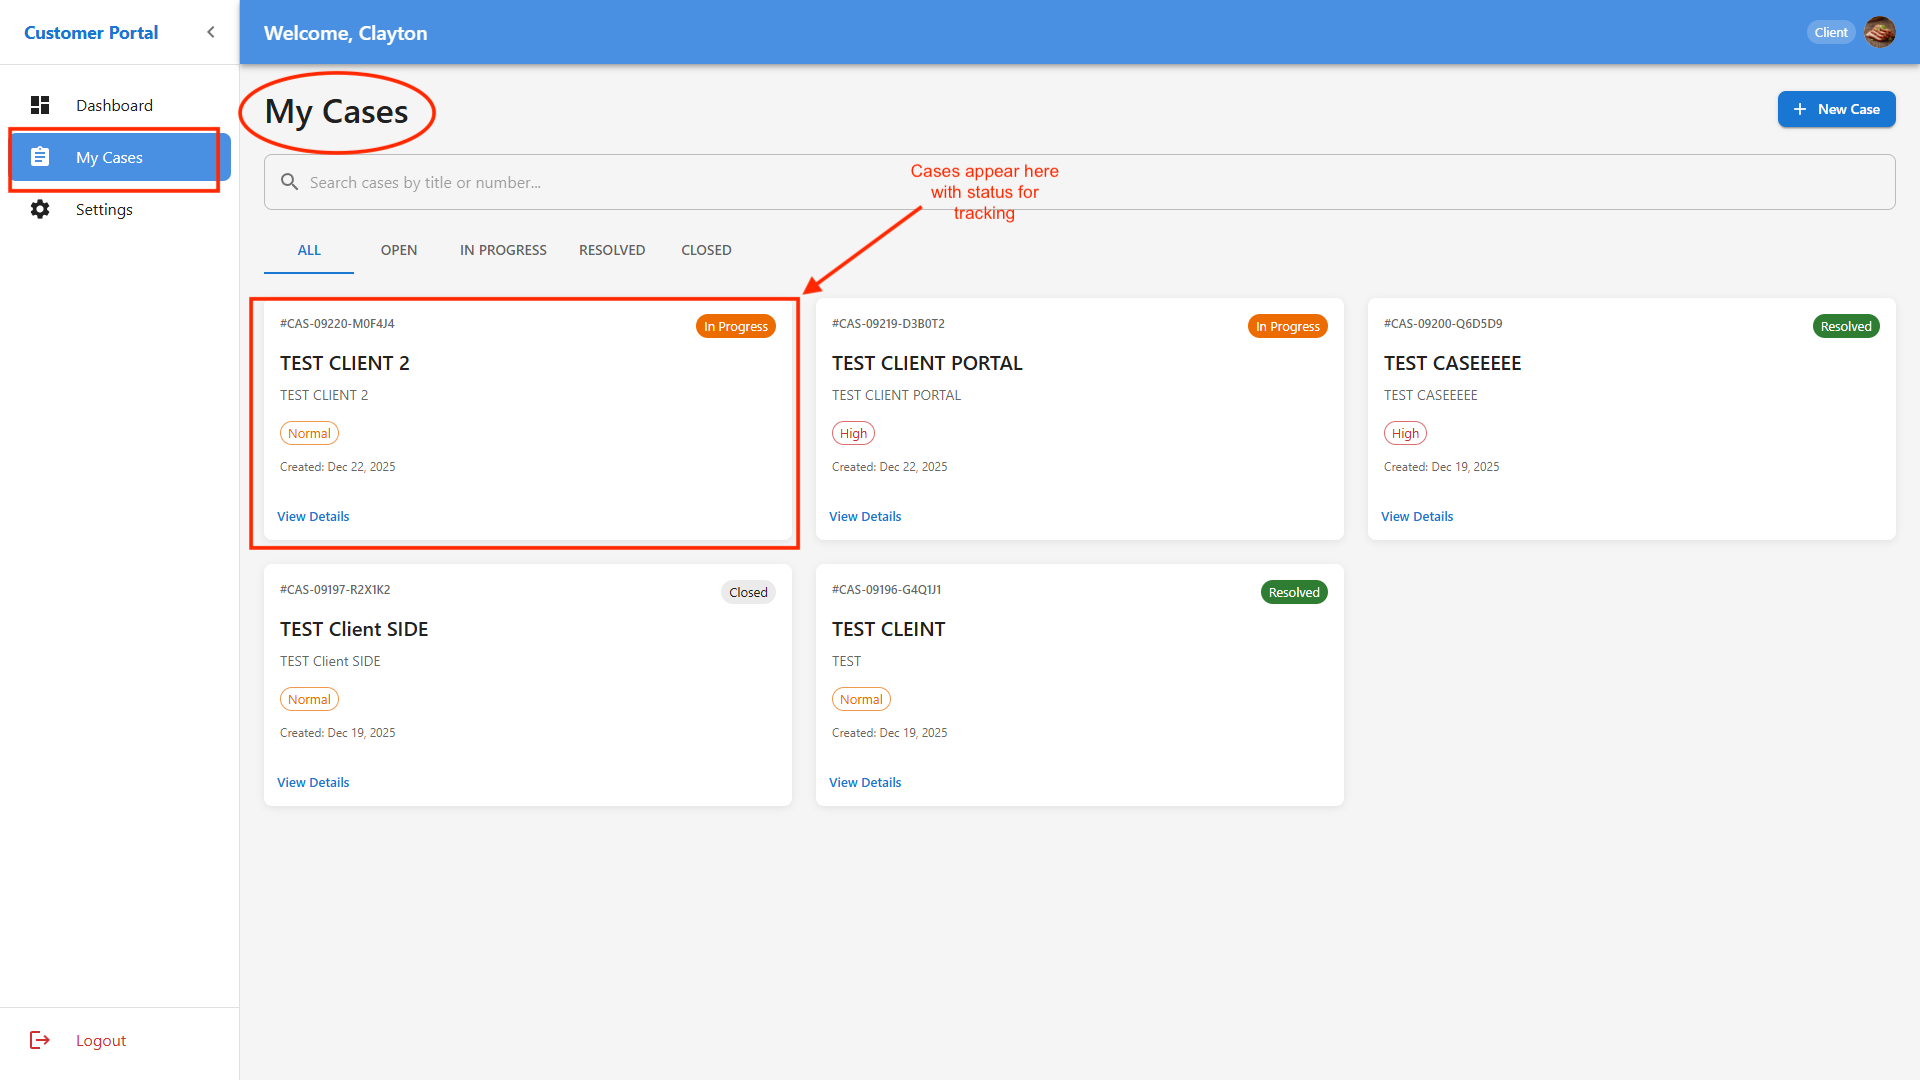
Once you have created cases, you can view and manage them through the My Cases section in your Dashboard.
-
Under My Cases, cases are grouped by status tabs: Open, In Progress, and Resolved.
-
Click the relevant tab to filter cases by their current status.
-
To view detailed information, click on a case summary. This opens the full case record, including all activity, correspondence, and attachments.
Case Details
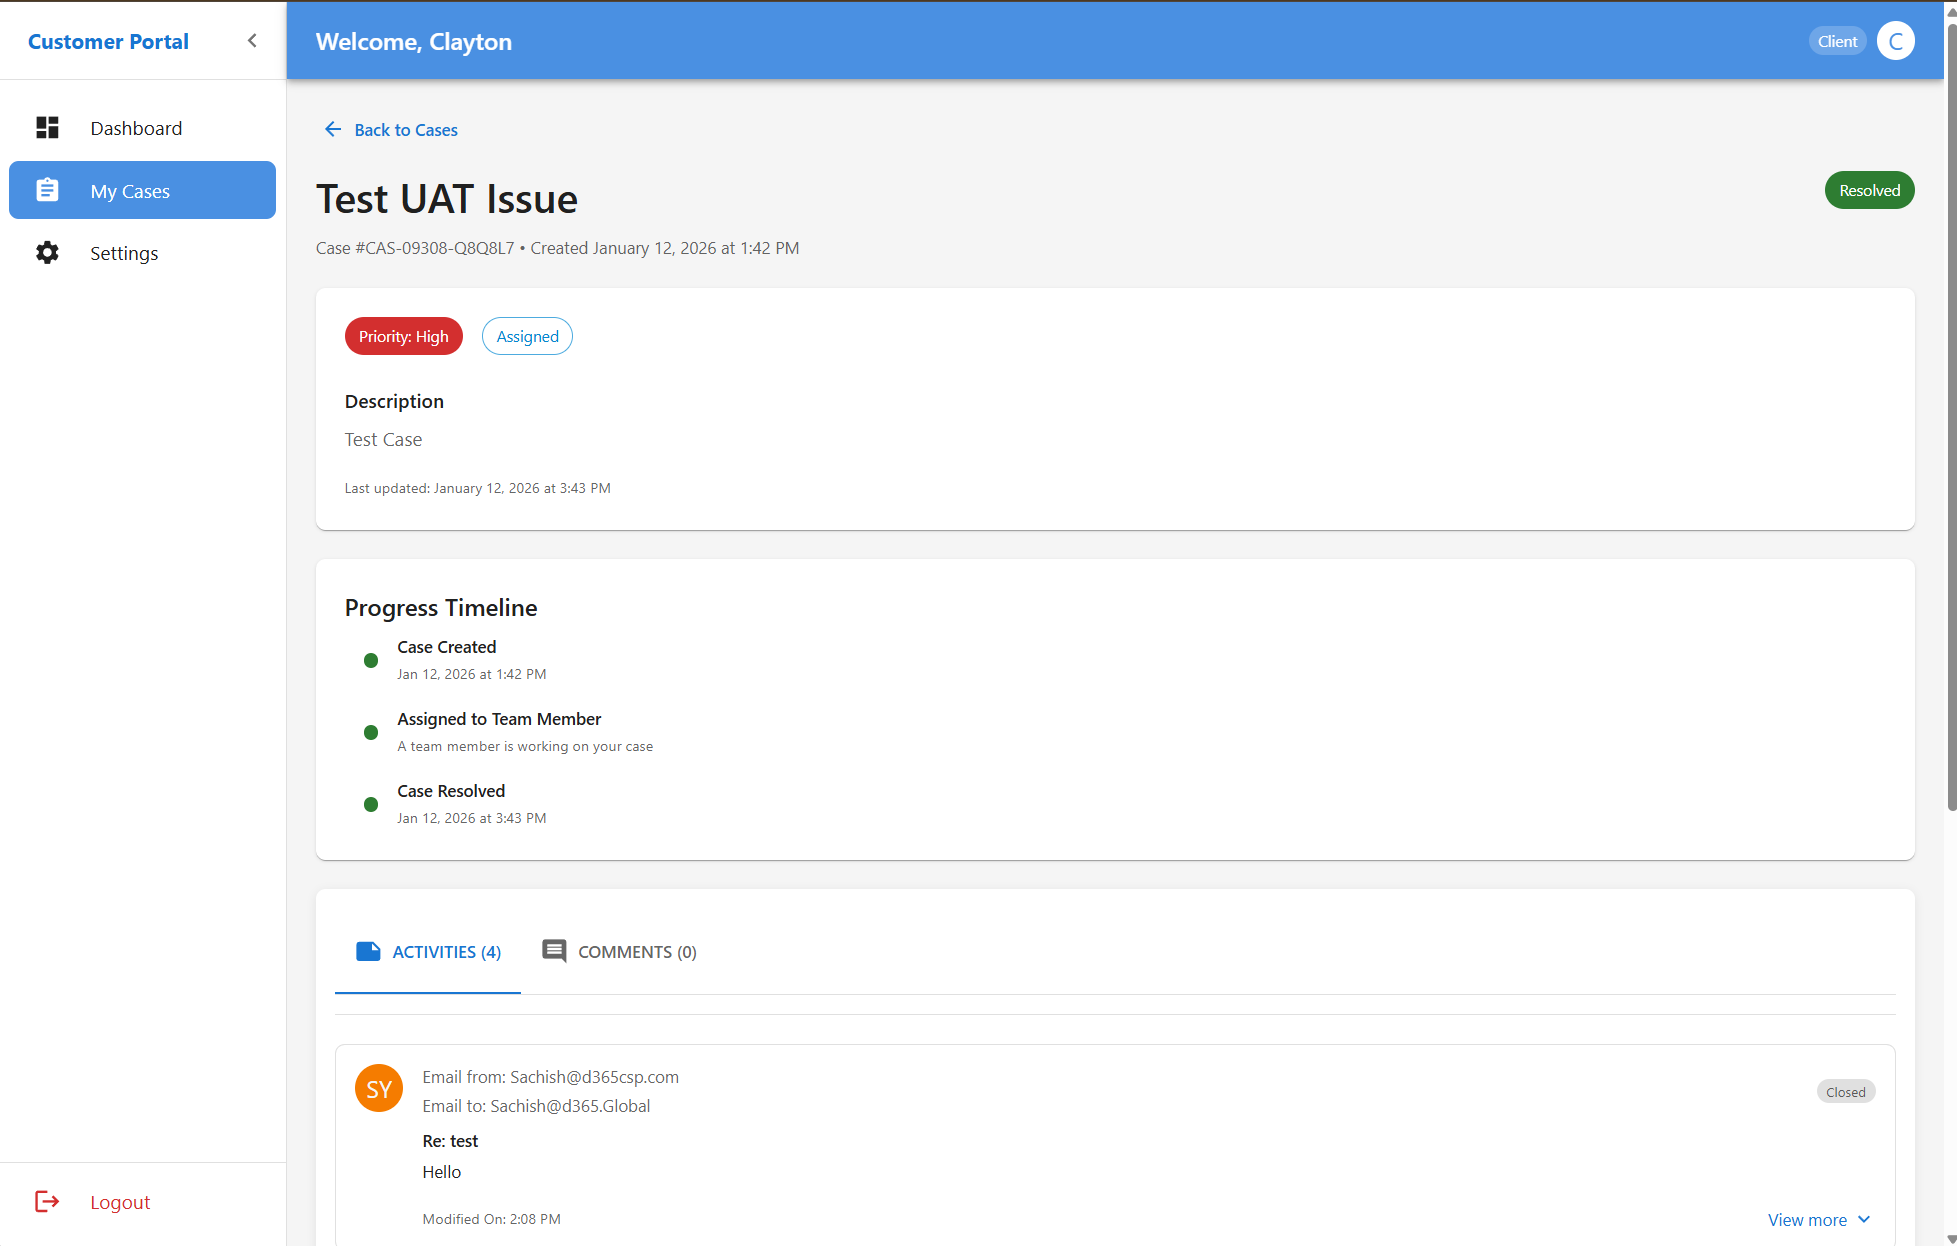
Clicking on a case opens the detailed case view.
Here you can:
- Review the full case description
- See all email communications
- Track system activities and updates
- View attachments added by you or the support team
All activity is shown in chronological order for full transparency.
Settings
The Settings area allows you to manage your profile and security information.
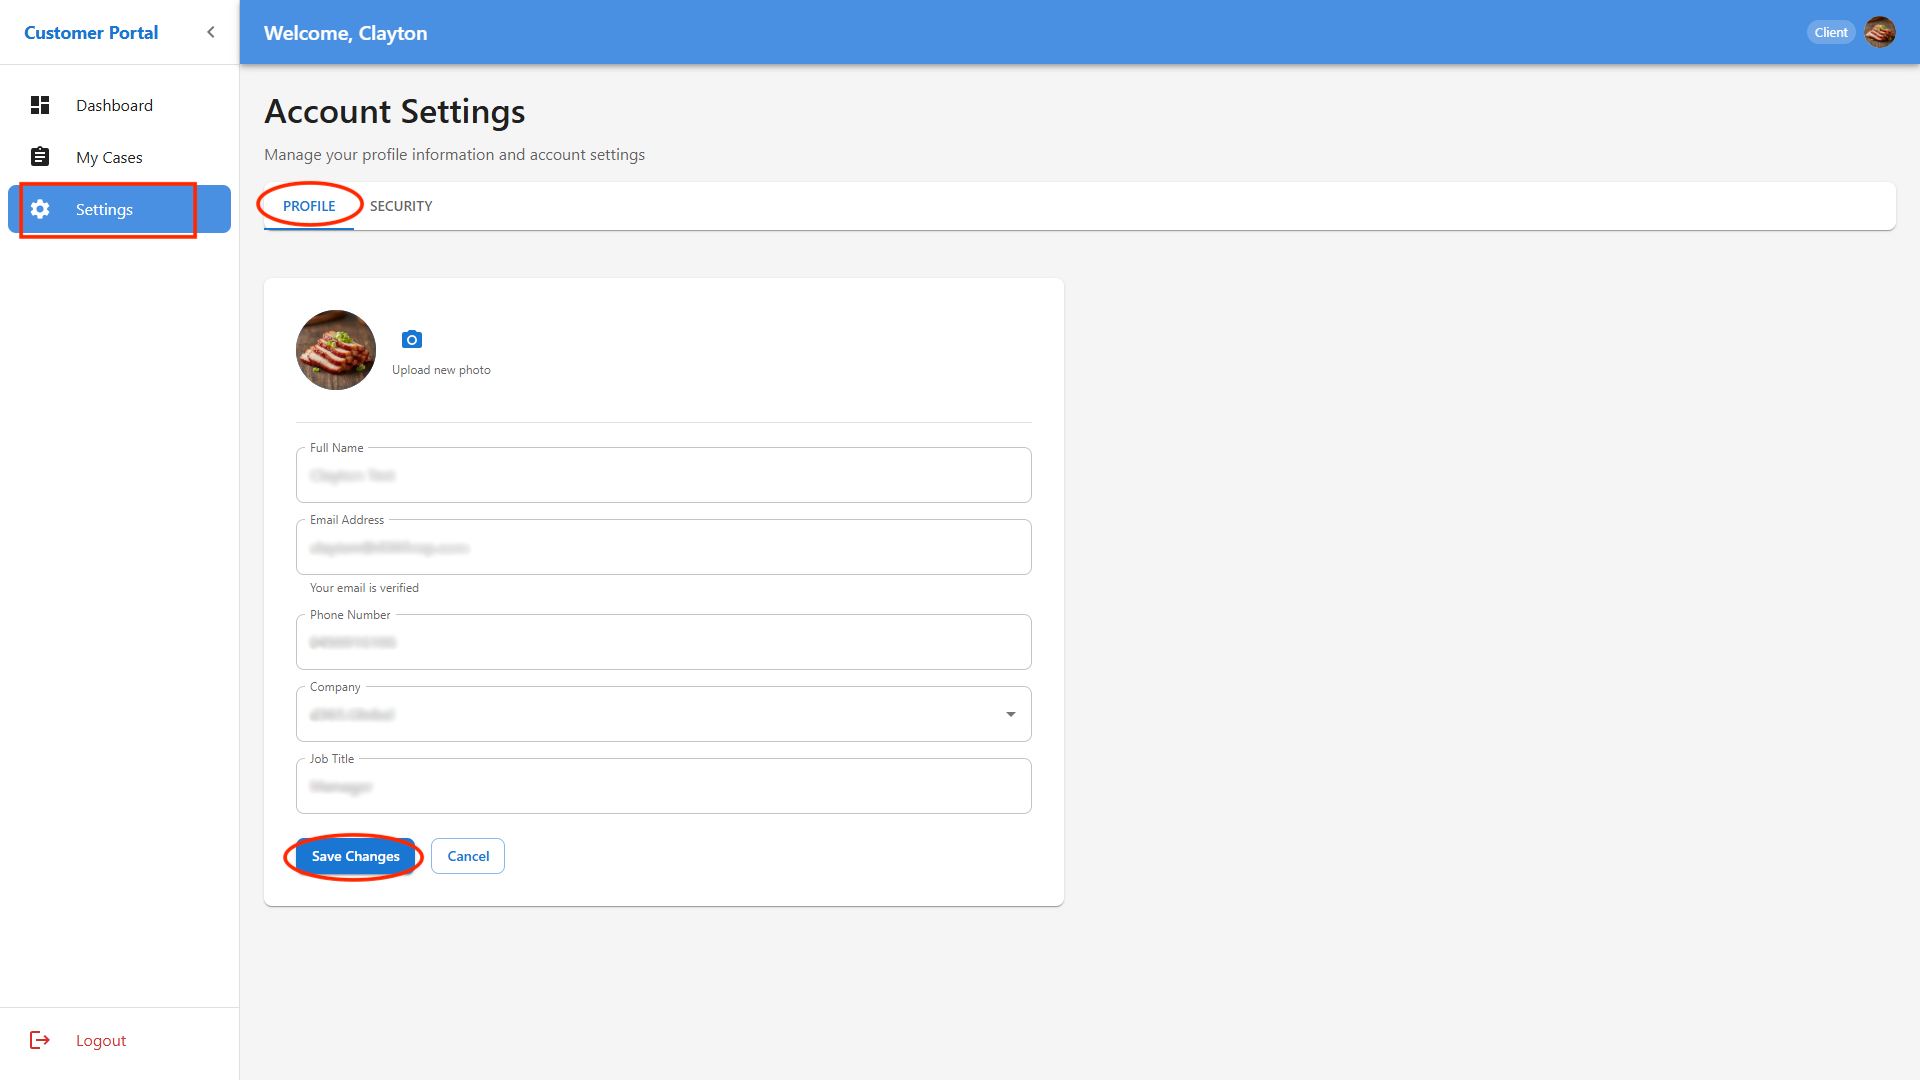
Managing Your Profile and Security
-
Click on Settings from the main navigation menu or use the Quick Actions shortcut.
-
Here you can update your profile details, such as name, contact information, and email address.
-
To change your password or update security options, go to the Security tab within Settings (if available).
-
Always save your changes before leaving the page.
Troubleshooting
If you encounter issues while trying to login to the portal, try the following steps:
- Go to the login page: https://support.d365.global/login
- Click Forgot Password.
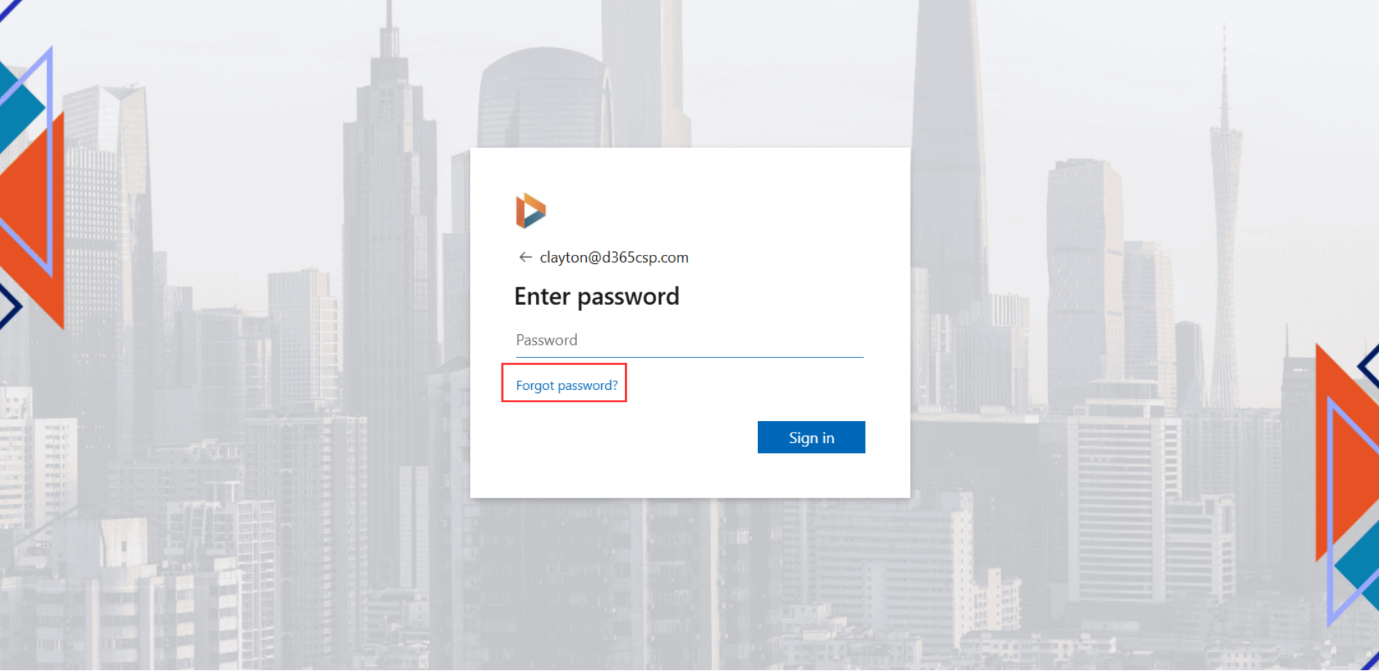
- Enter your registered email address.
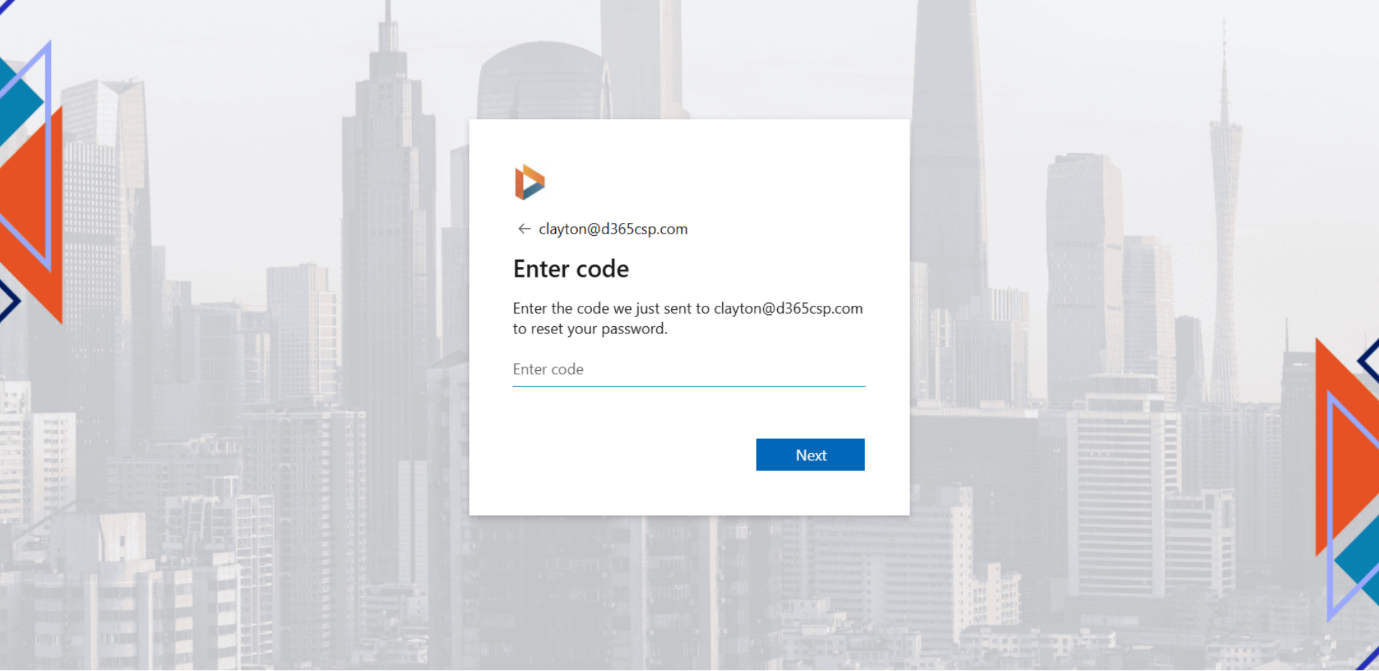
- Check your email for the password reset link.
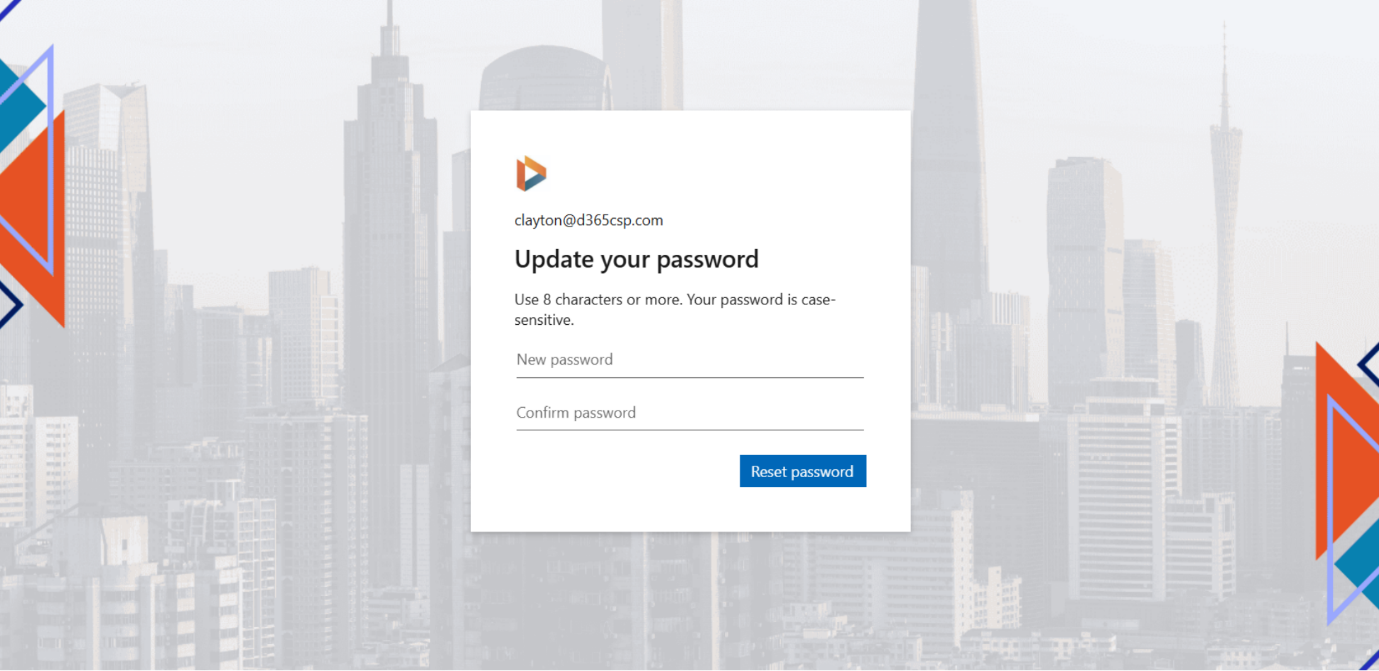
- Click the link and follow the instructions to set a new password. You will be required to enter a code sent to your email.
If you do not receive the email:
- Check your spam or junk folder.
- Ensure you entered the correct email address.
- Wait a few minutes and try again.
Support and Resources
If you need help using the portal, look for the Help or Support links in the main menu or Learn d365 Portal . These may include FAQs, user manuals, and contact details support@d365.global. For urgent issues, you can also use the portal’s messaging or chat feature to contact support directly.
By following this guide, you should be able to confidently manage your support cases and profile information using the Dynamics 365 Customer Self-Service Portal.