Power Platform Configuration
From your web browser, go to https://make.powerapps.com/ .
Sign In to Power Platform
Sign in using the account you created earlier.
-
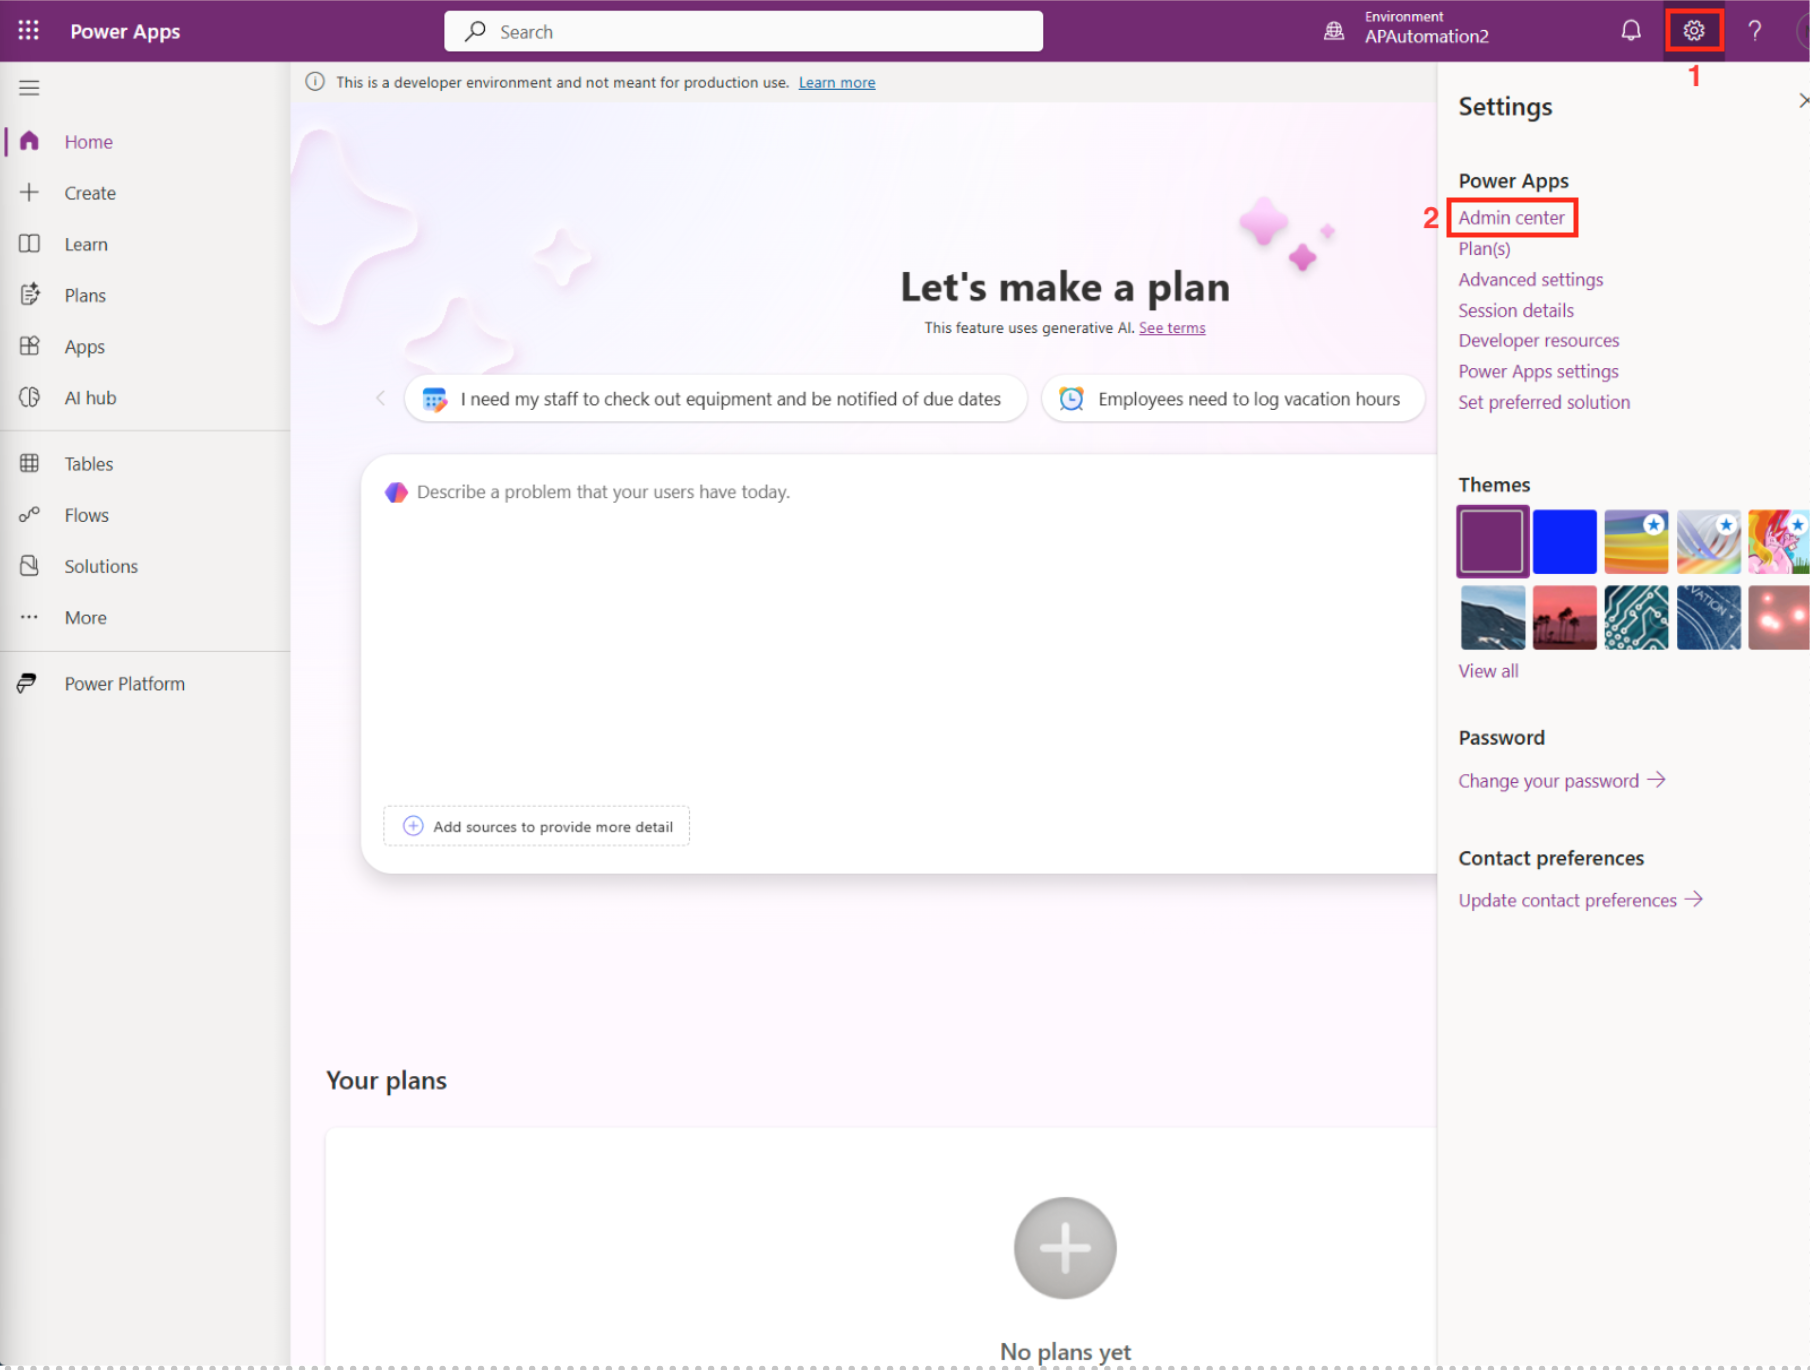
Go to the Settings, by clicking the gear icon near the top right corner of your screen.
-
Select the Admin center.
In the next part, we will create a new environment.
Create a New Environment
-
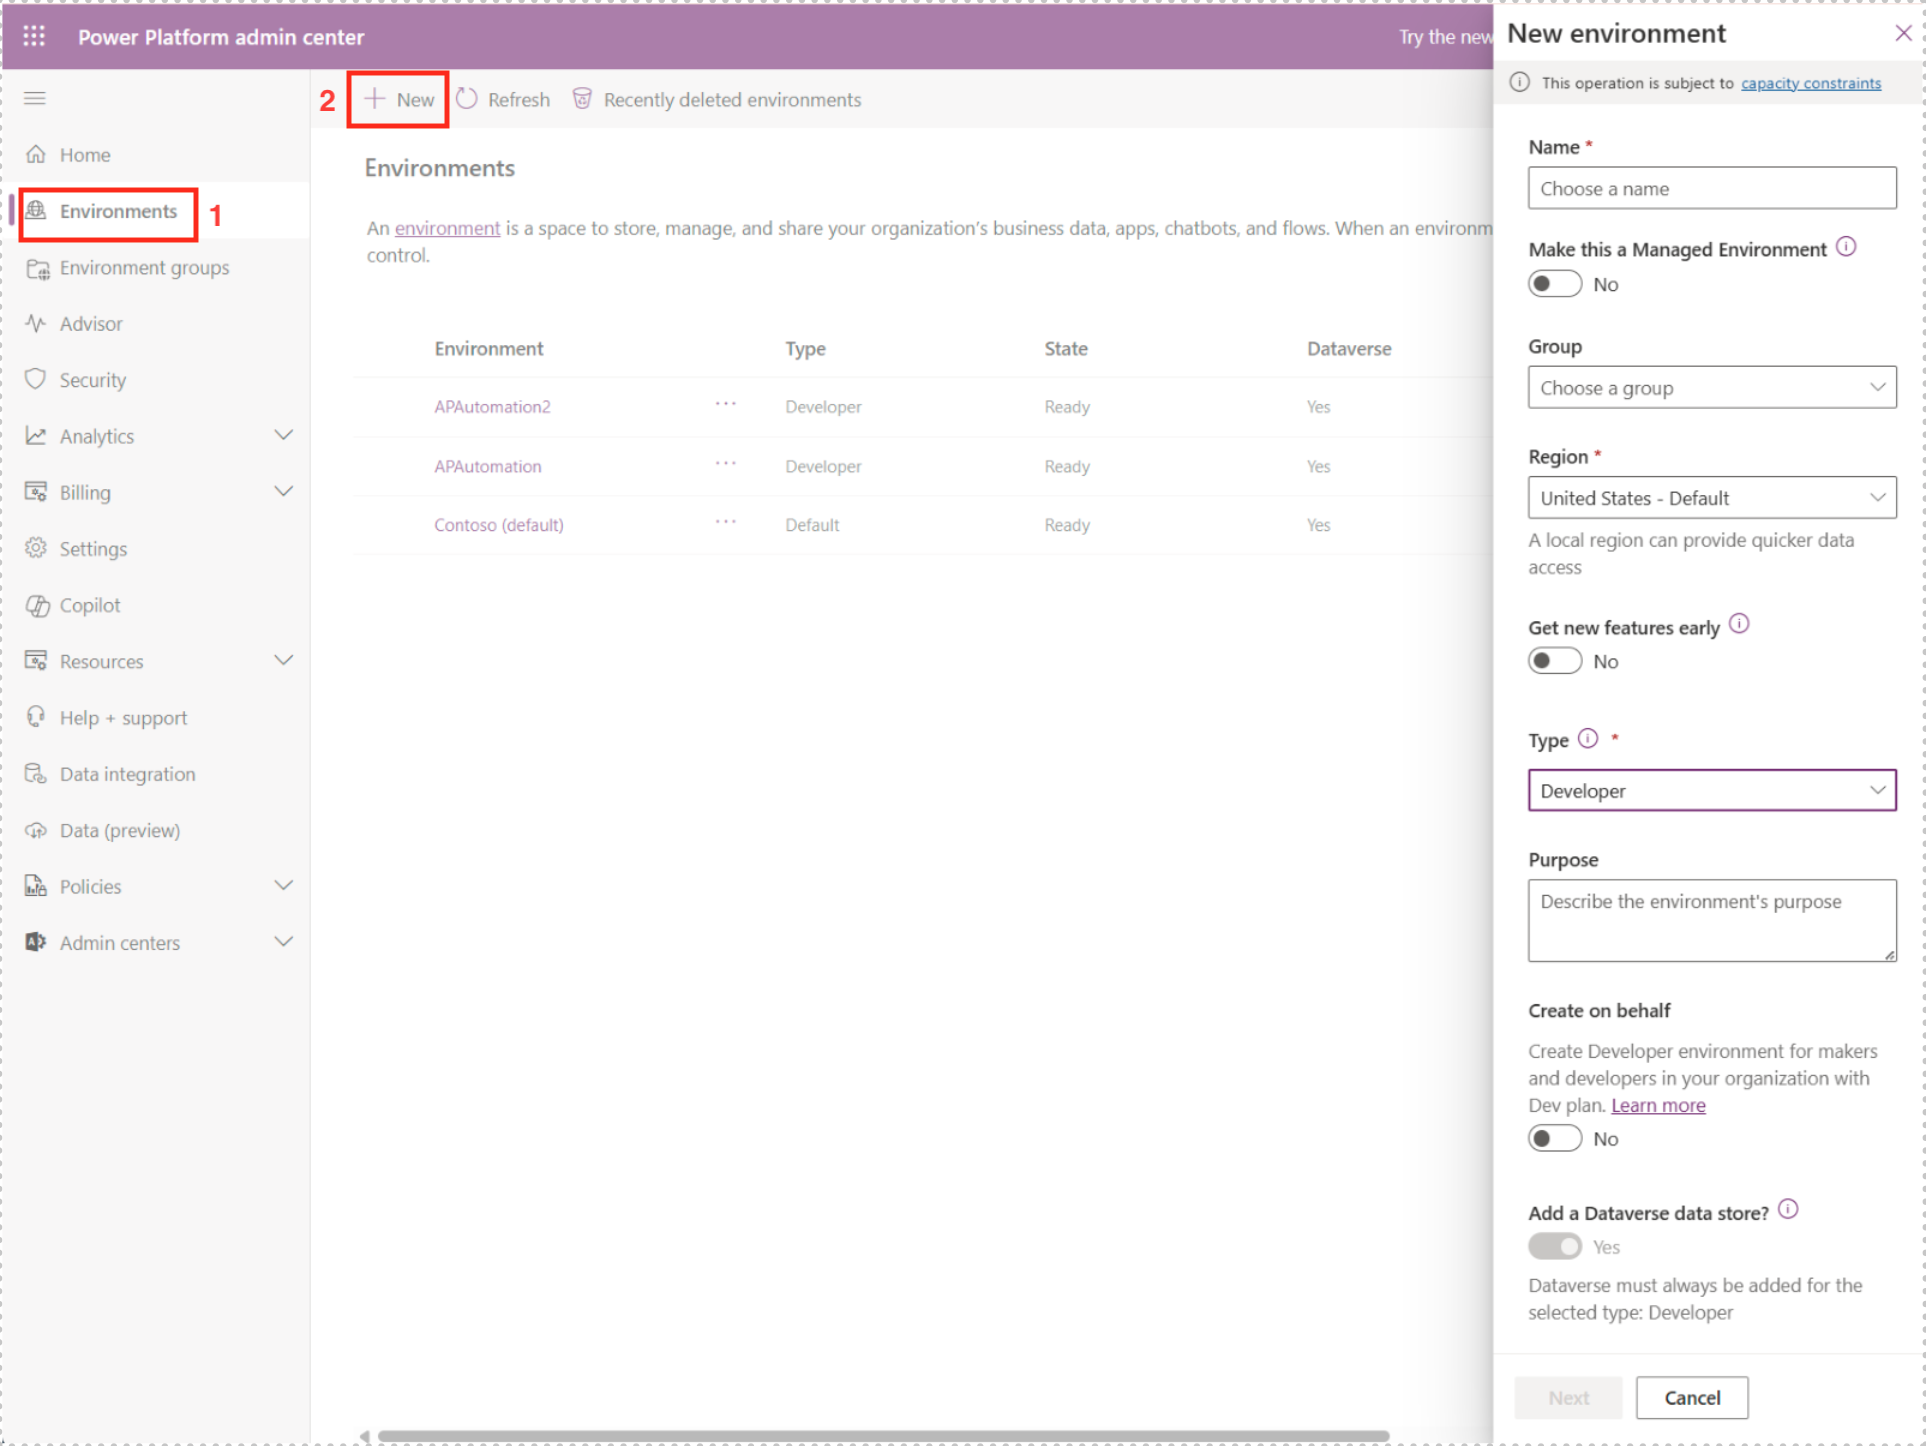
In the Admin center, go to Environments in the Home main menu.
-
Click New to create a new environment.
Choose a Name that is appropriate for your project.
Select a Region that is nearest to your location.
Select Developer under Type.
For Add a Dataverse data store select Yes. Click Next to continue.
Wait until the state is ready.
Add a User to the Environment
-
When it is ready click on the new environment you created.
-
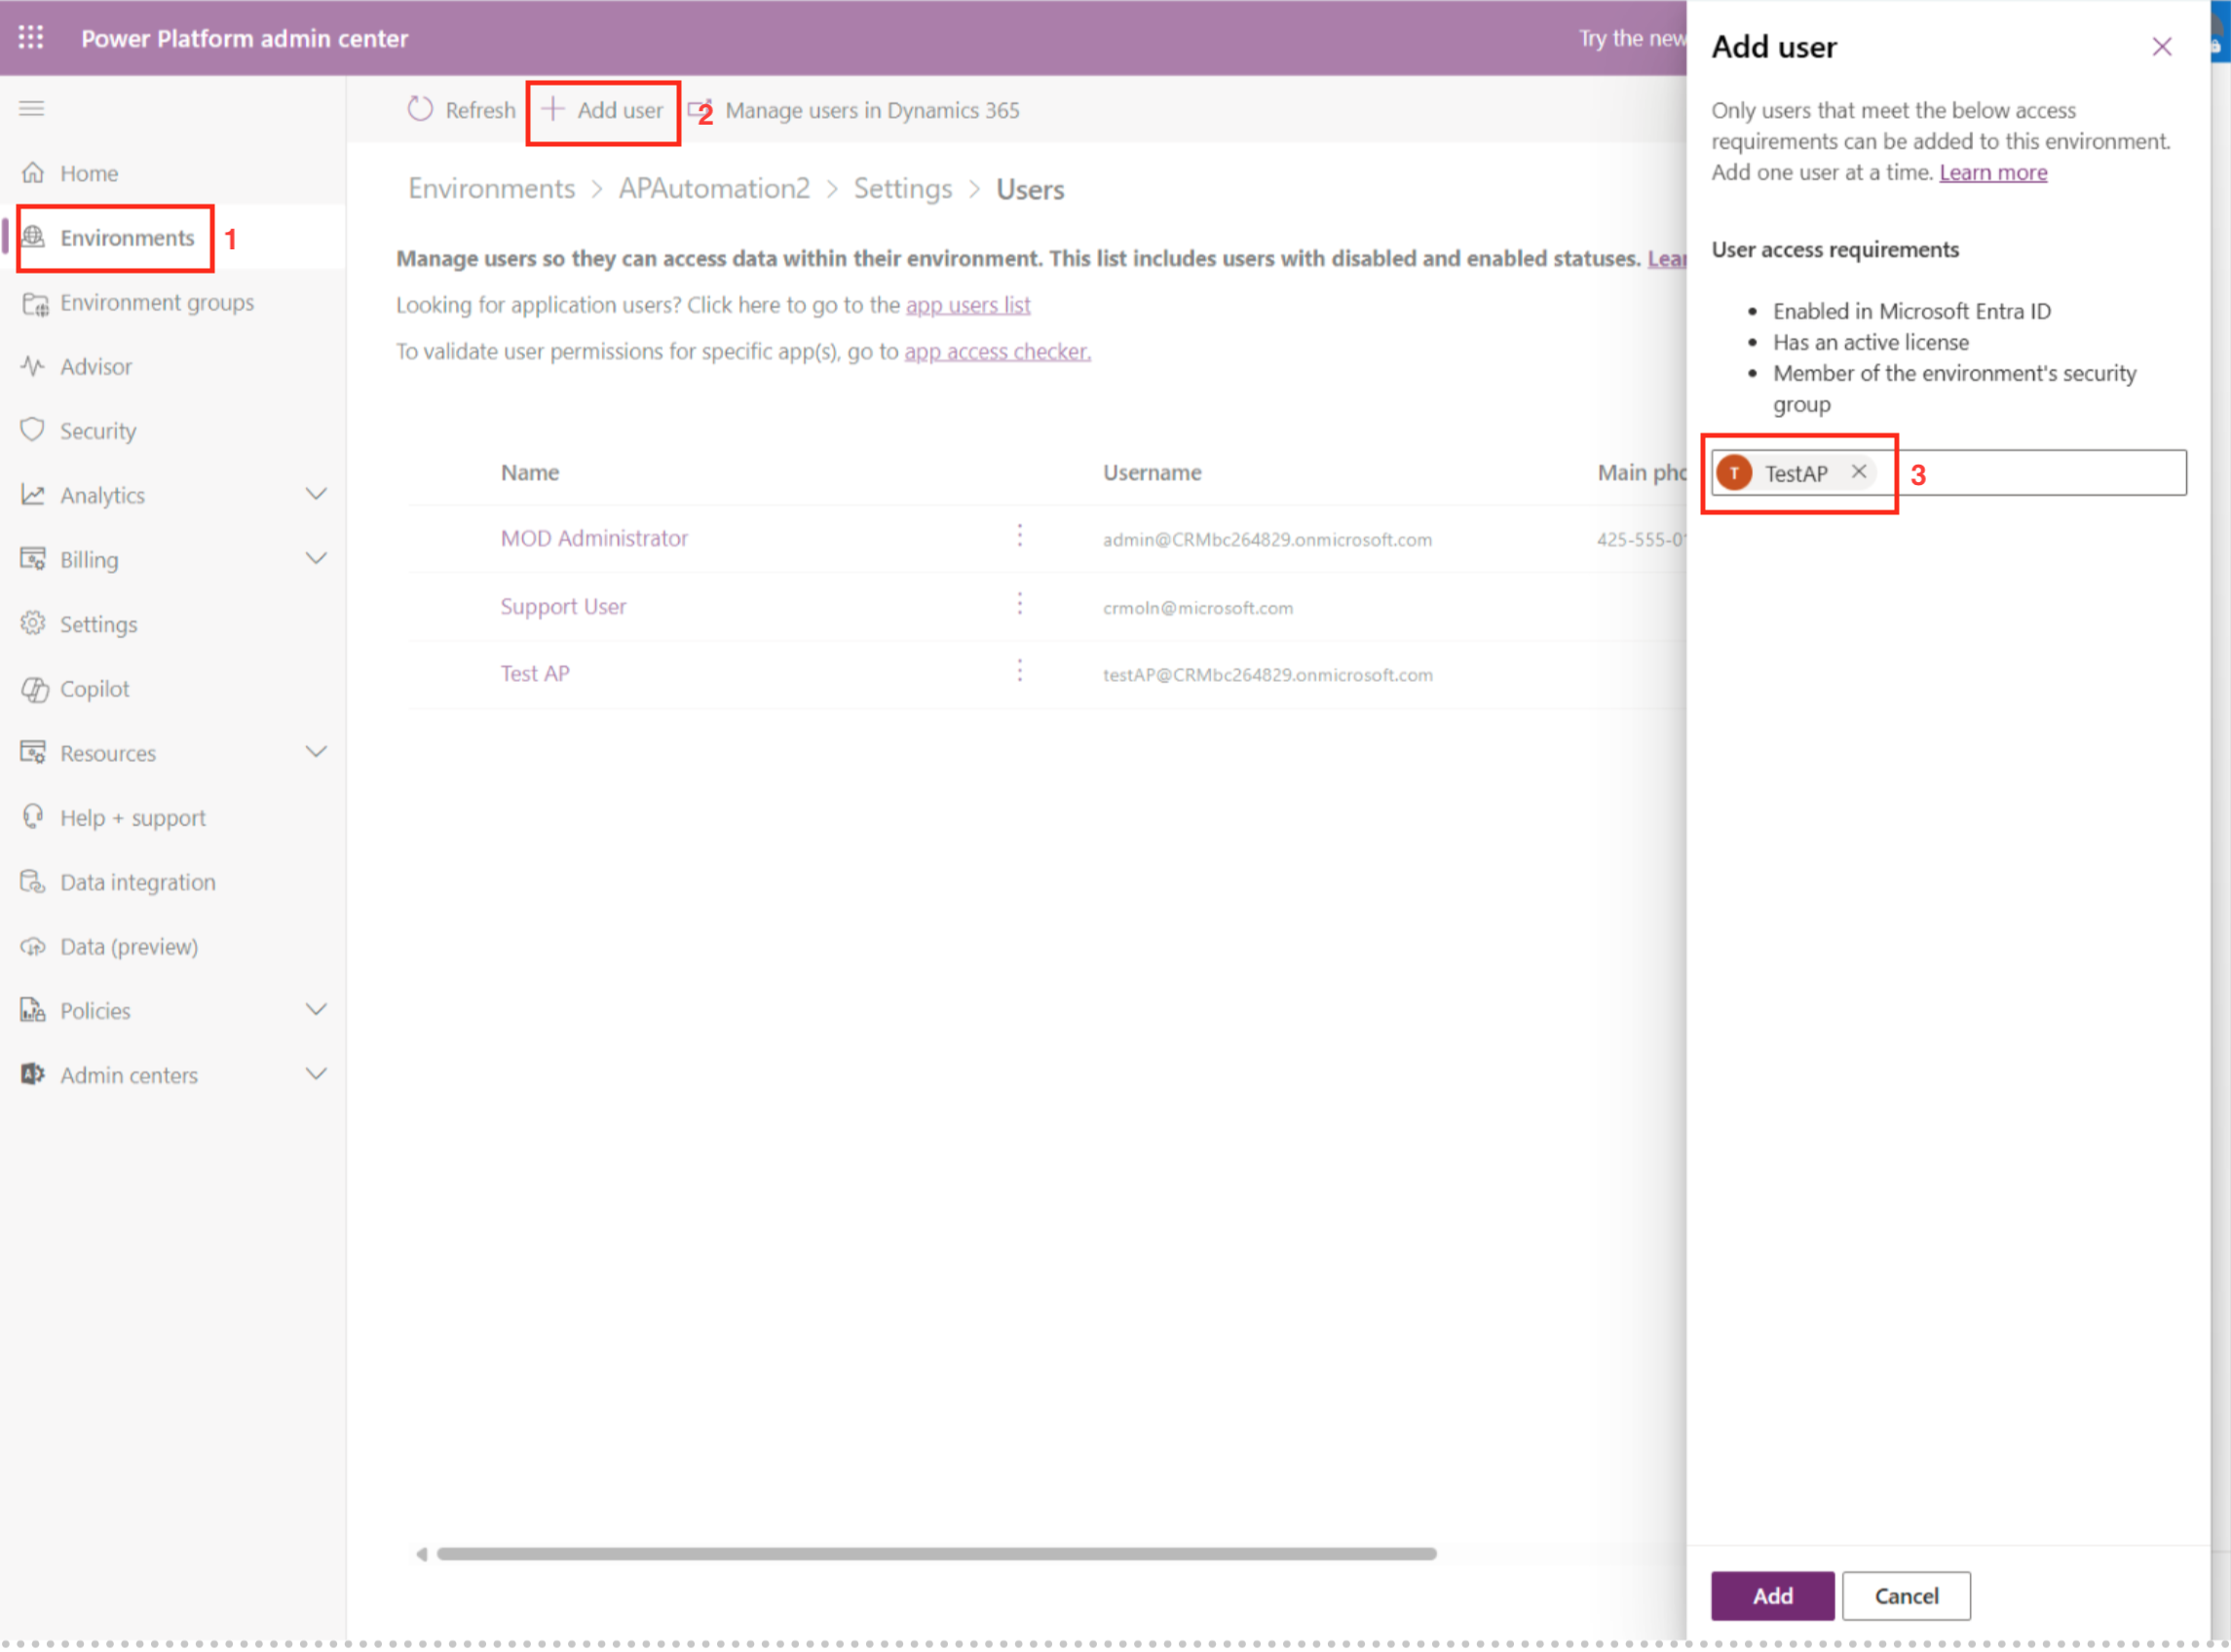
Select Settings > Users and click Add user.
-
Add the user you created previously. Check the access requirements for the user you added.
Click the Add button from the Add user form to proceed.
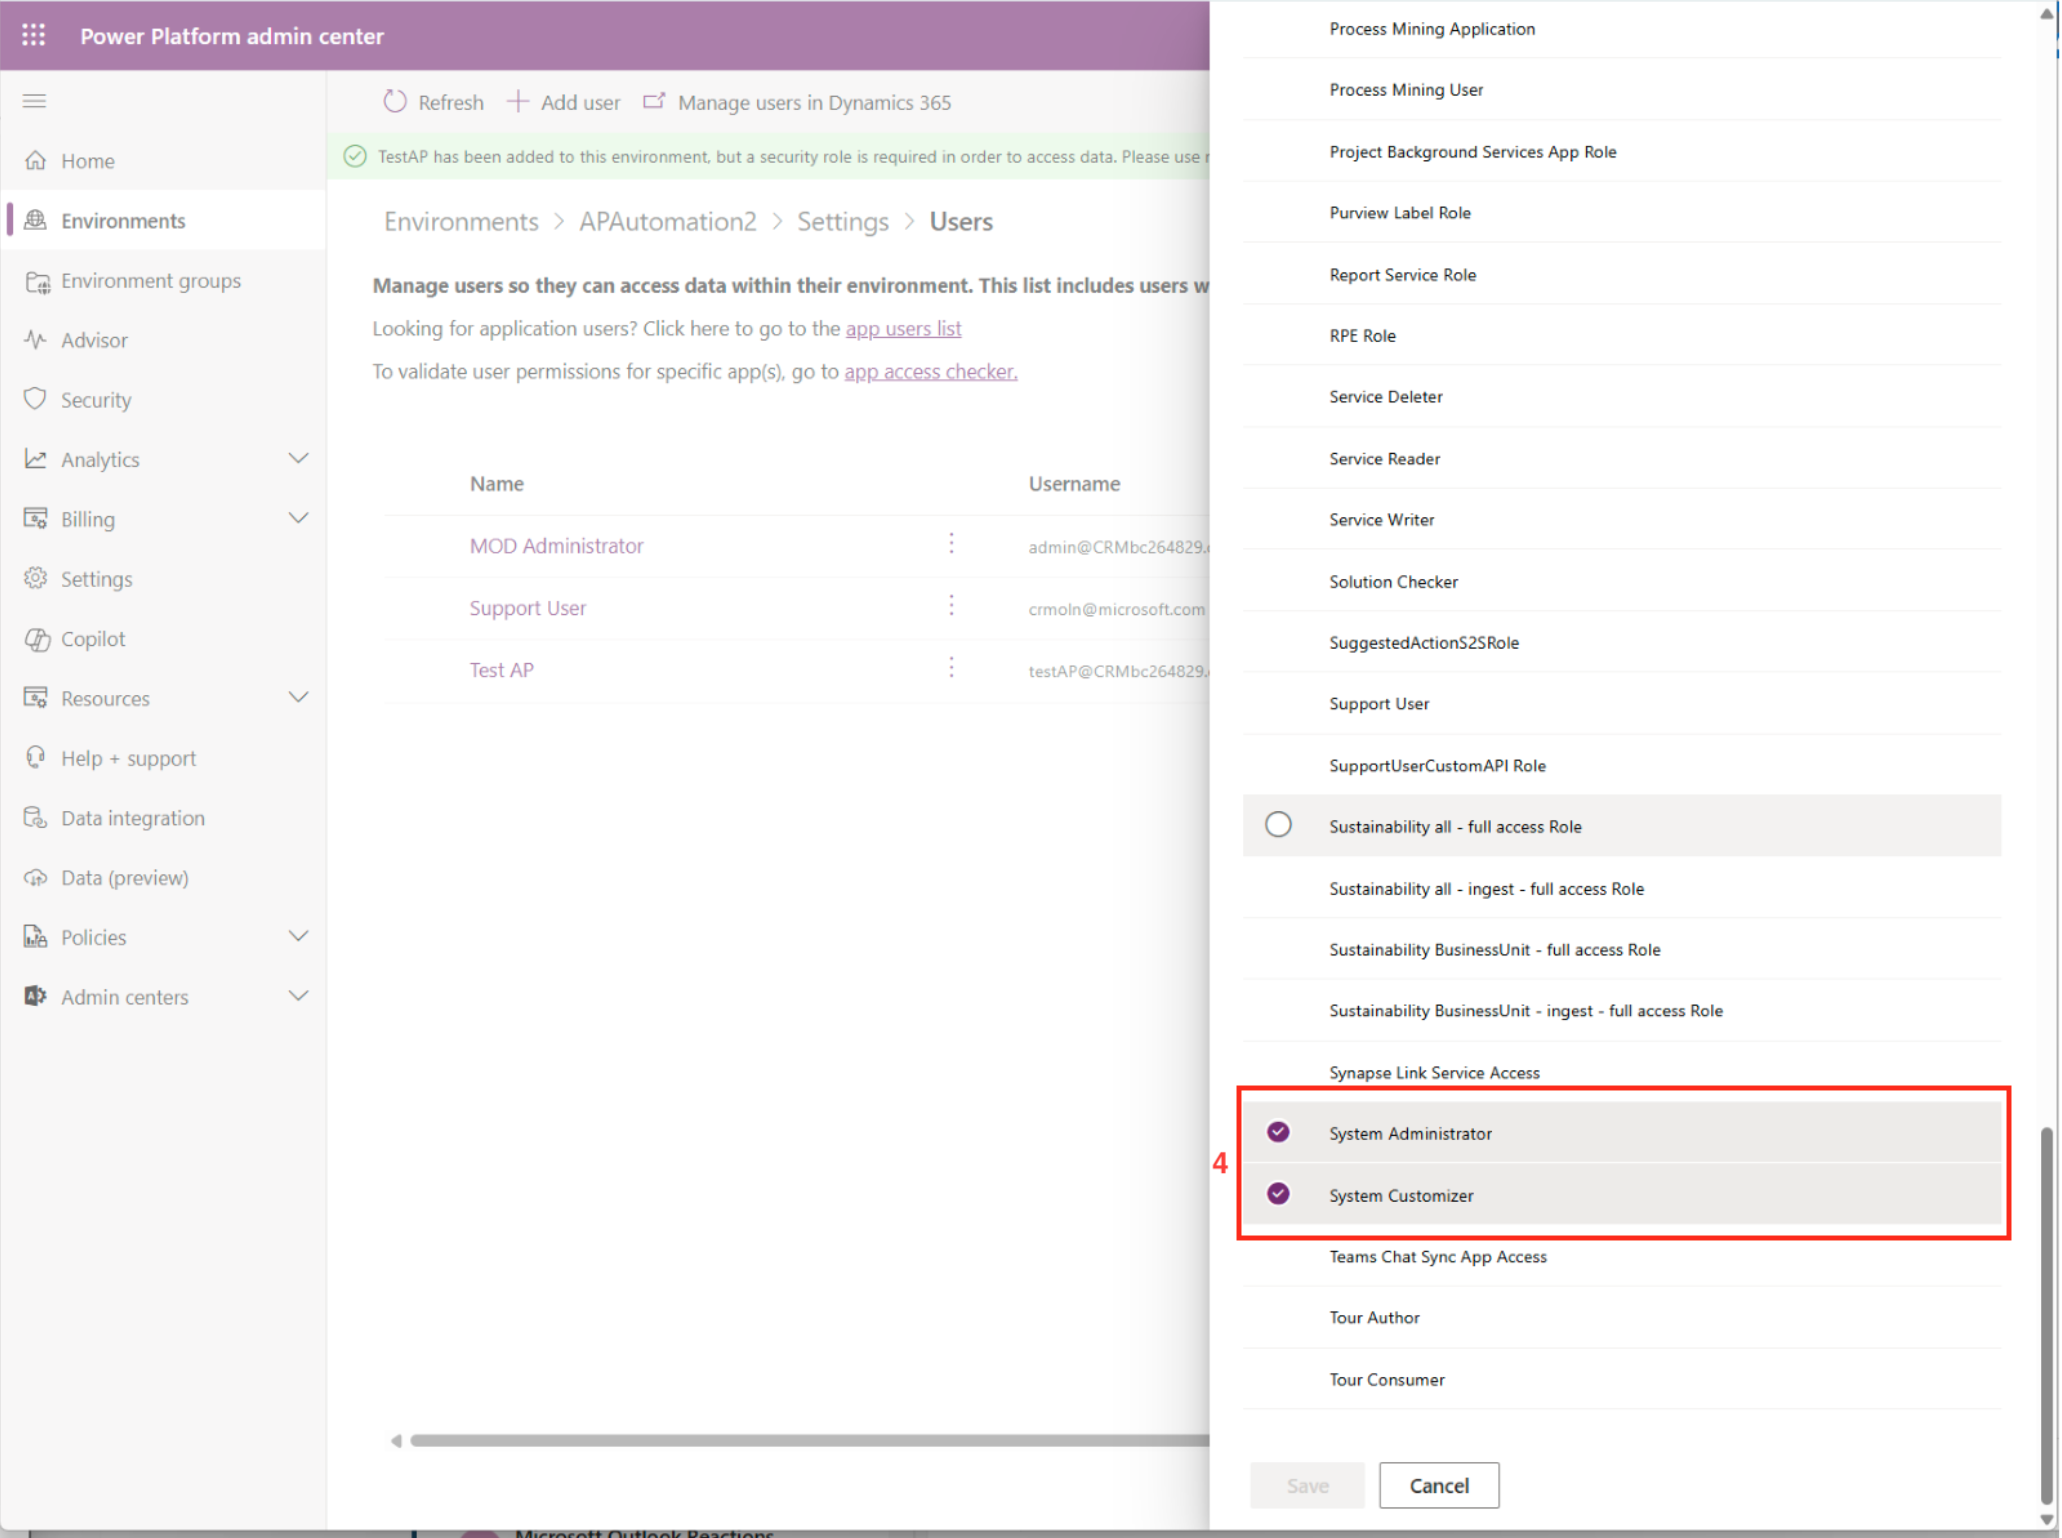
- Give the System Administrator and System Customizer Role rights to the user. Once you have made changes, the Save button will be enabled. Click the Save button to save your configuration.
Configuring Client ID Permission
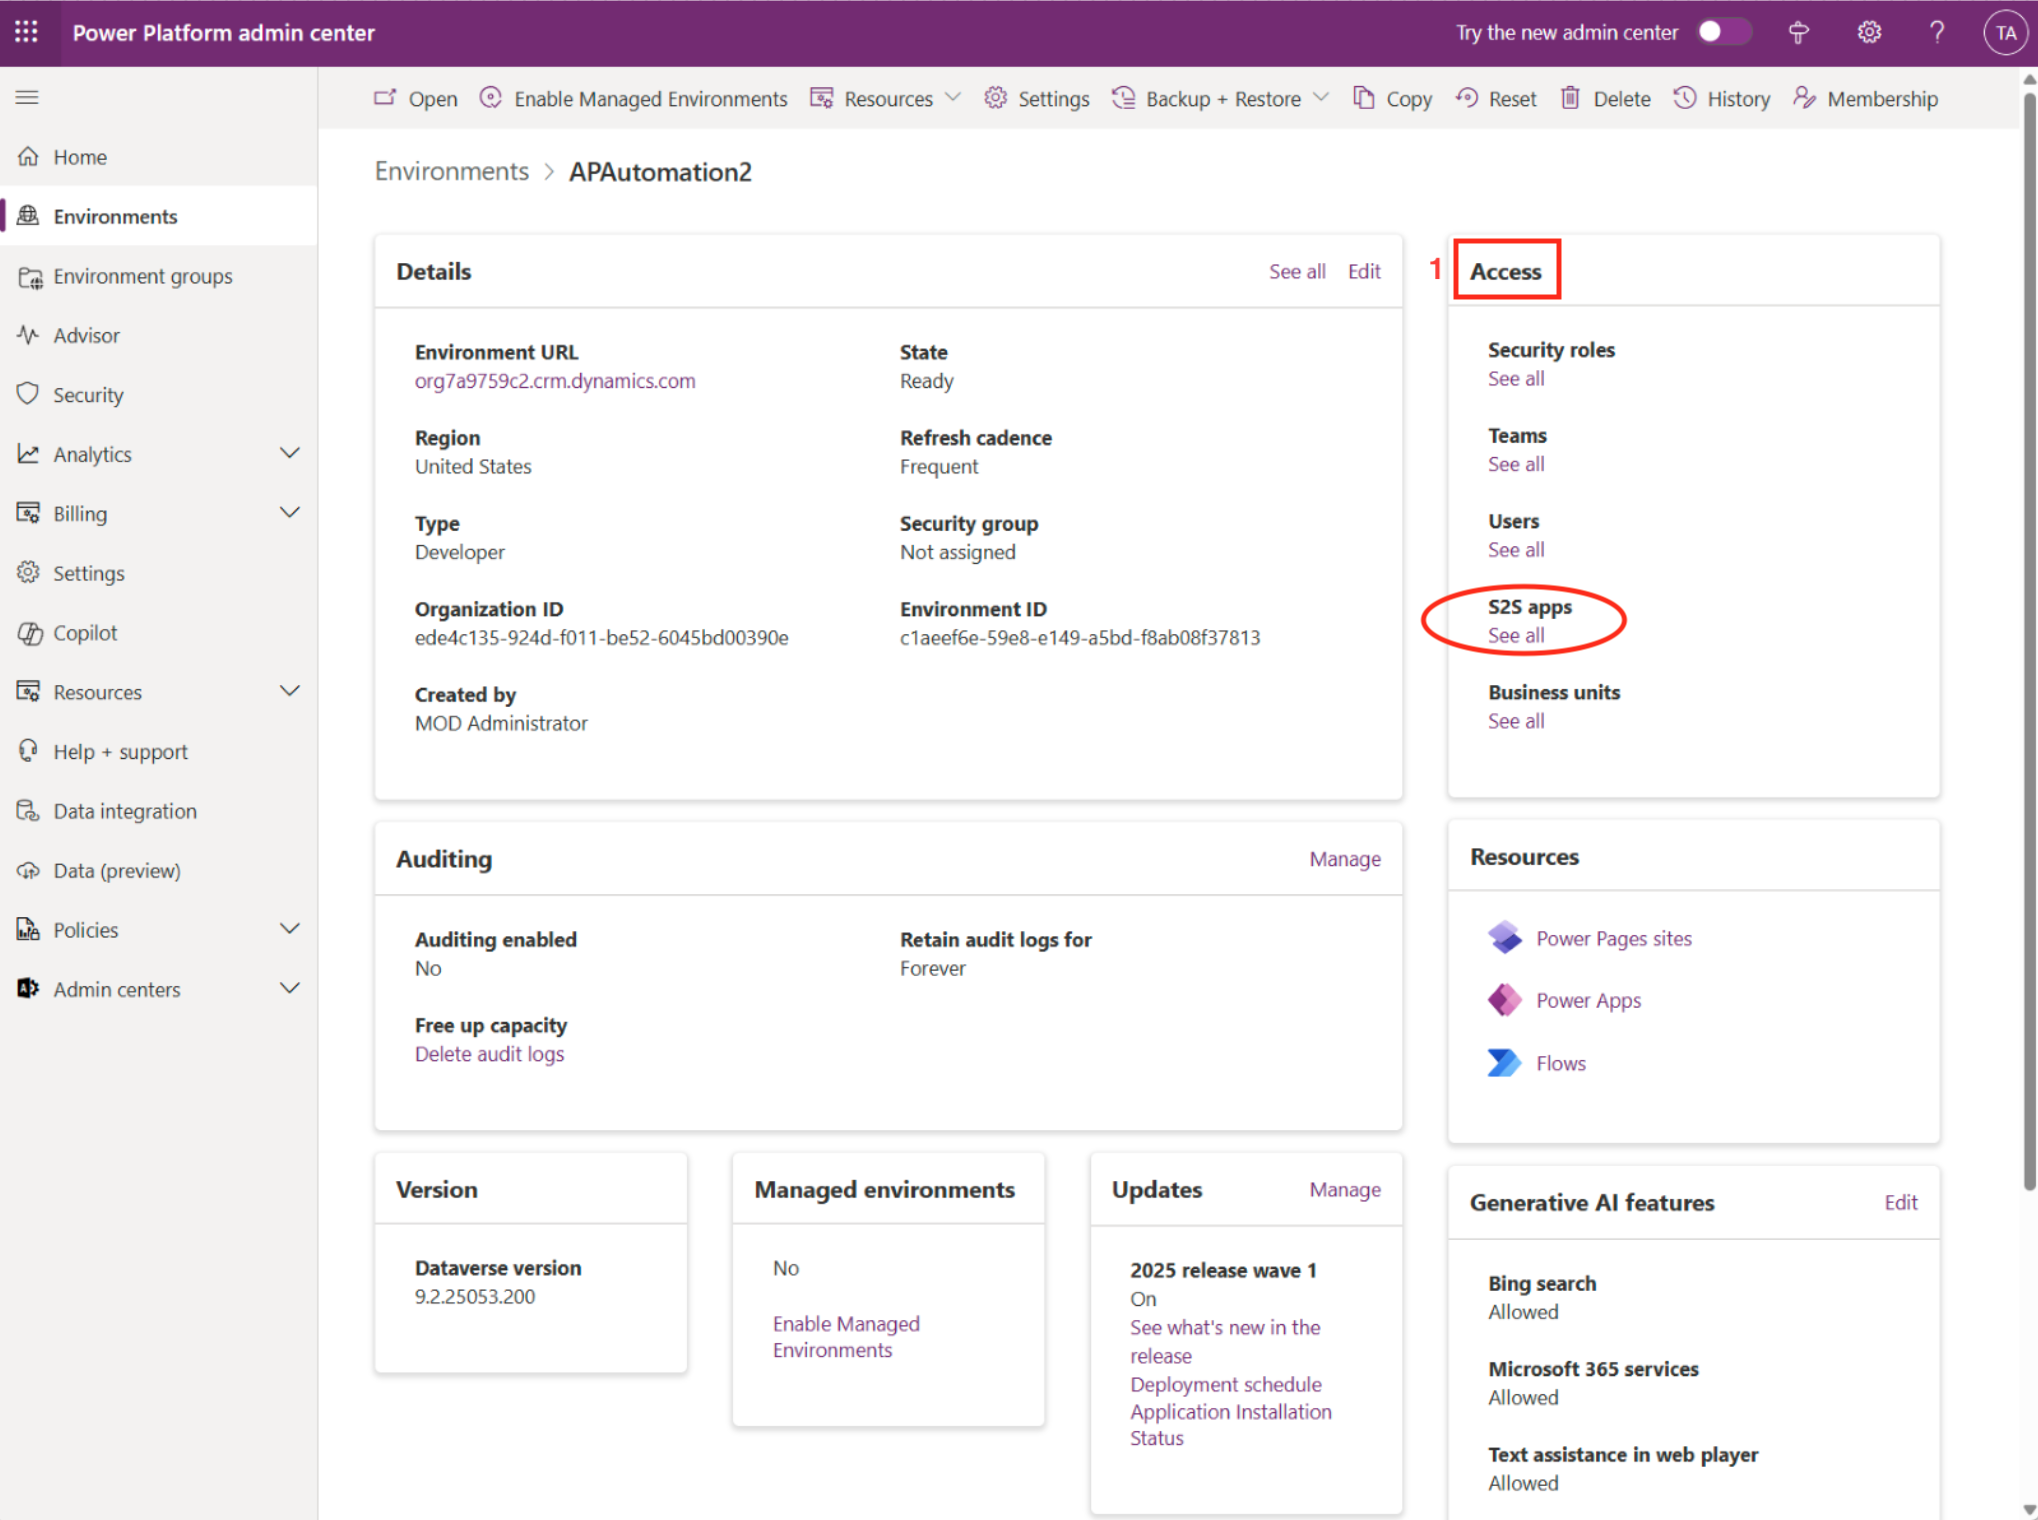
We will now configure the Client ID permission in Power Platform.
- In the Access section, in the S2S apps tab, click See all.
-
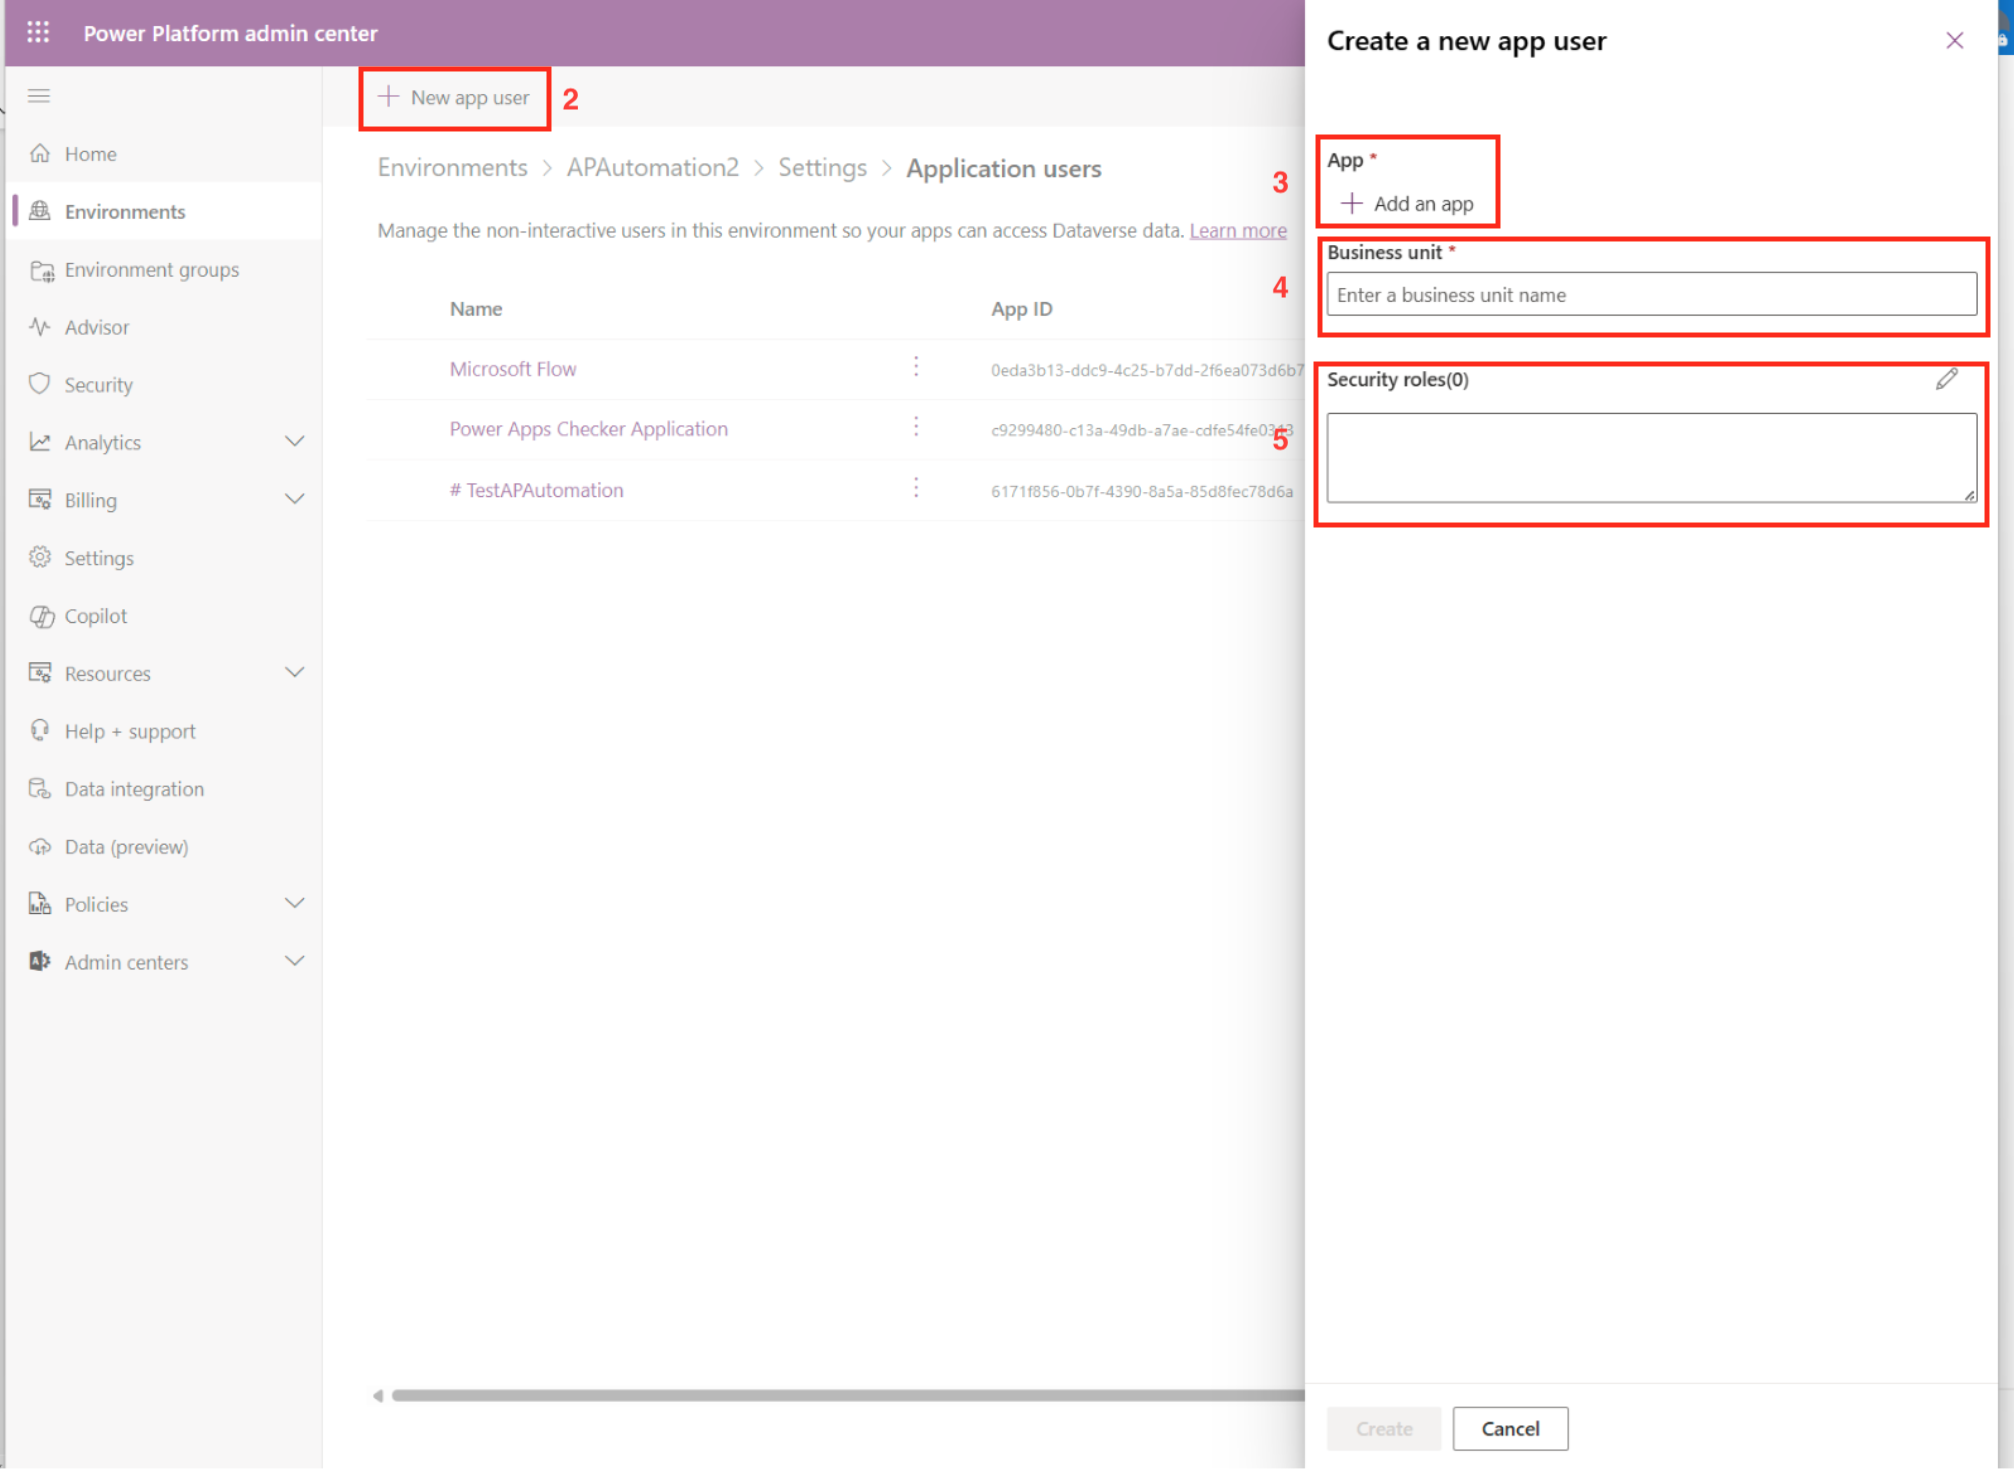
Click to create New app user.
-
Select Add an app and enter the Client ID you previously created.
-
In Business unit, enter the name of the environment business unit.
-
In Security roles, give new app user the System Administrator and System Customizer role.
Click the Create button to save configuration (or Cancel to discontinue creation of new app user).
Import Power Platform Solution
Next, we will import the Power Platform Solution.
-
From the Home main menu, select the Solutions tab.
-
Click on Import solution.
-
First, update the Environment Variables in Import a solution. Fill out the fields.
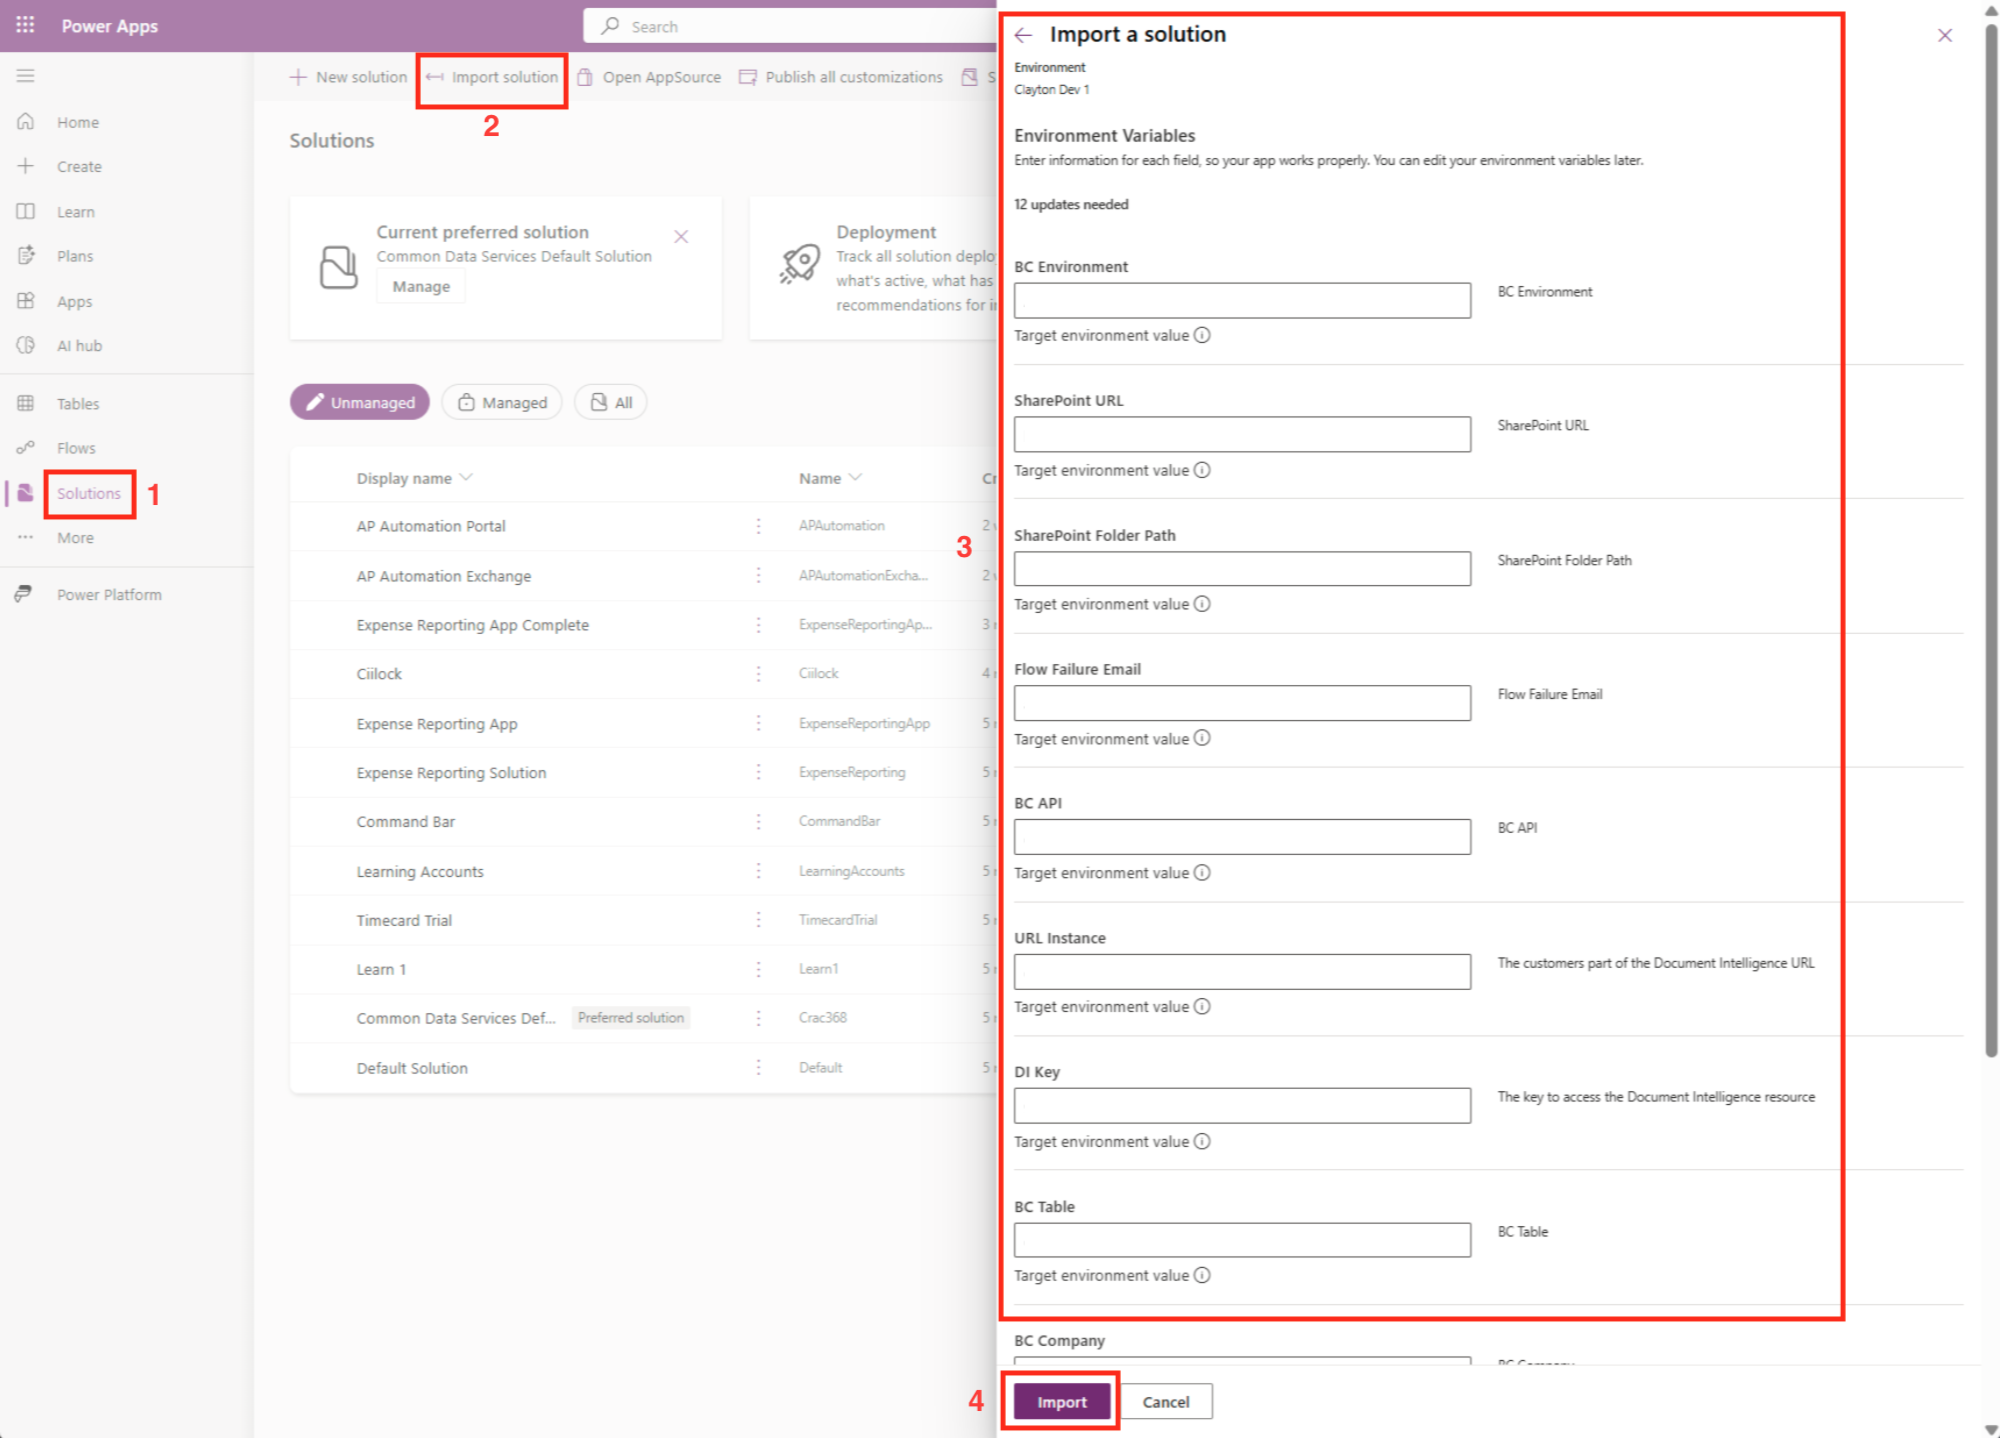
The following are a description of some of the fields:
- DI Key : Ocp-Apim-Subscription-Key (Key 1 or Key 2)
- Email : The email you previously created
- Flow Failure Email : Email address you want to use to receive notification in case of errors or critical issues
- SharePoint Folder Path : The folder you previously created
- SharePoint URL : The SharePoint site URL previously created
- URL instance : The customers part of the Document Intelligence URL
- Click the Import button when finished.
We now go to Cloud flows in the Power Apps > Objects:
- Save the items in the Display name. Do this for each item; there is no one setting that saves them together.
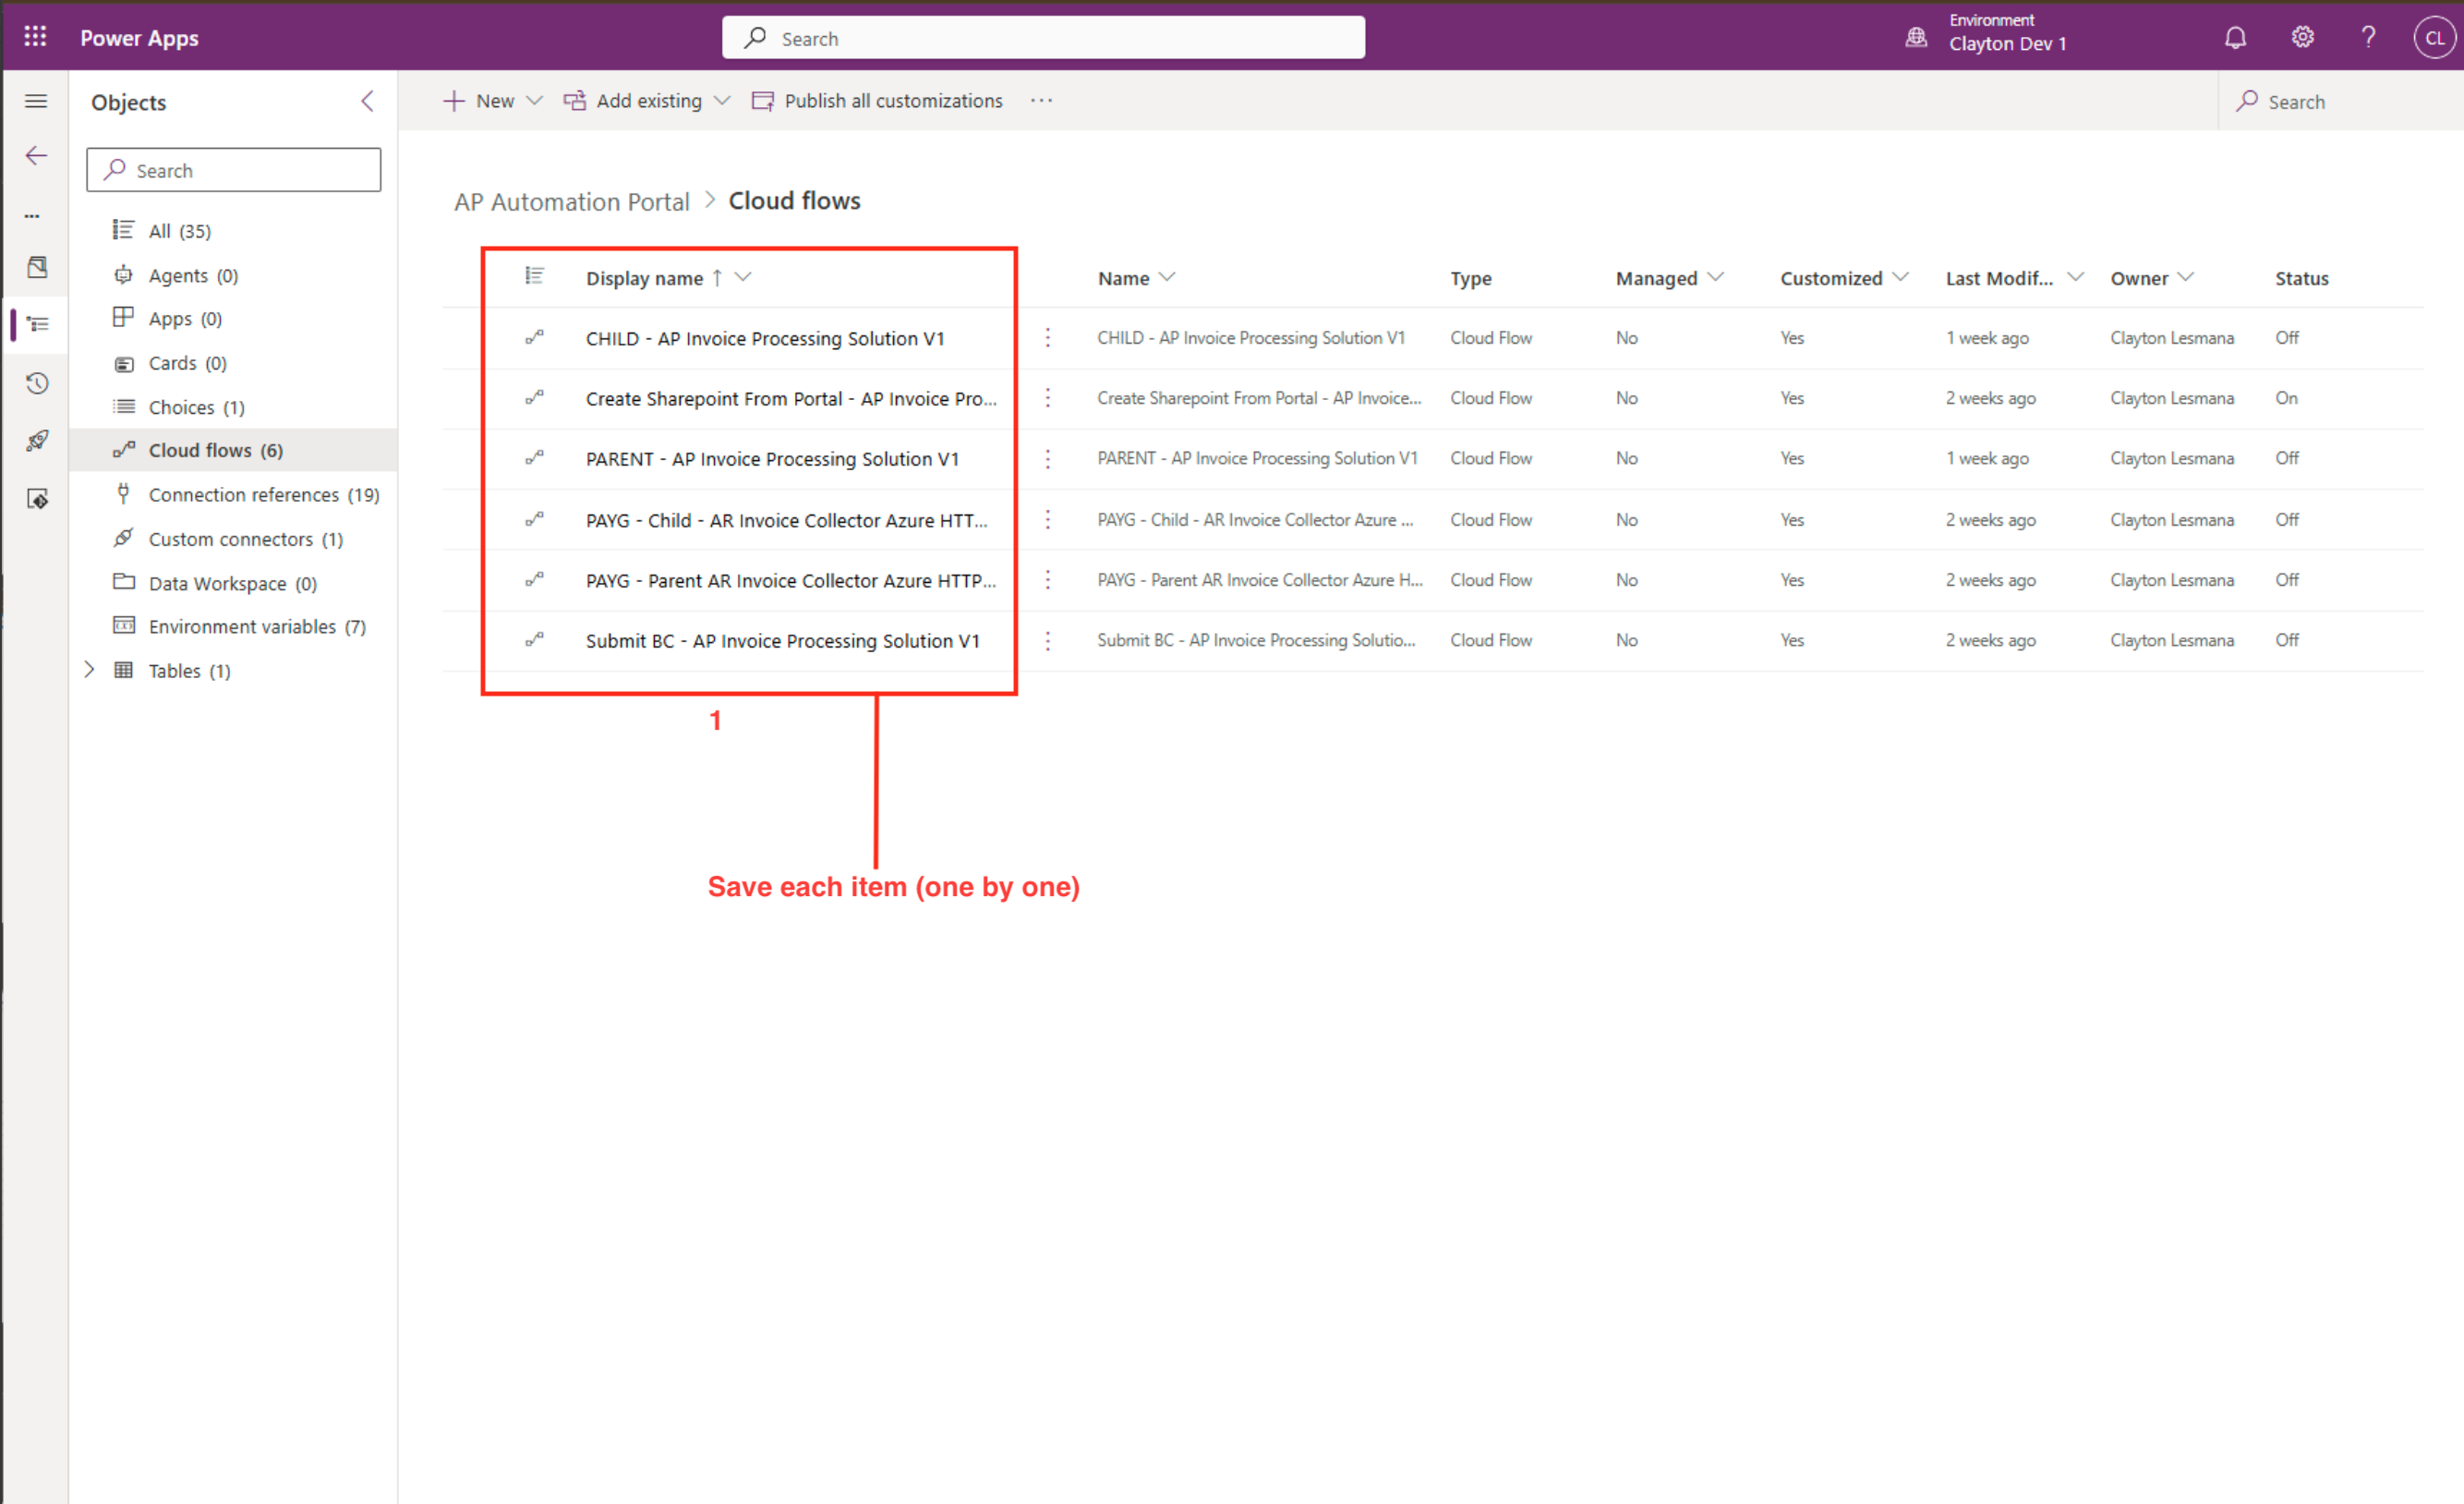
For example, open an item and click Save As.
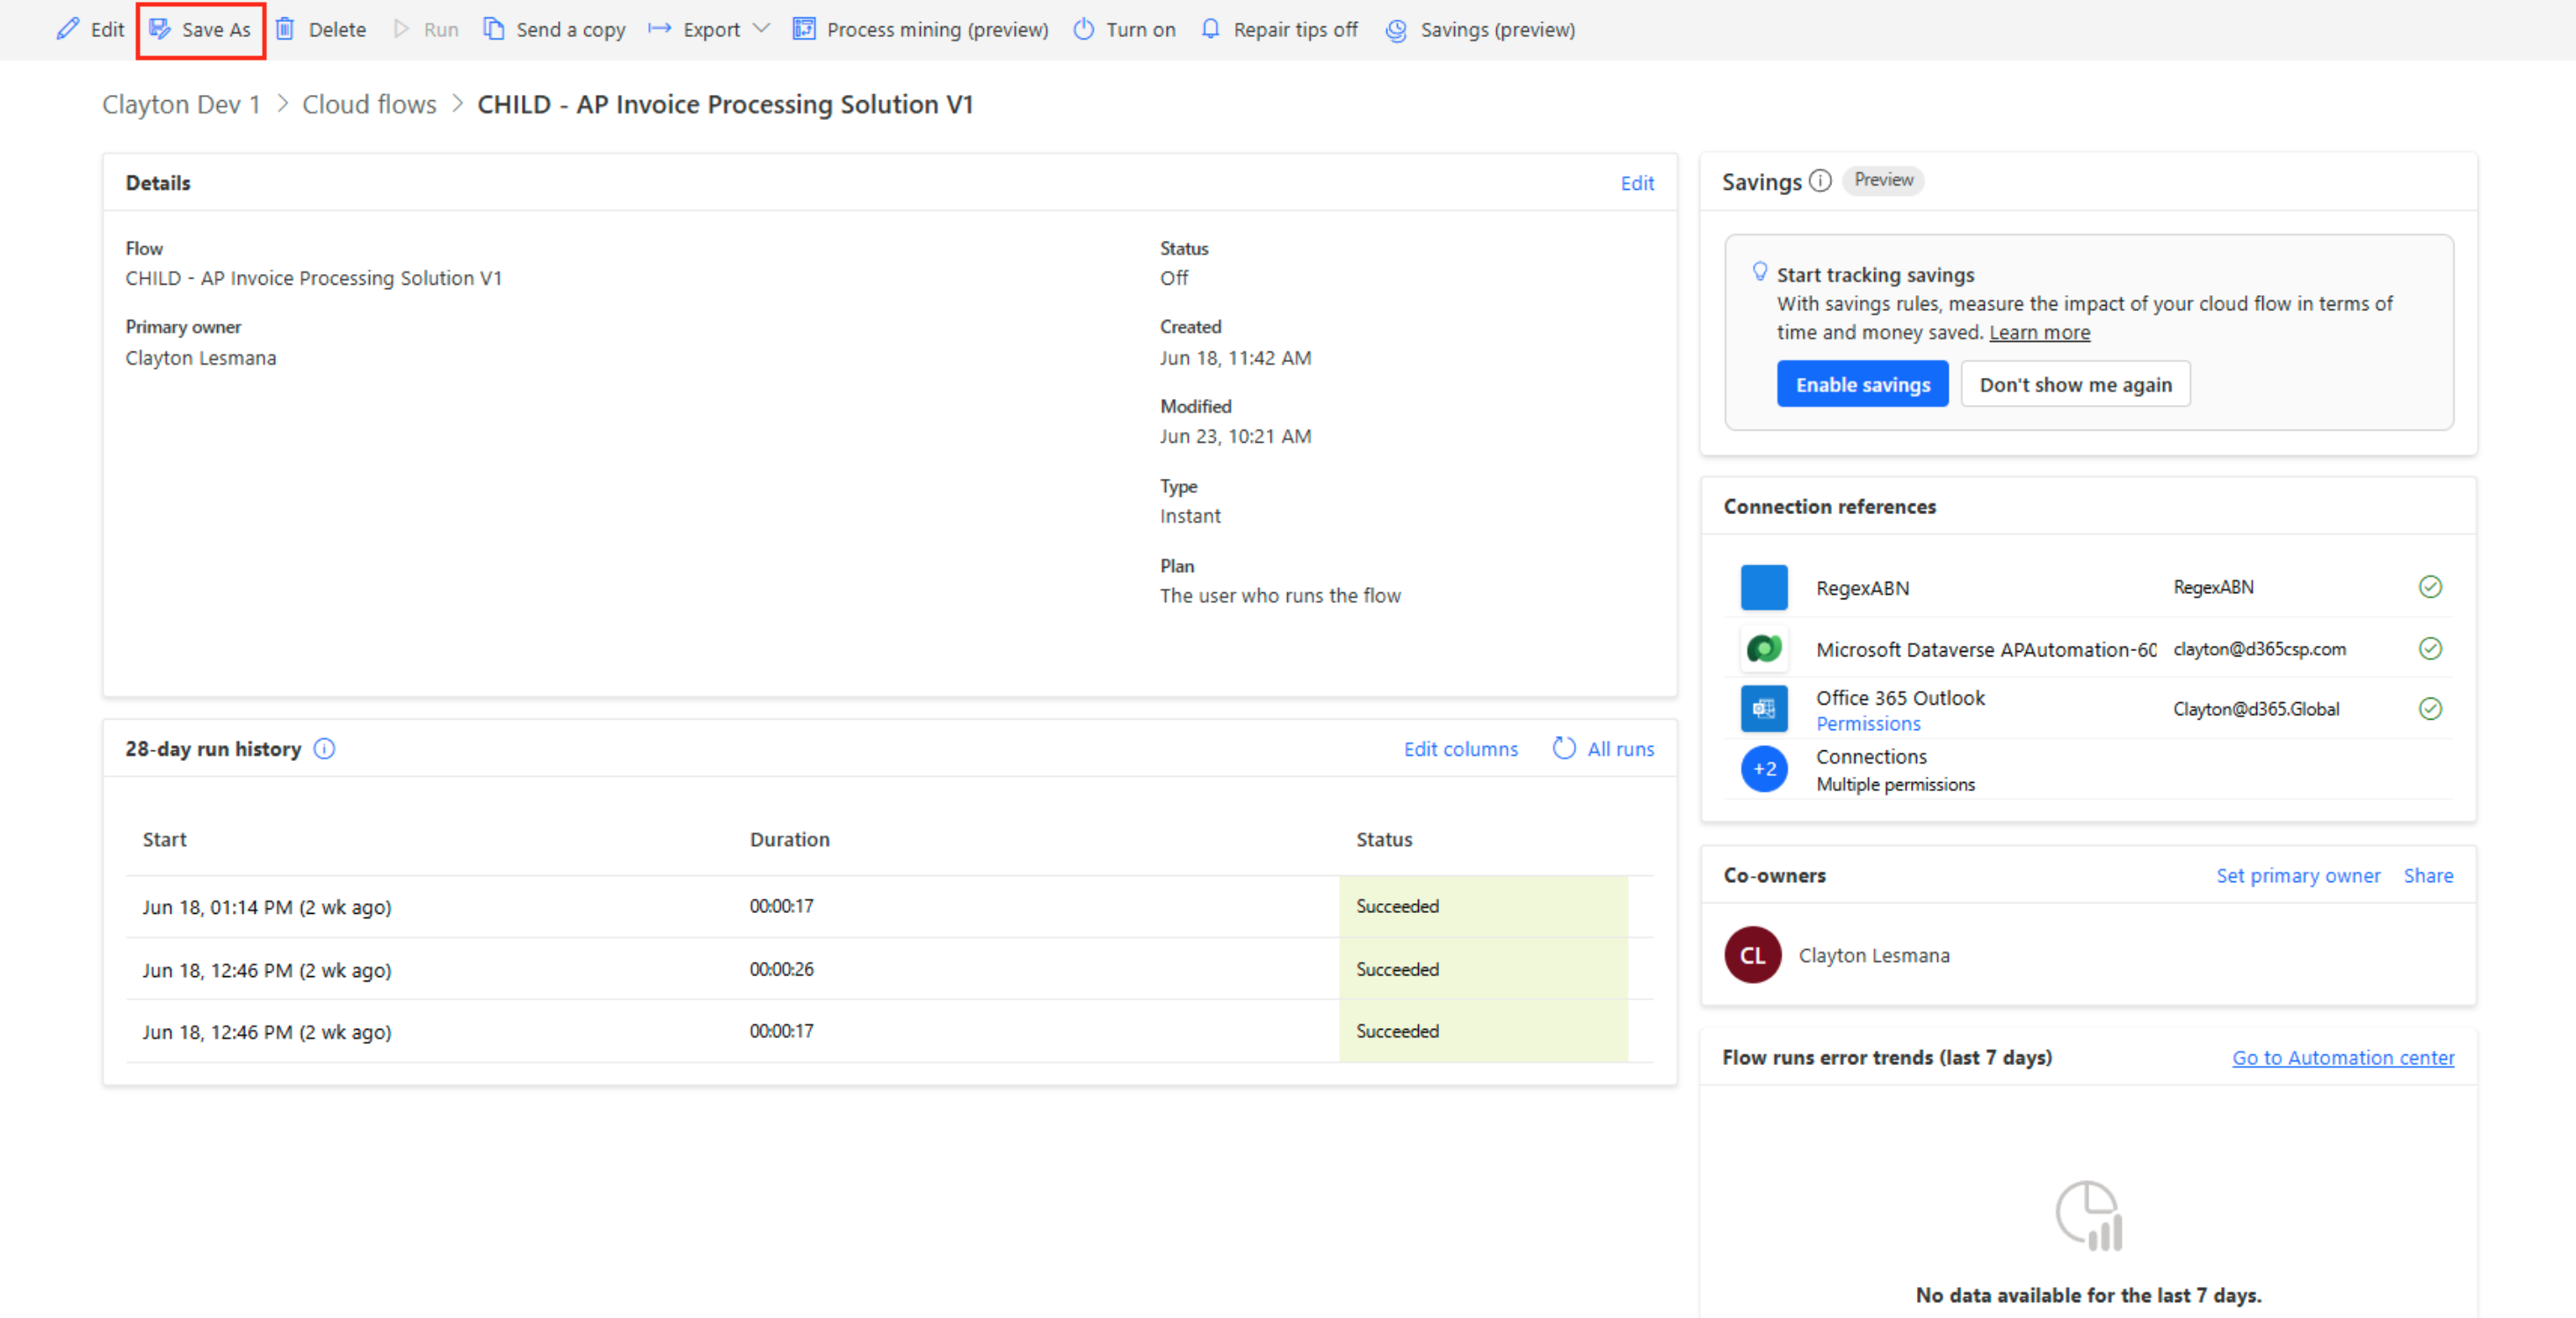
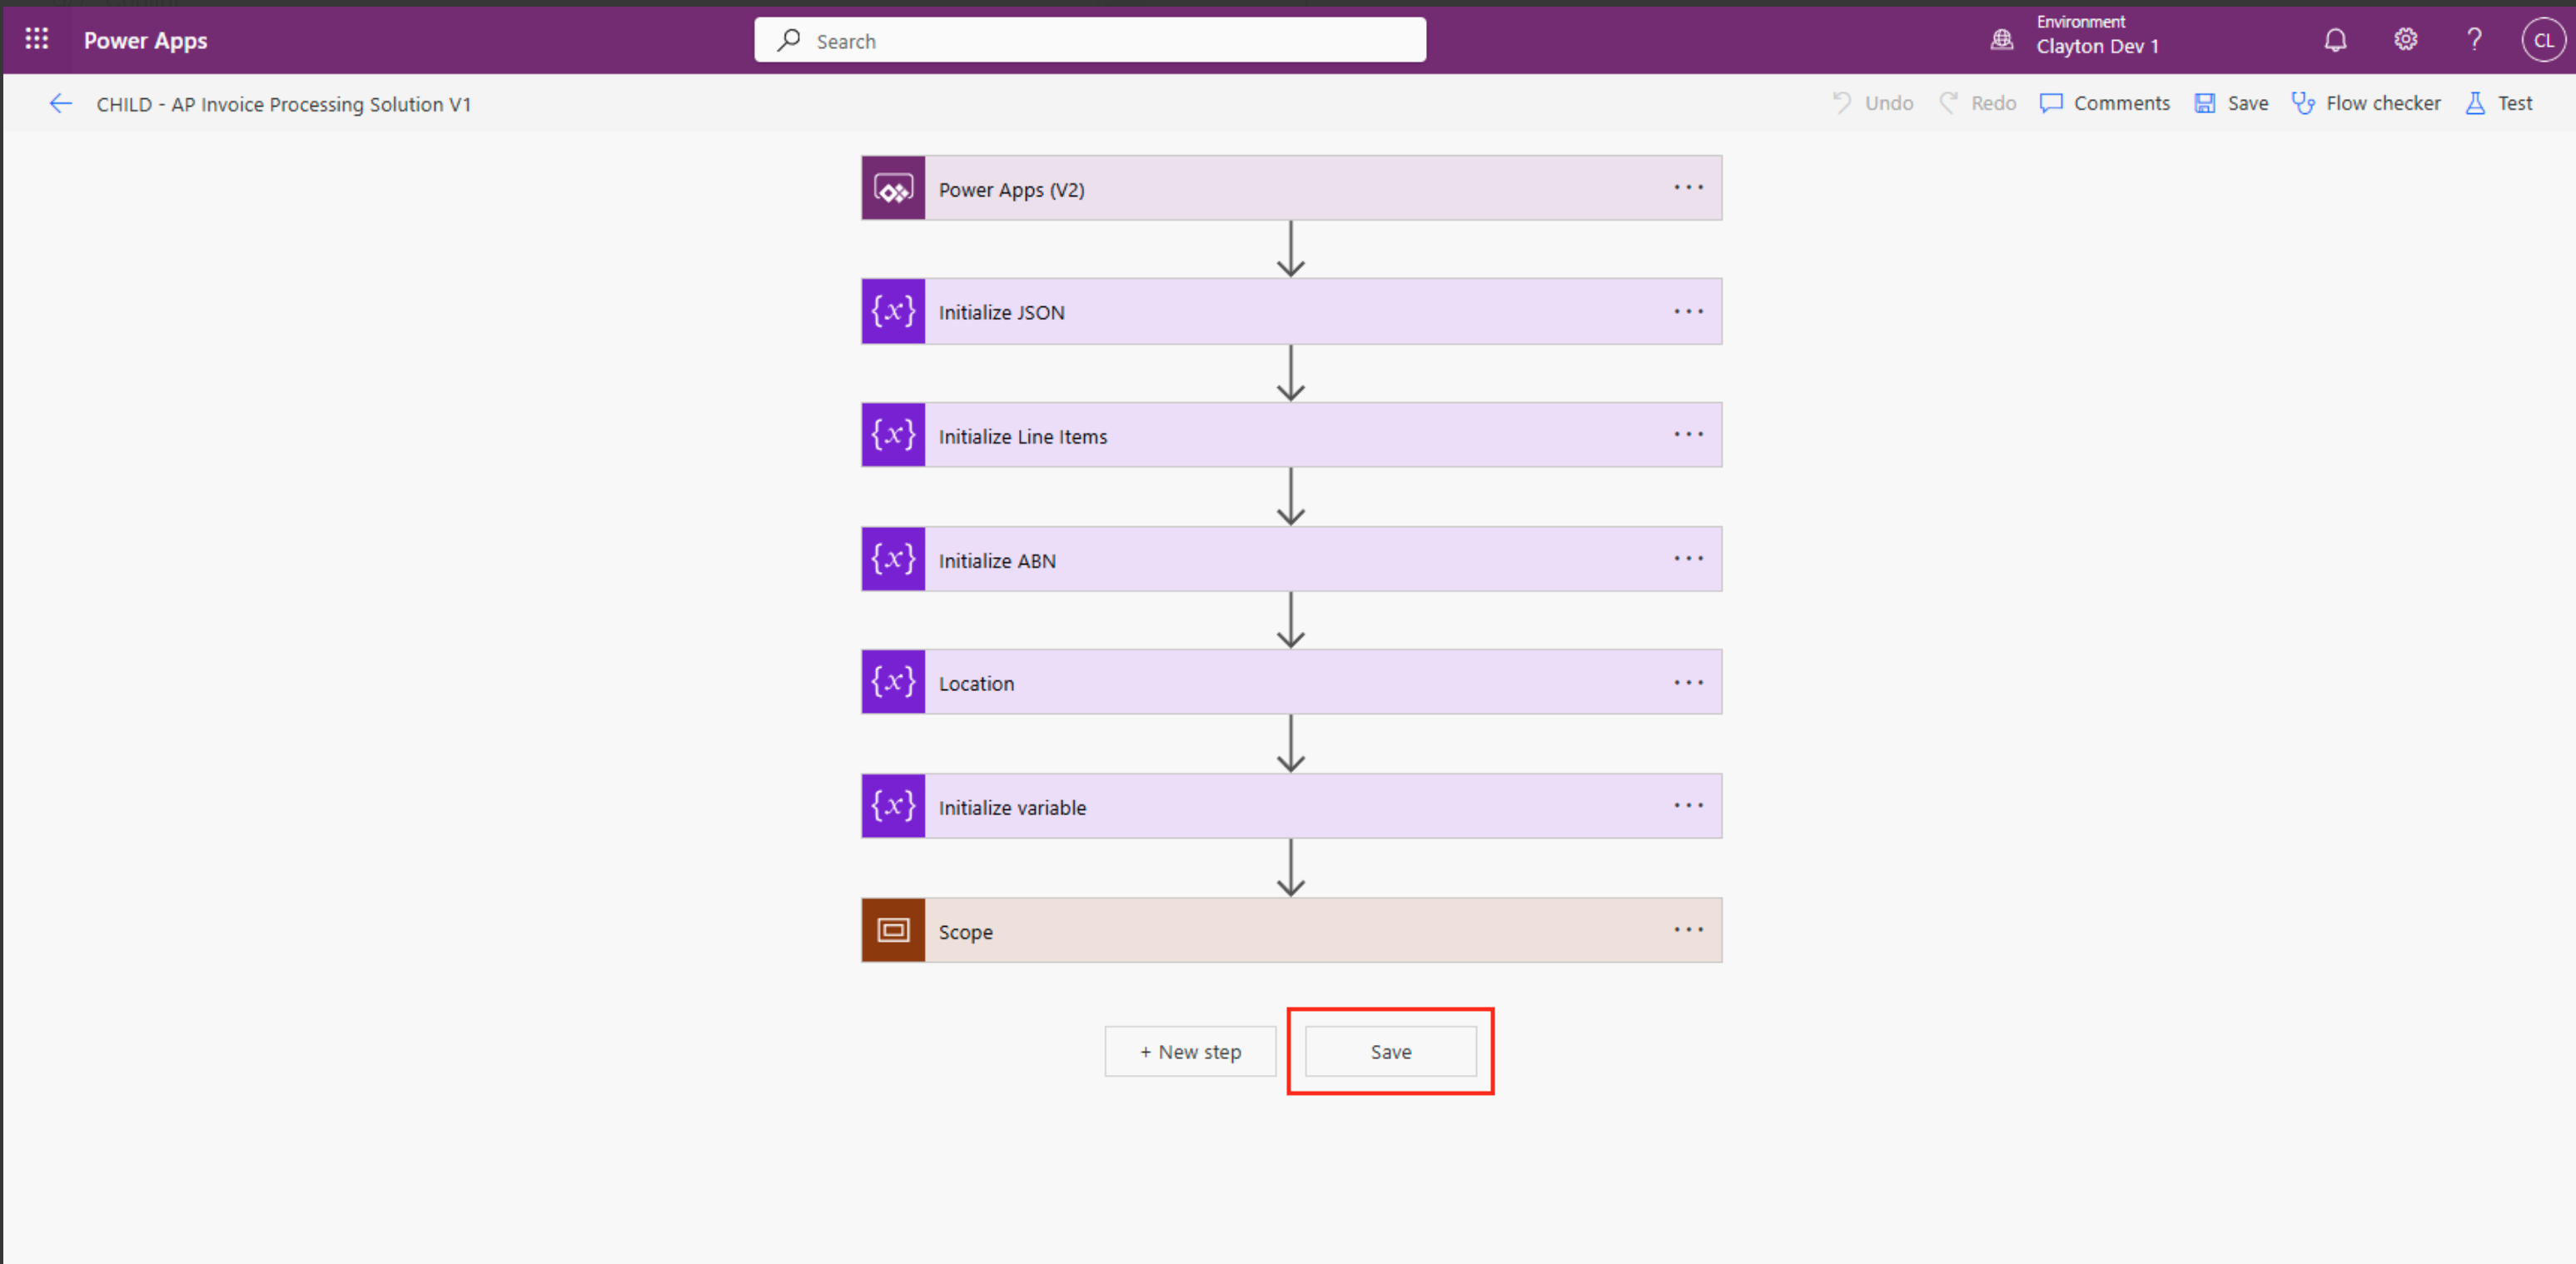
Then click the Save button to save your configuration.
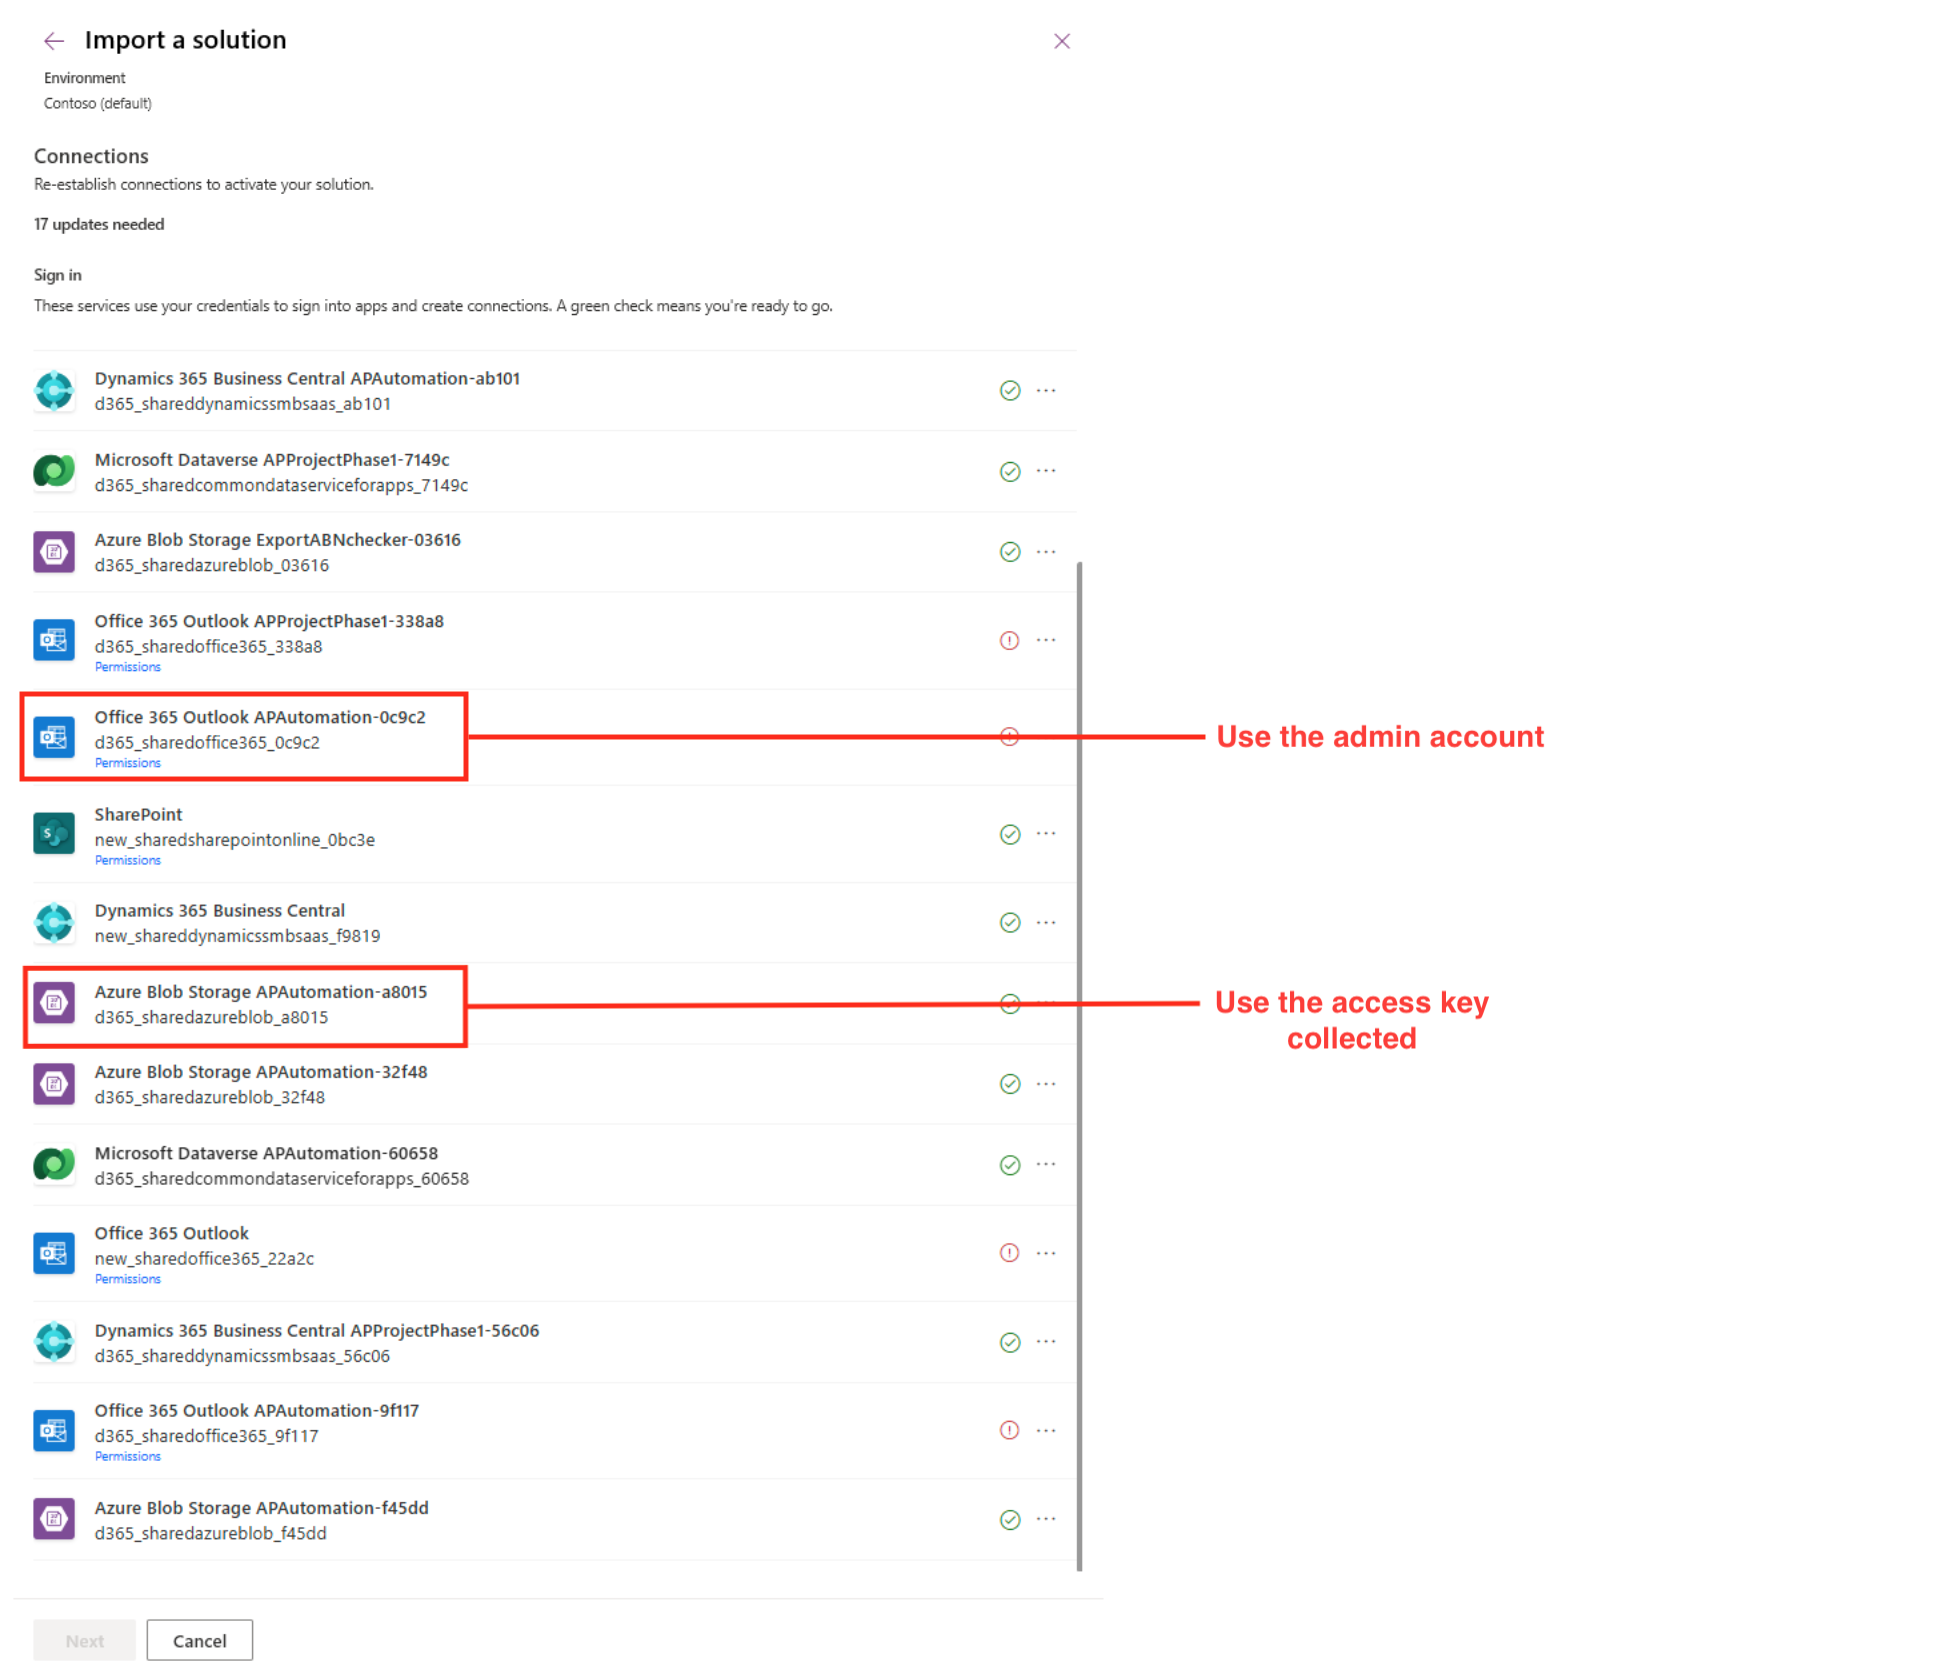
Connect Connection Reference to Collected Environments
Connect the connection reference with the collected environments from the previous steps.
For example, Azure Blob Storage using the Outlook sign in with the admin account and the access key you created.
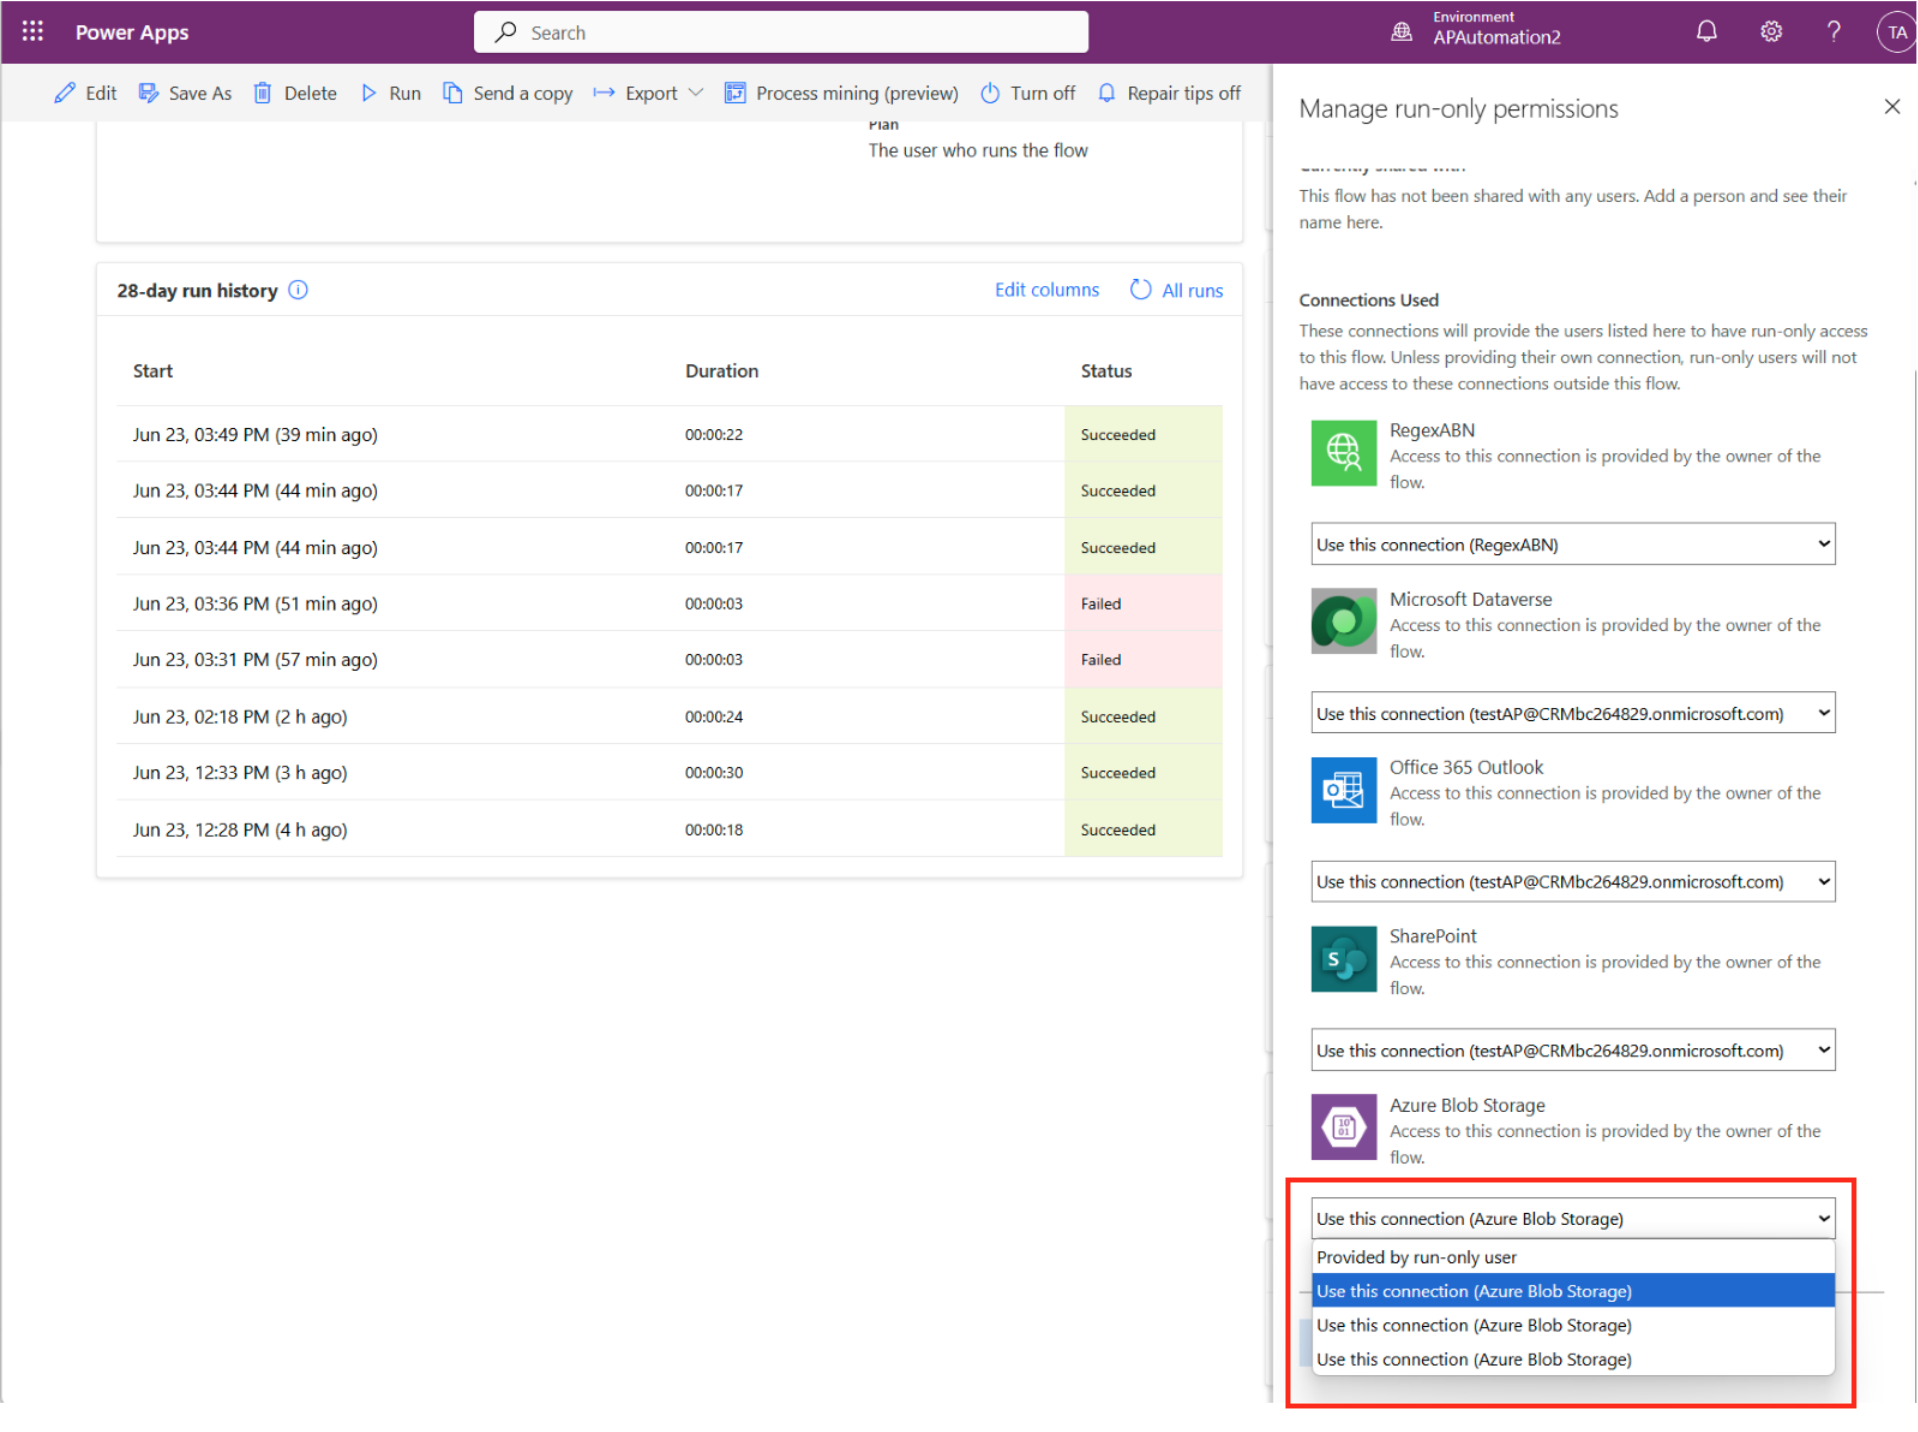
Click Edit in Run only users.
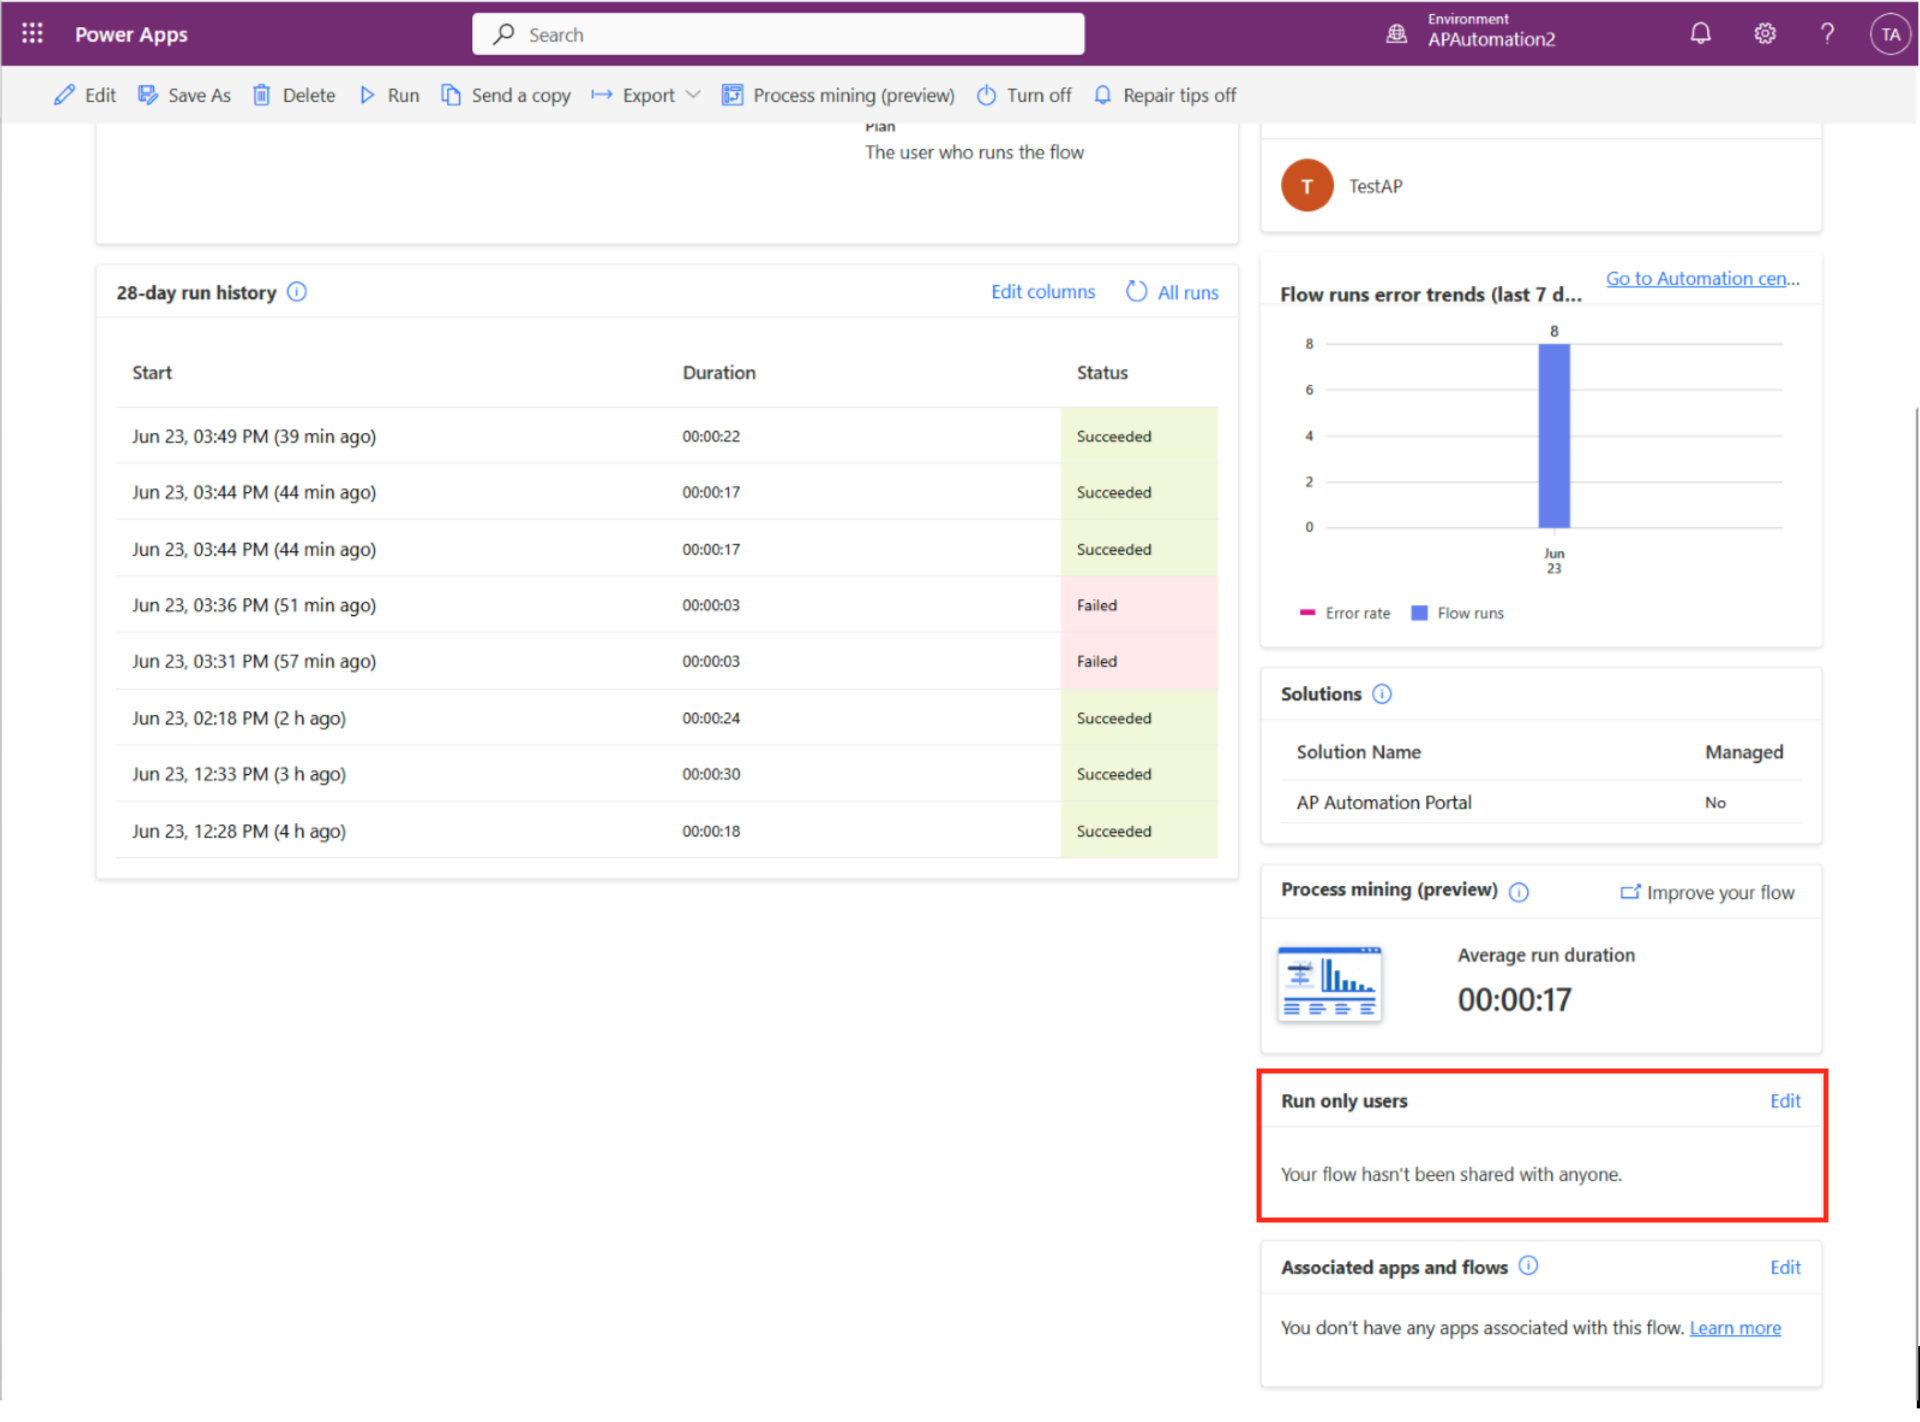
In Manage run-only permissions, ensure the permission is set to Use this connection (Azure Blob Storage).
Send an email to the shared email address that was created, and it should trigger the PARENT flow.