Microsoft 365 & User Account Setup
User Setup
Go to https://admin.microsoft.com . Your credentials are your Email Address and Password. Make sure your account has admin permission to sign in.
Create a new user account with appropriate administrative permissions (Power Platform Admin or Global Administrator).
-
From the Microsoft 365 admin center main menu, on the left-hand side of the application window, select Active users.
-
Click Add a user from the Active users tab.
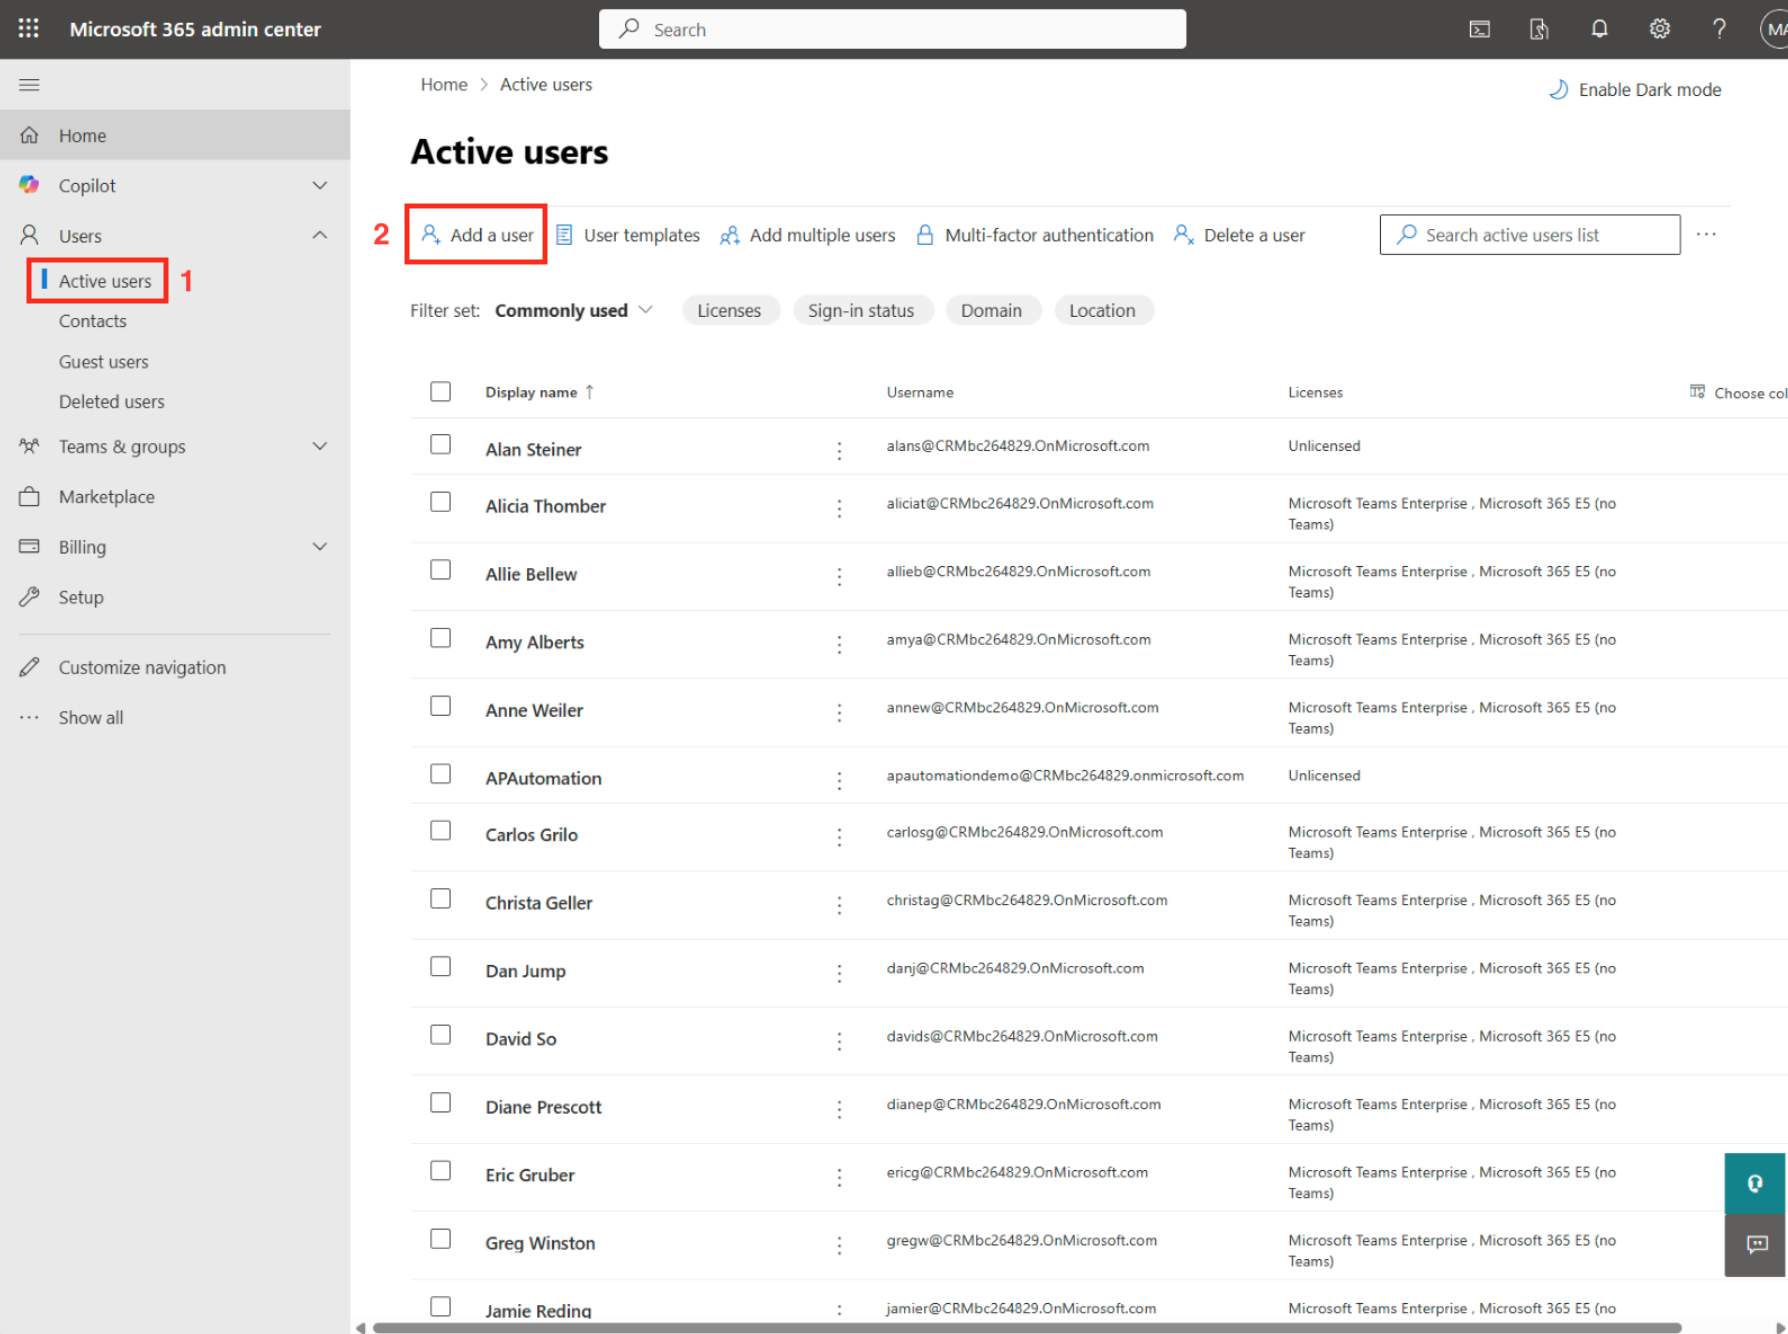
Step 1
The first step is to fill out the form Set up the basics.
Make sure you enter in the field input boxes your First name, Last name, Display name (required), Username (required), and Domains (click drop-down box to select a domain or use default). You can automatically generate a password or create your own.
Passwords must be from 8 to 256 characters using a combination of uppercase letters, lowercase letters, numbers, and symbols. Check the Require the user to change their password when they first sign in, which allows users to create their own password.
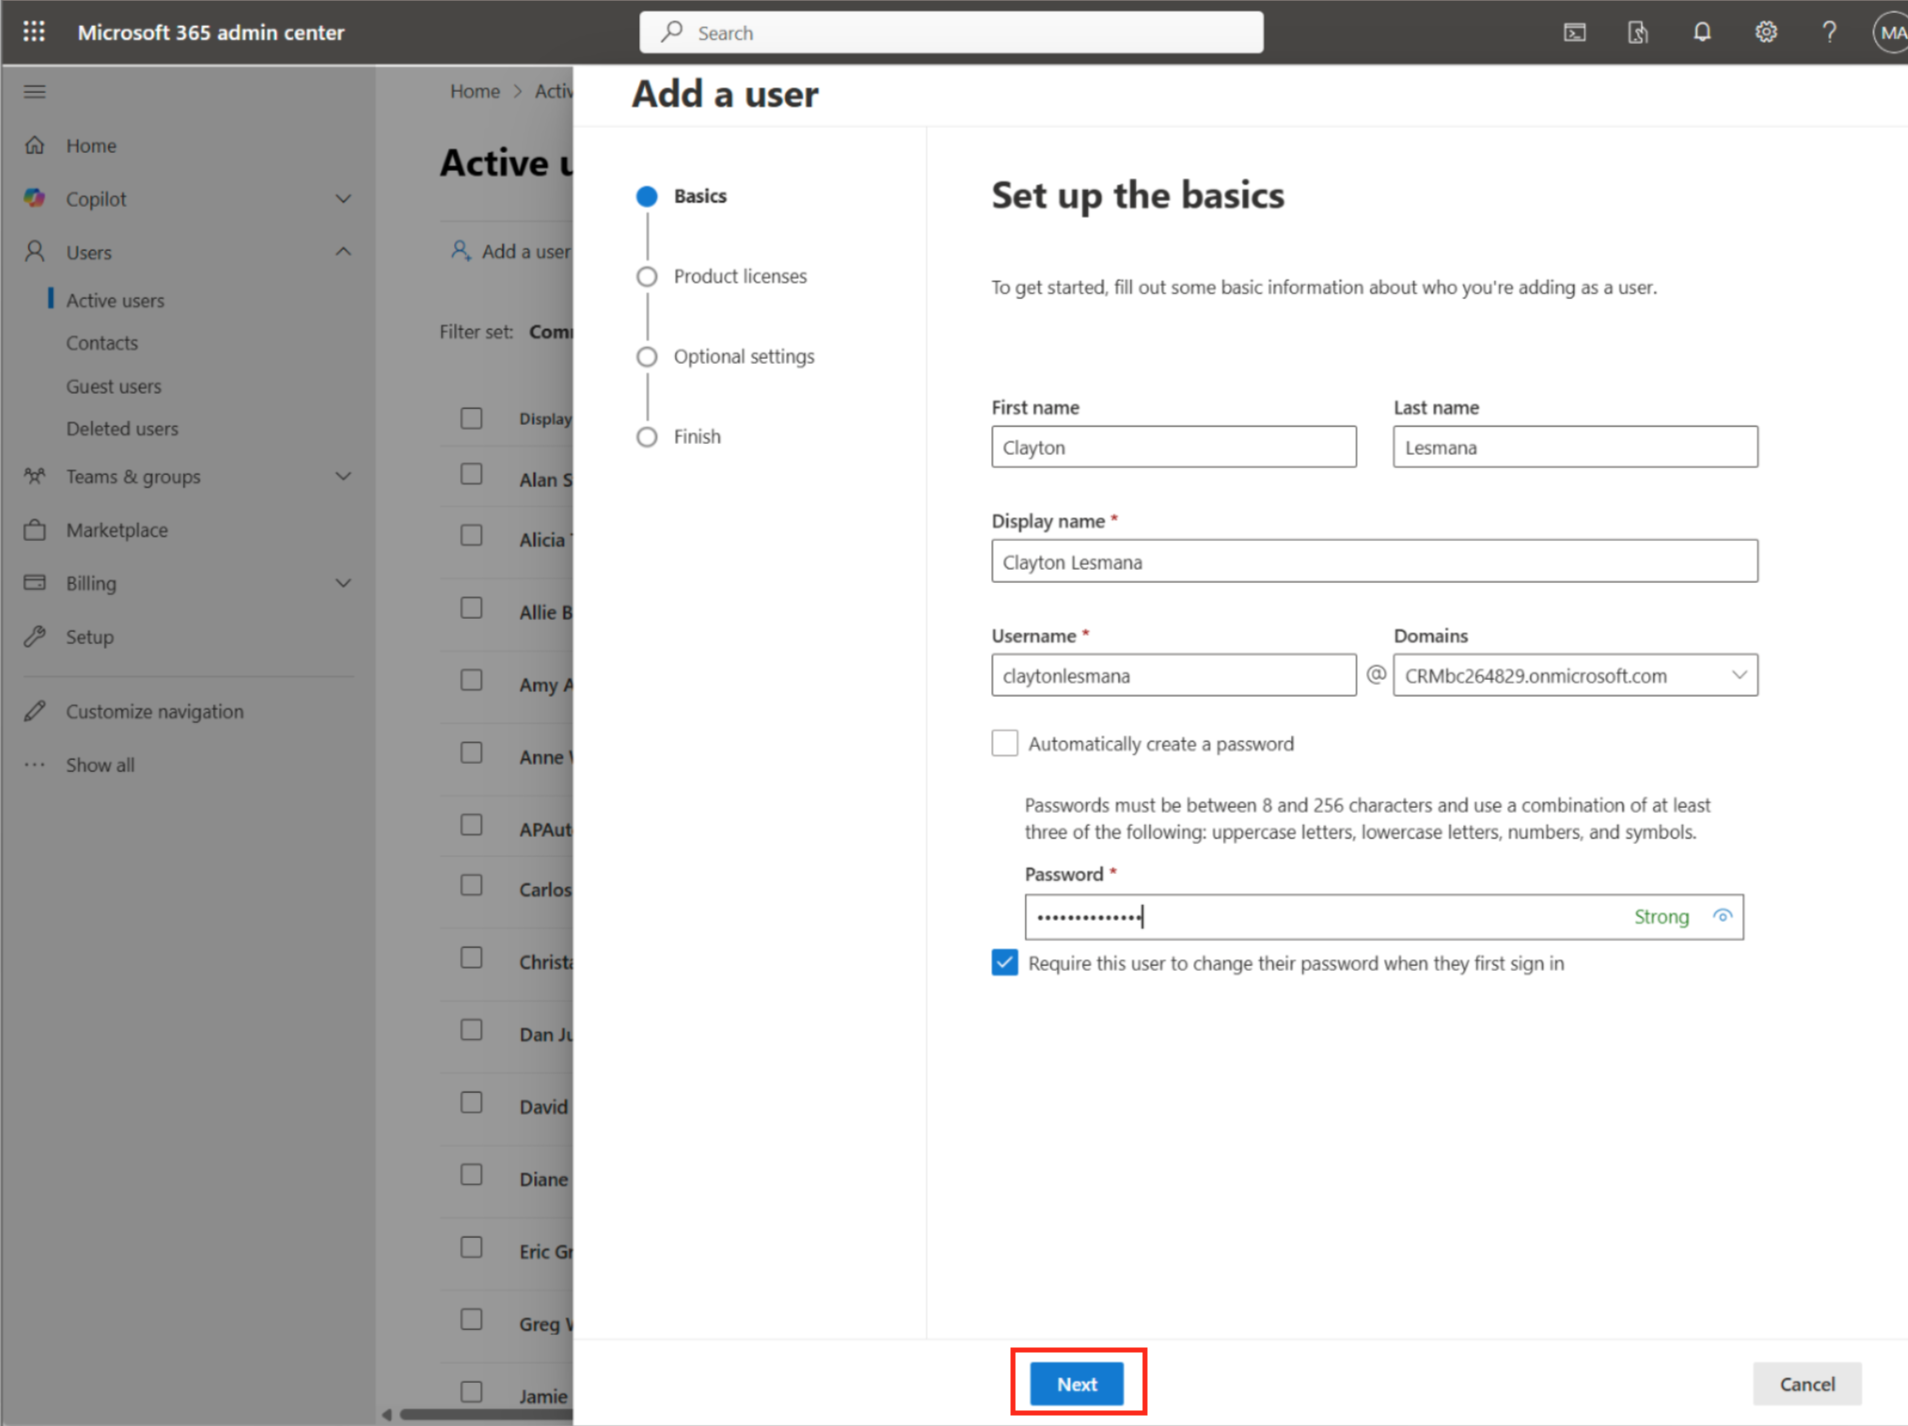
When you are finished, click on the Next button to proceed, or Cancel button (if you need to cancel creating a new user).
Step 2
Whenever you complete a step, a circle next to the step name will turn blue with a white check mark.
You will now see the Assign product licenses step. This is where you apply the product licenses.
Select Assign user a product license option, and apply licenses for the following items (check the box next to each item):
- Dynamics 365 Business Central for IWs
- Microsoft Power Apps for Developer
- Microsoft Power Automate Free
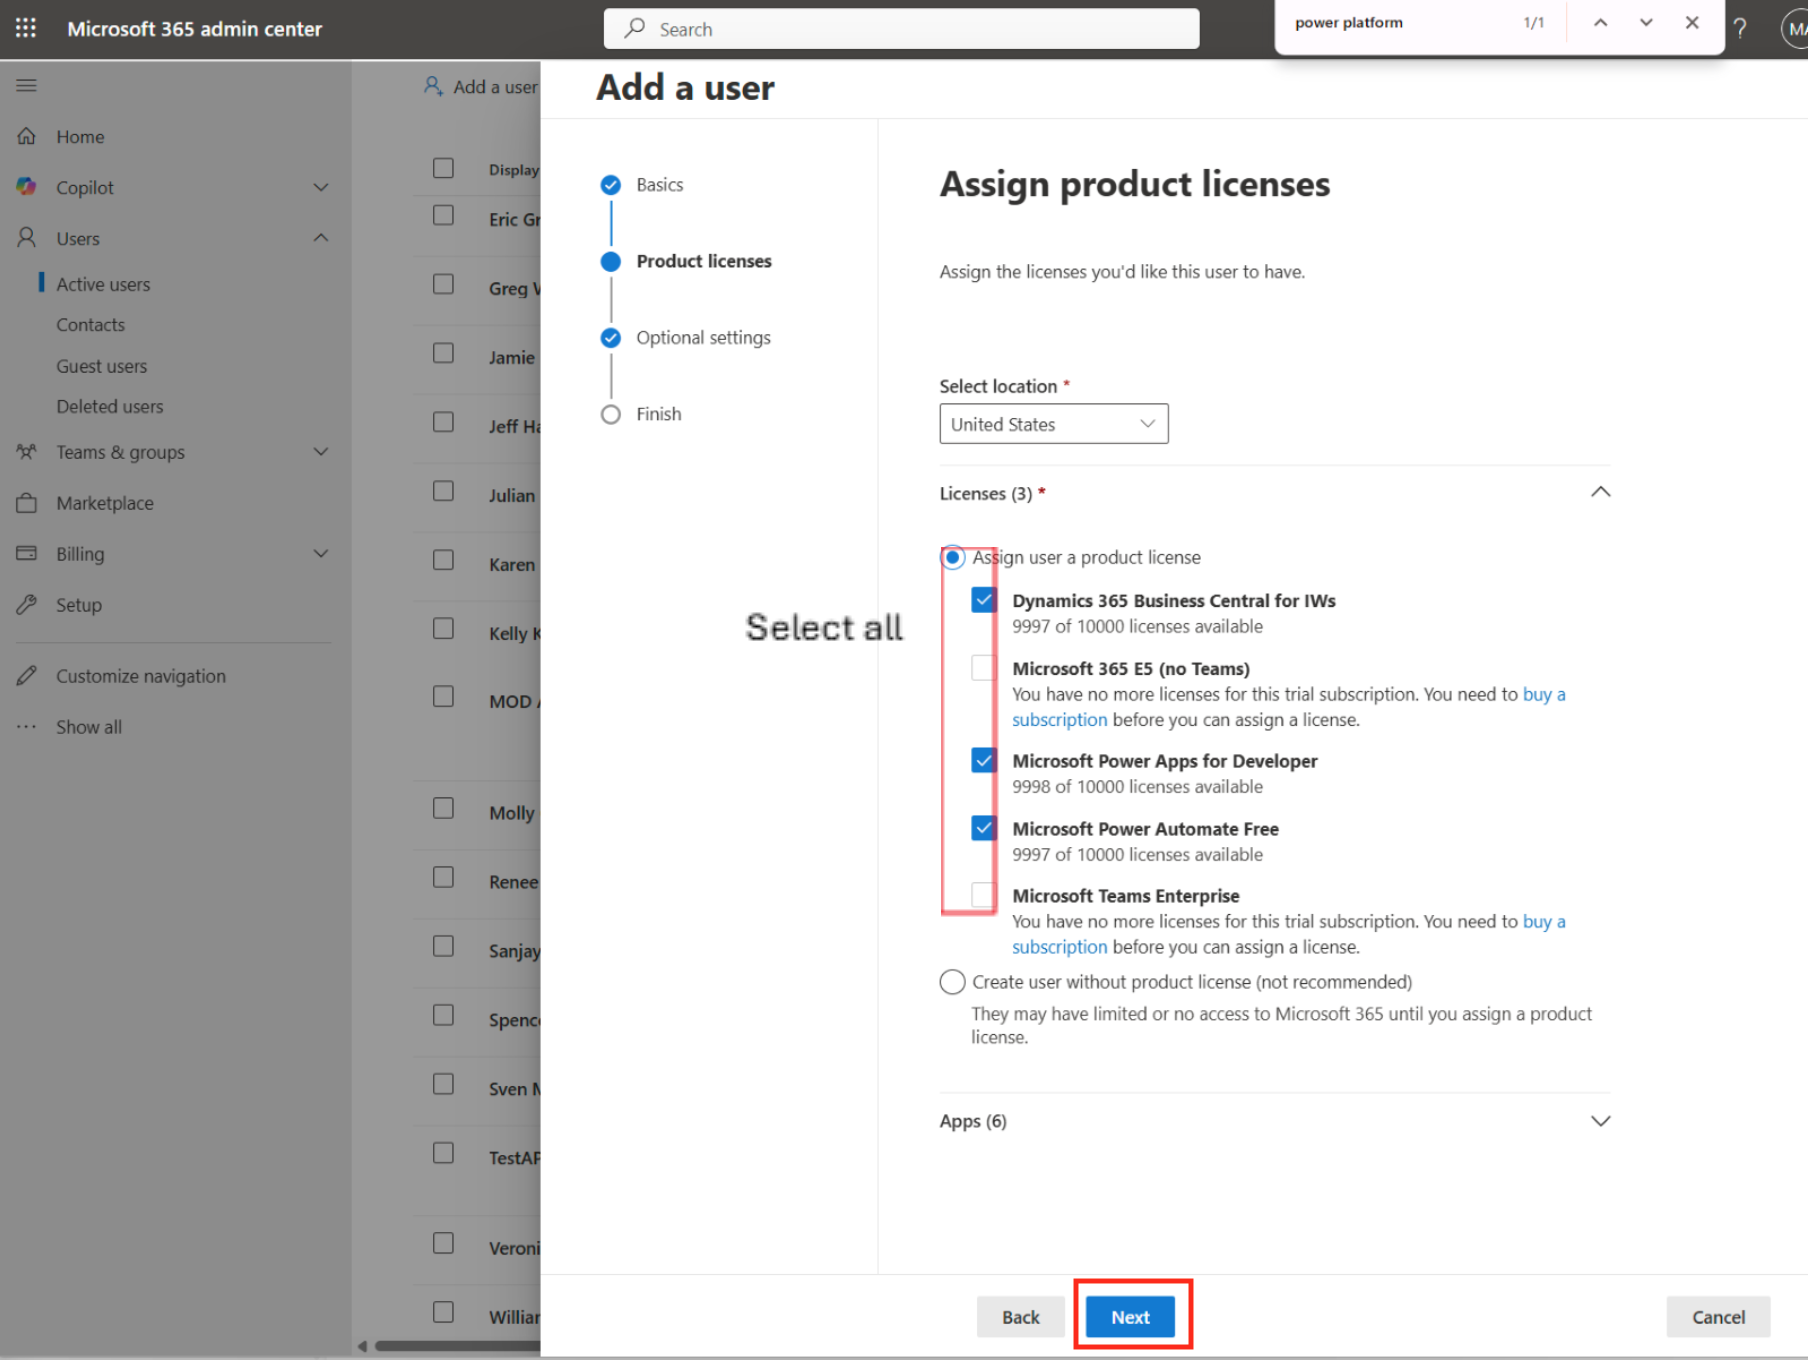
Click the Next button to proceed. You can also return to the previous step if you need to by clicking the Back button.
Optional Settings
The next step is Optional settings.
Admin Center Access
Make sure that Admin center access option is selected, and the Global Administrator option is checked.
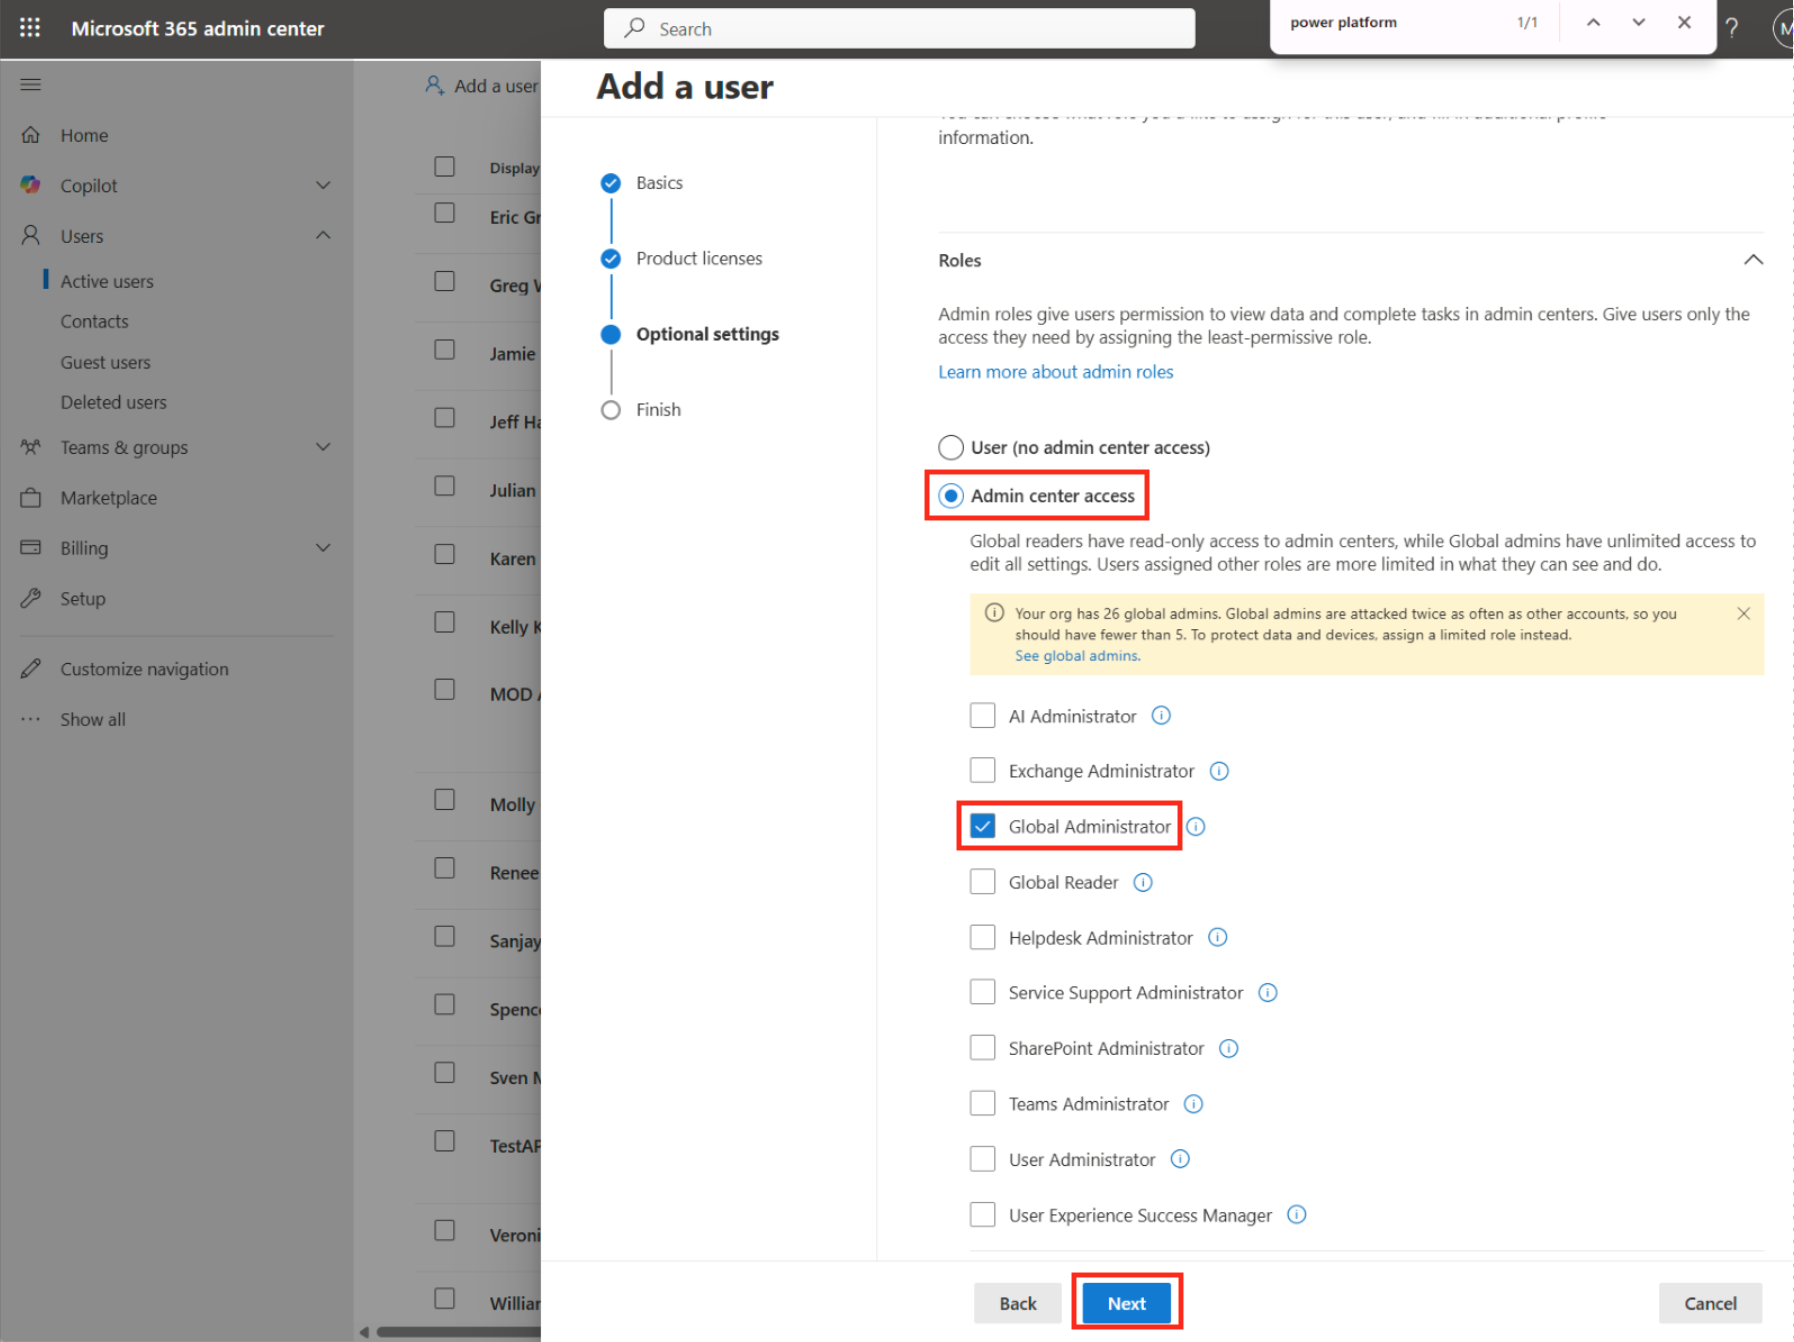
Click the Next button to Finish. You now have a user, and we will continue with the configuration.
(If you need to return to the previous step, click the Back button)
Shared Mailbox
From the main menu, click Teams & groups to expand. You will see more options available.
-
Under Teams & groups, click Shared mailboxes to change the tab.
-
From the Shared mailboxes tab, click Add a shared mailbox.
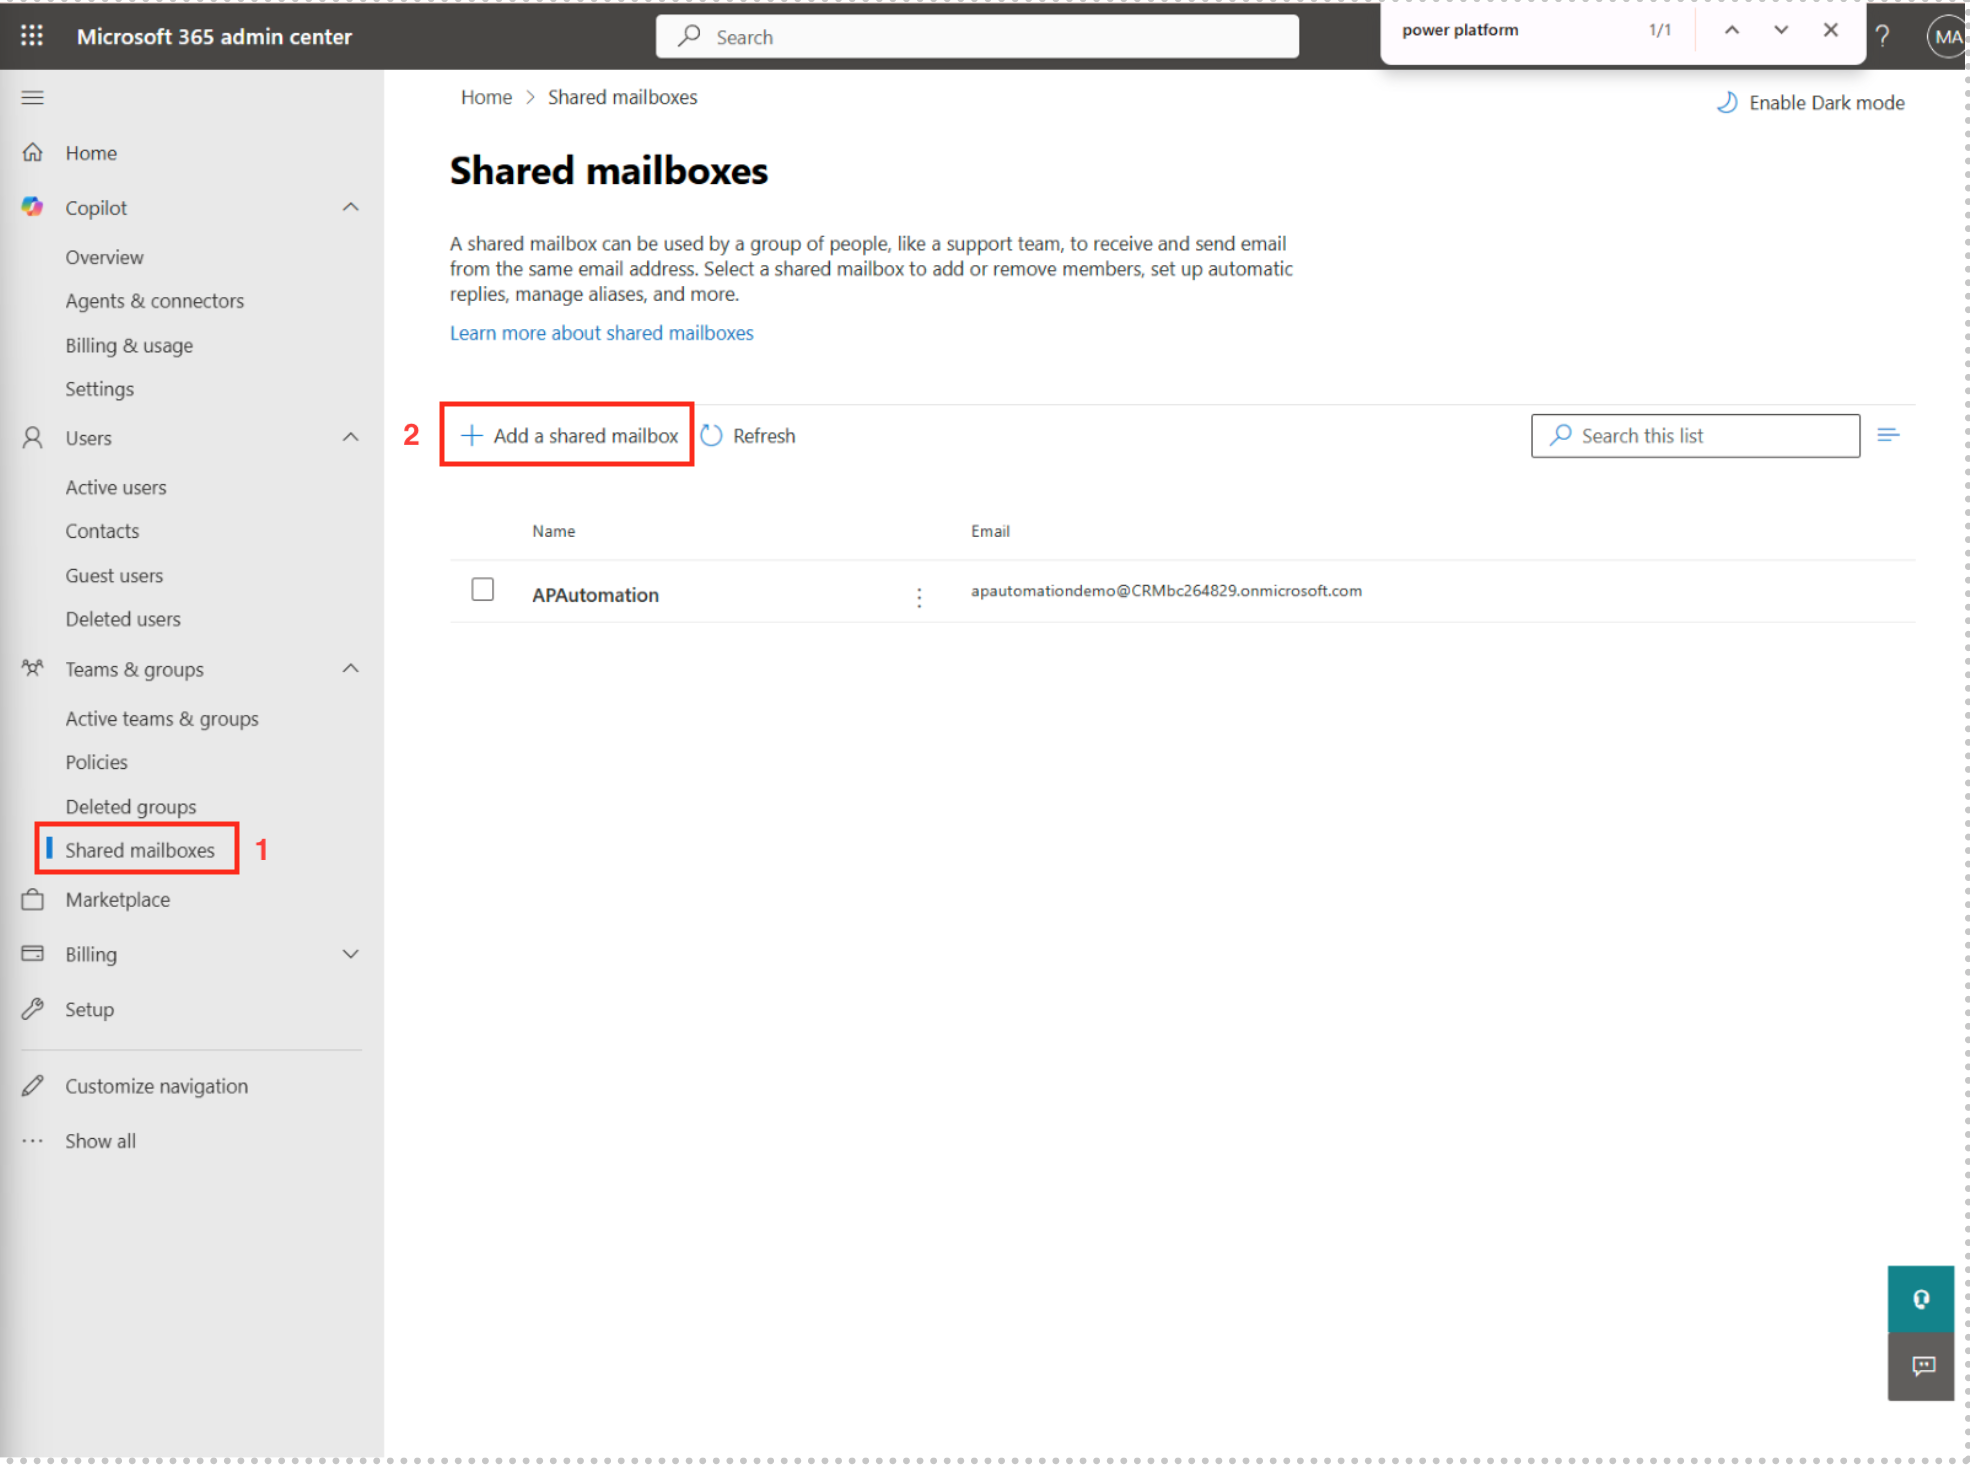
The name of the shared mailbox you have added will appear in the list of Shared mailboxes.
Select the mailbox and from the form (e.g. APAutomation), go to Members, then click Edit.
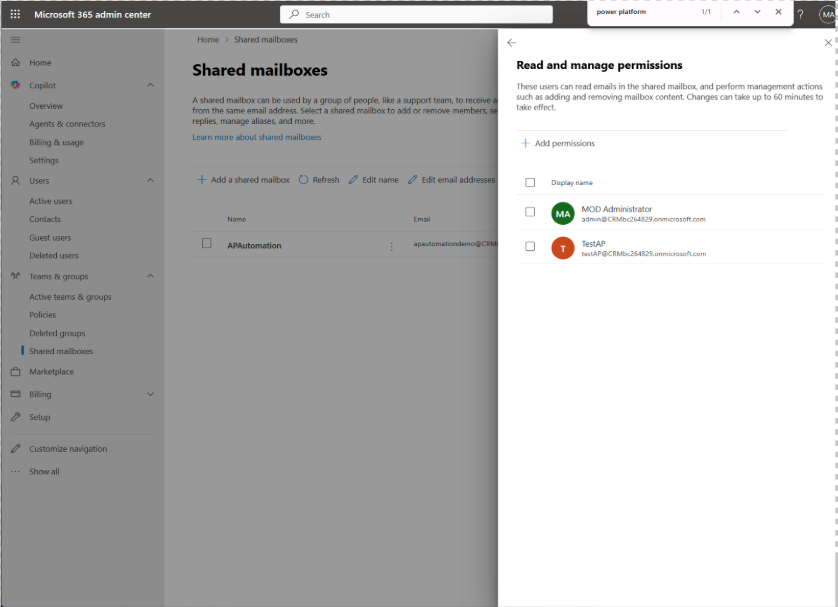
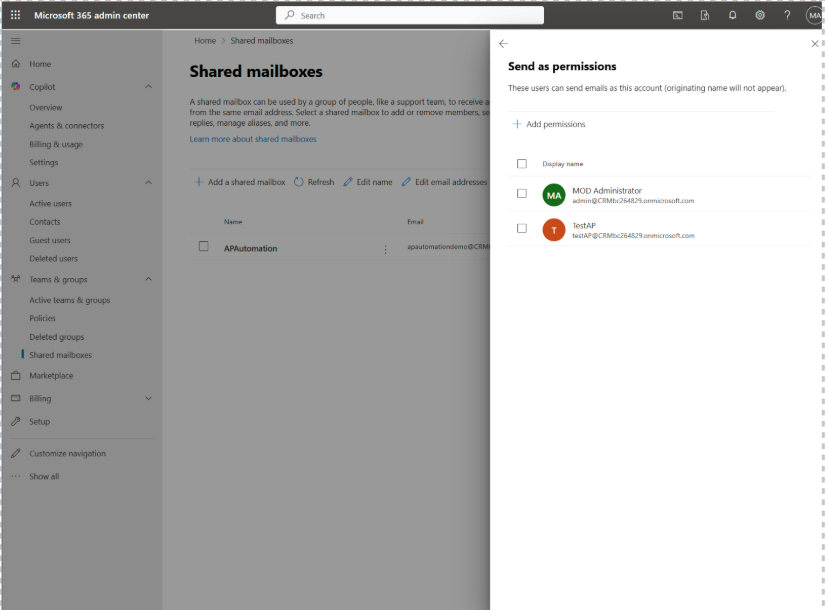
Under Manage mailbox permissions give the user Read and manage permissions and the Send as permissions.
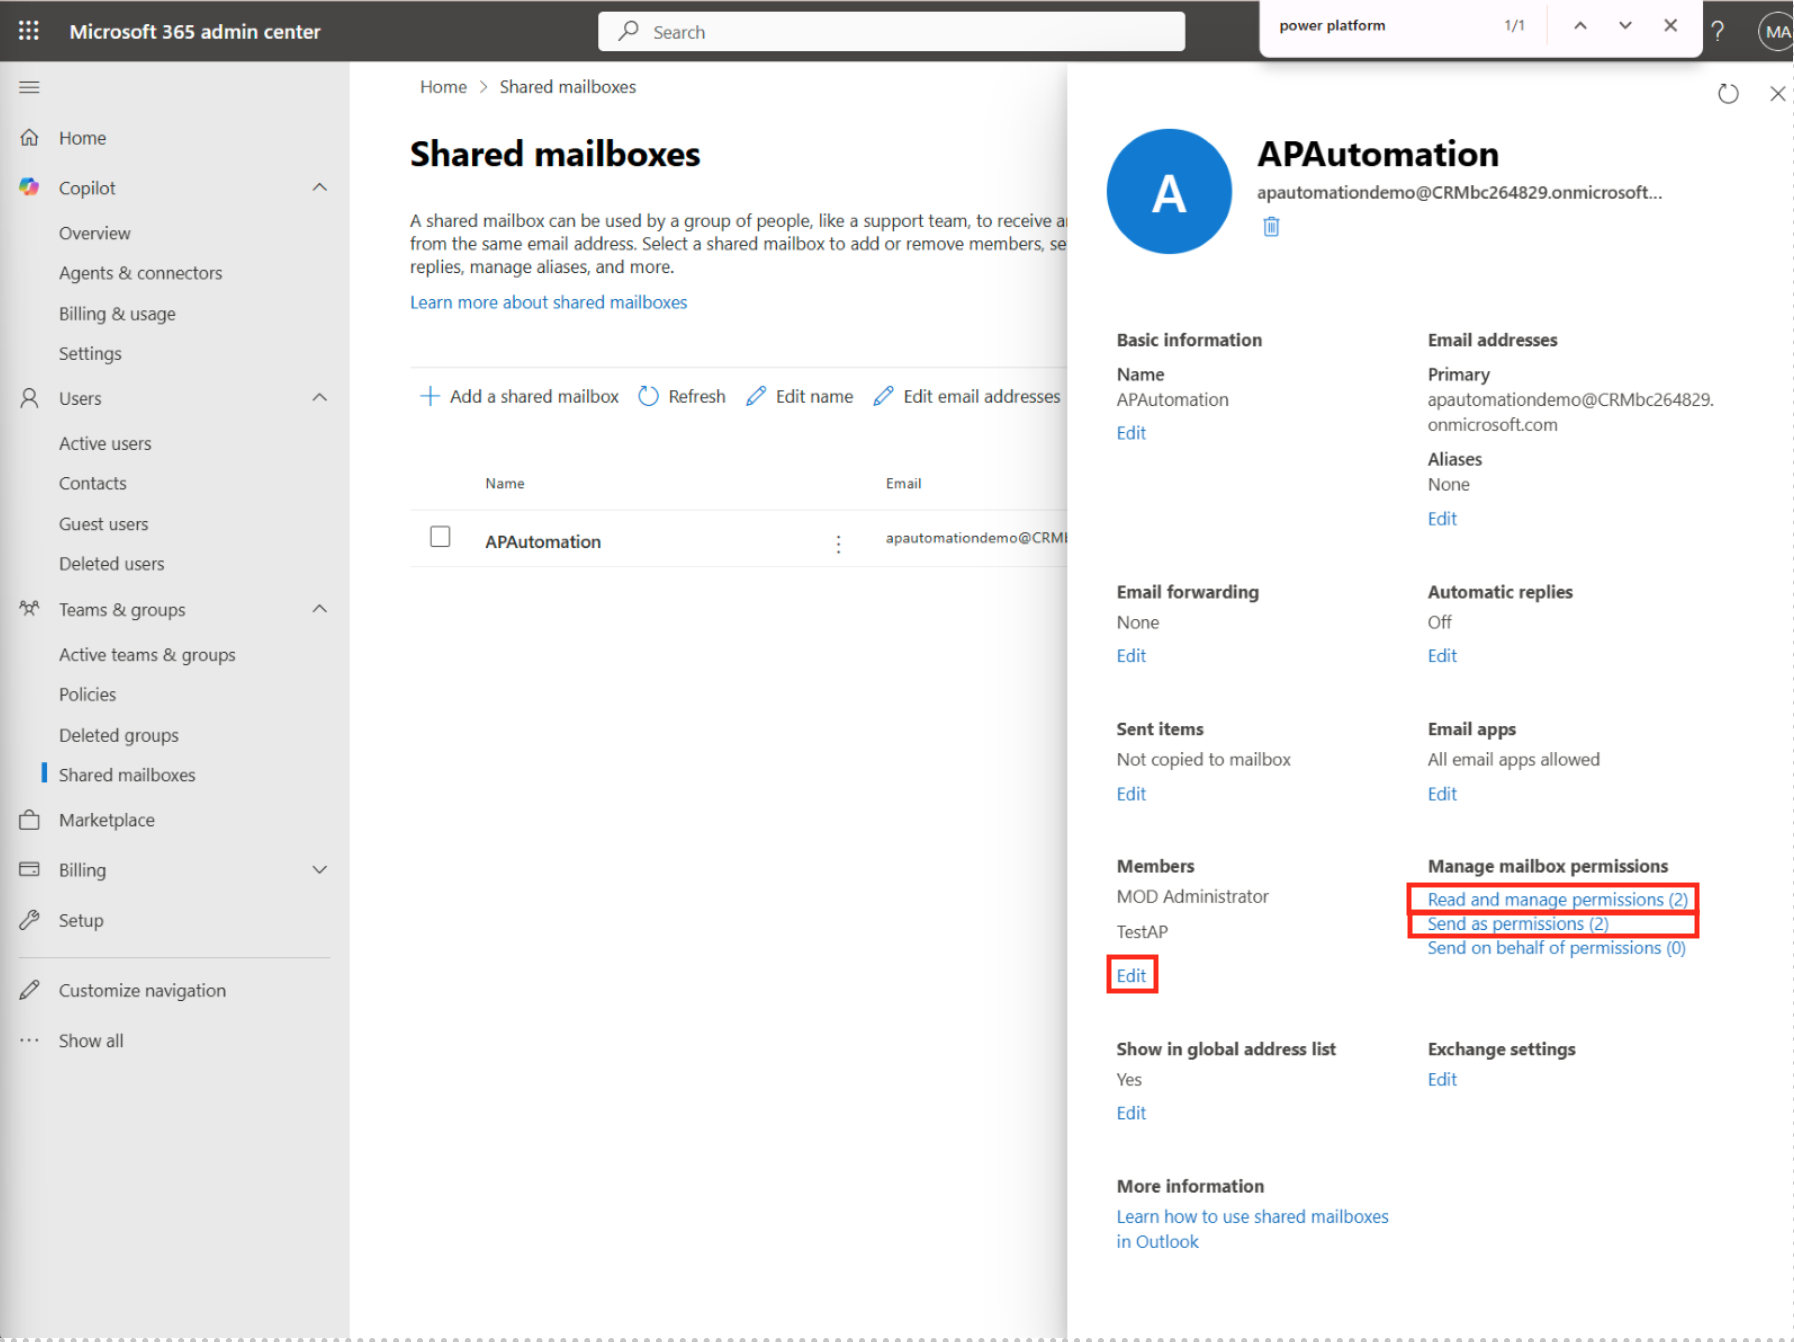
Close the form by clicking on the x icon at the top right corner of the form window, and your settings will be saved.
Set Read and manage permissions.
Set Send as permissions.
The user account setup is now complete.