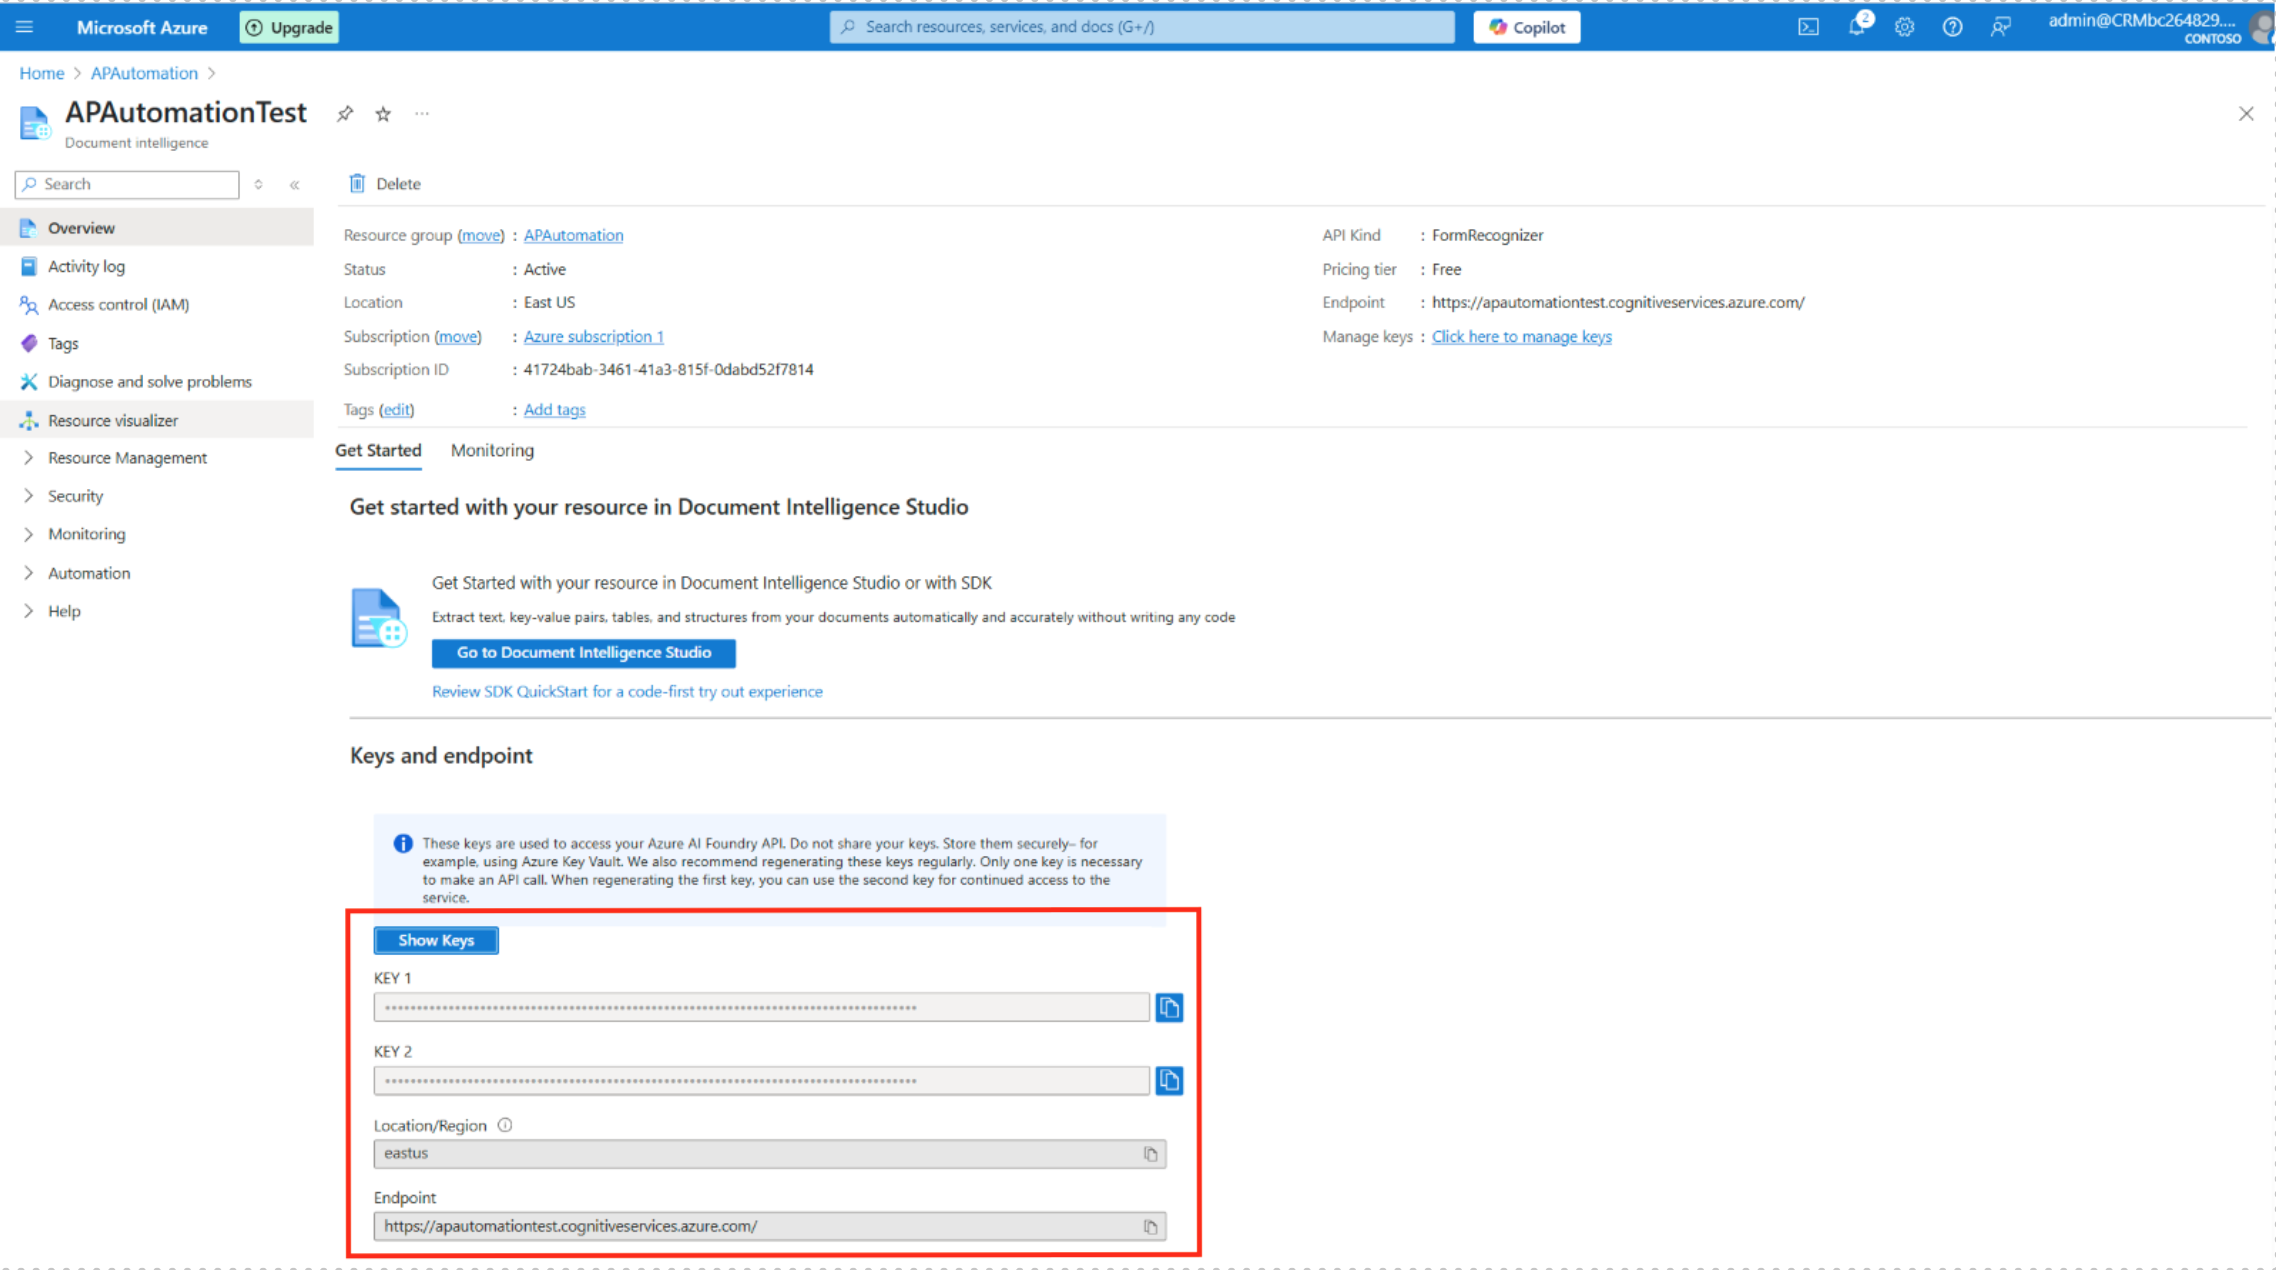
Azure Resource Provisioning
Go to https://portal.azure.com and sign in using the admin account.
Create Storage Account
Under Home > Storage Accounts, do the following.
From Create a storage account, create a user by filling out the fields in their respective tabs.
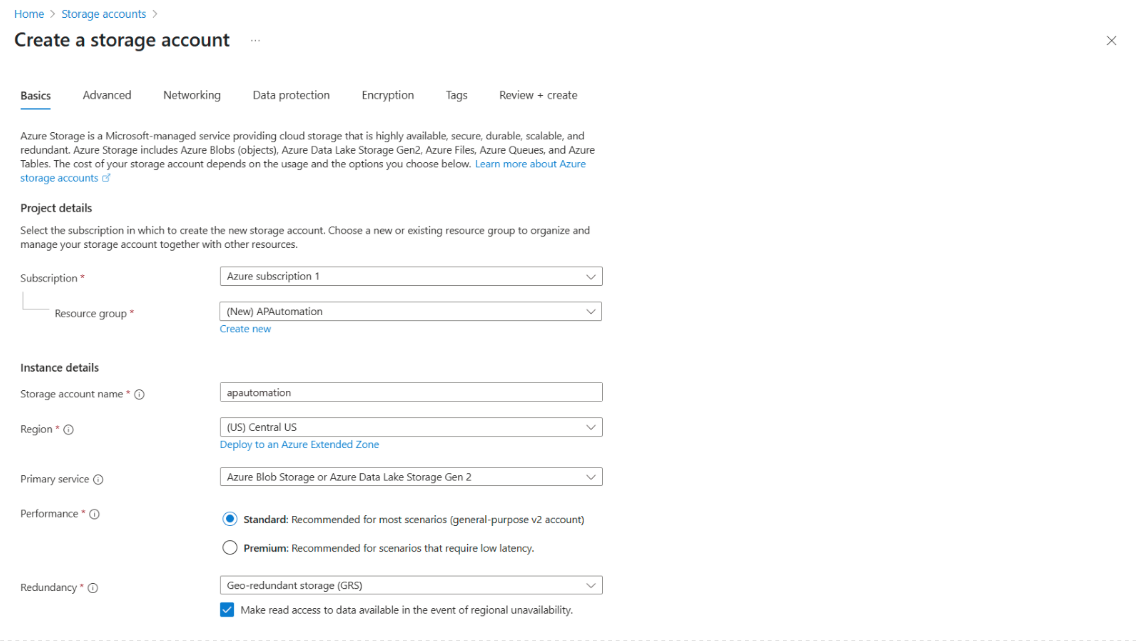
Make sure you fill out the Subscription and Resource Group, Storage account name, selected Region, Performance scenario (depends on your account subscription), and Redundancy settings.
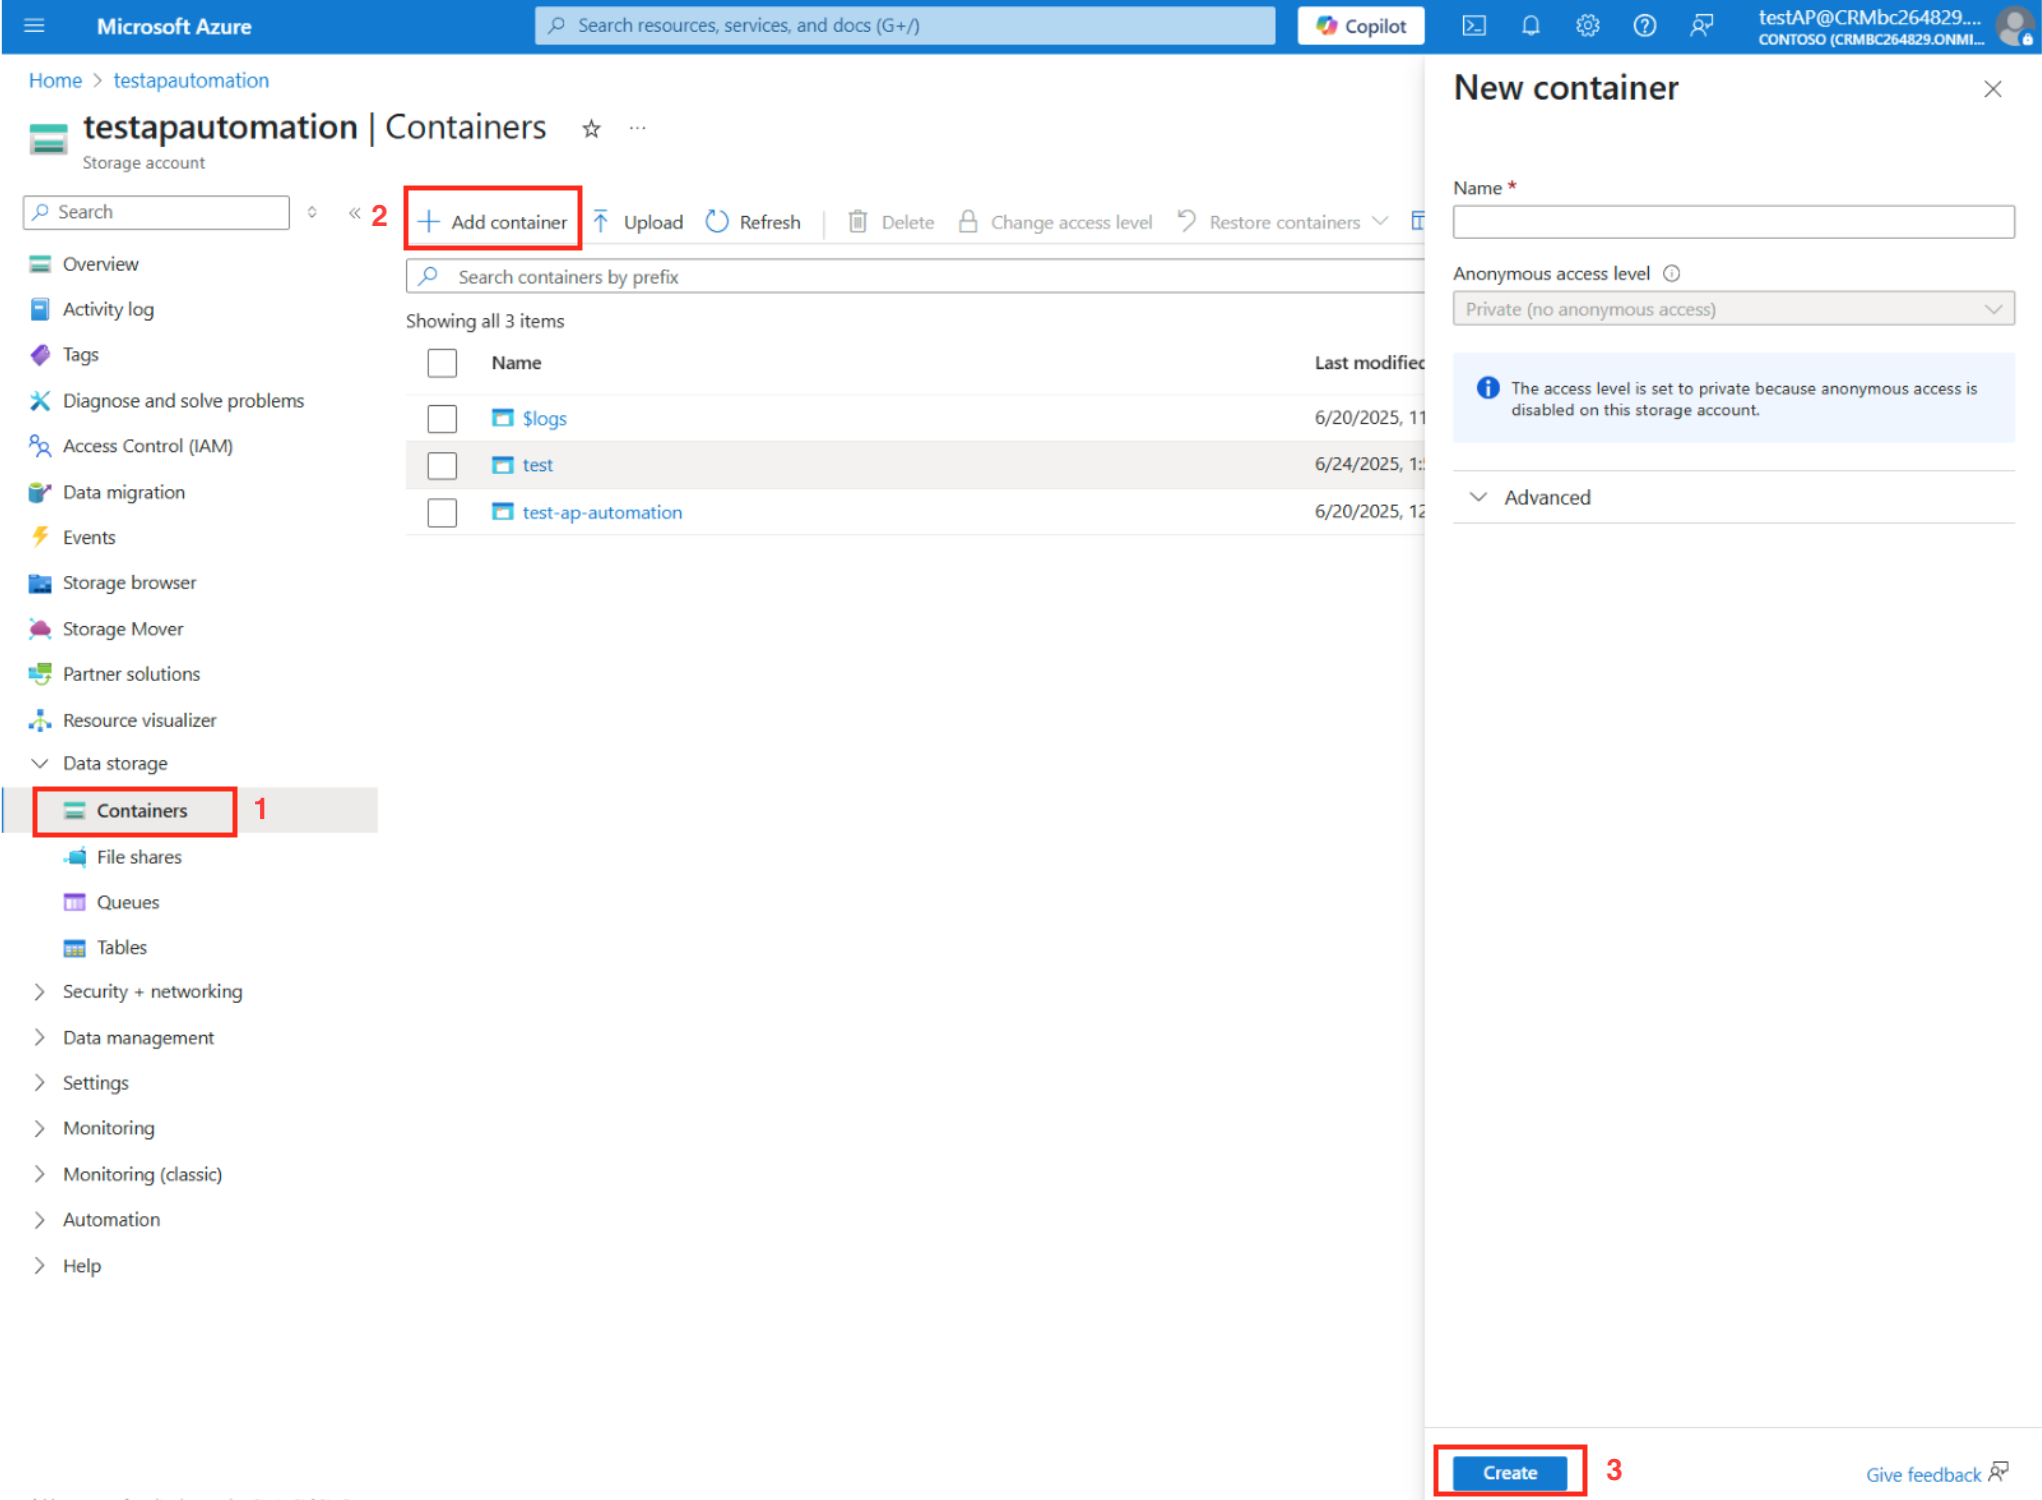
Next, from within the storage account Home > (storage account name), create a blob container.
-
From the main menu, expand Data storage, and select Containers.
-
Click on Add Container. Give your new container a Name and fill out any other fields.
-
Click Create to finish creating your blob container.
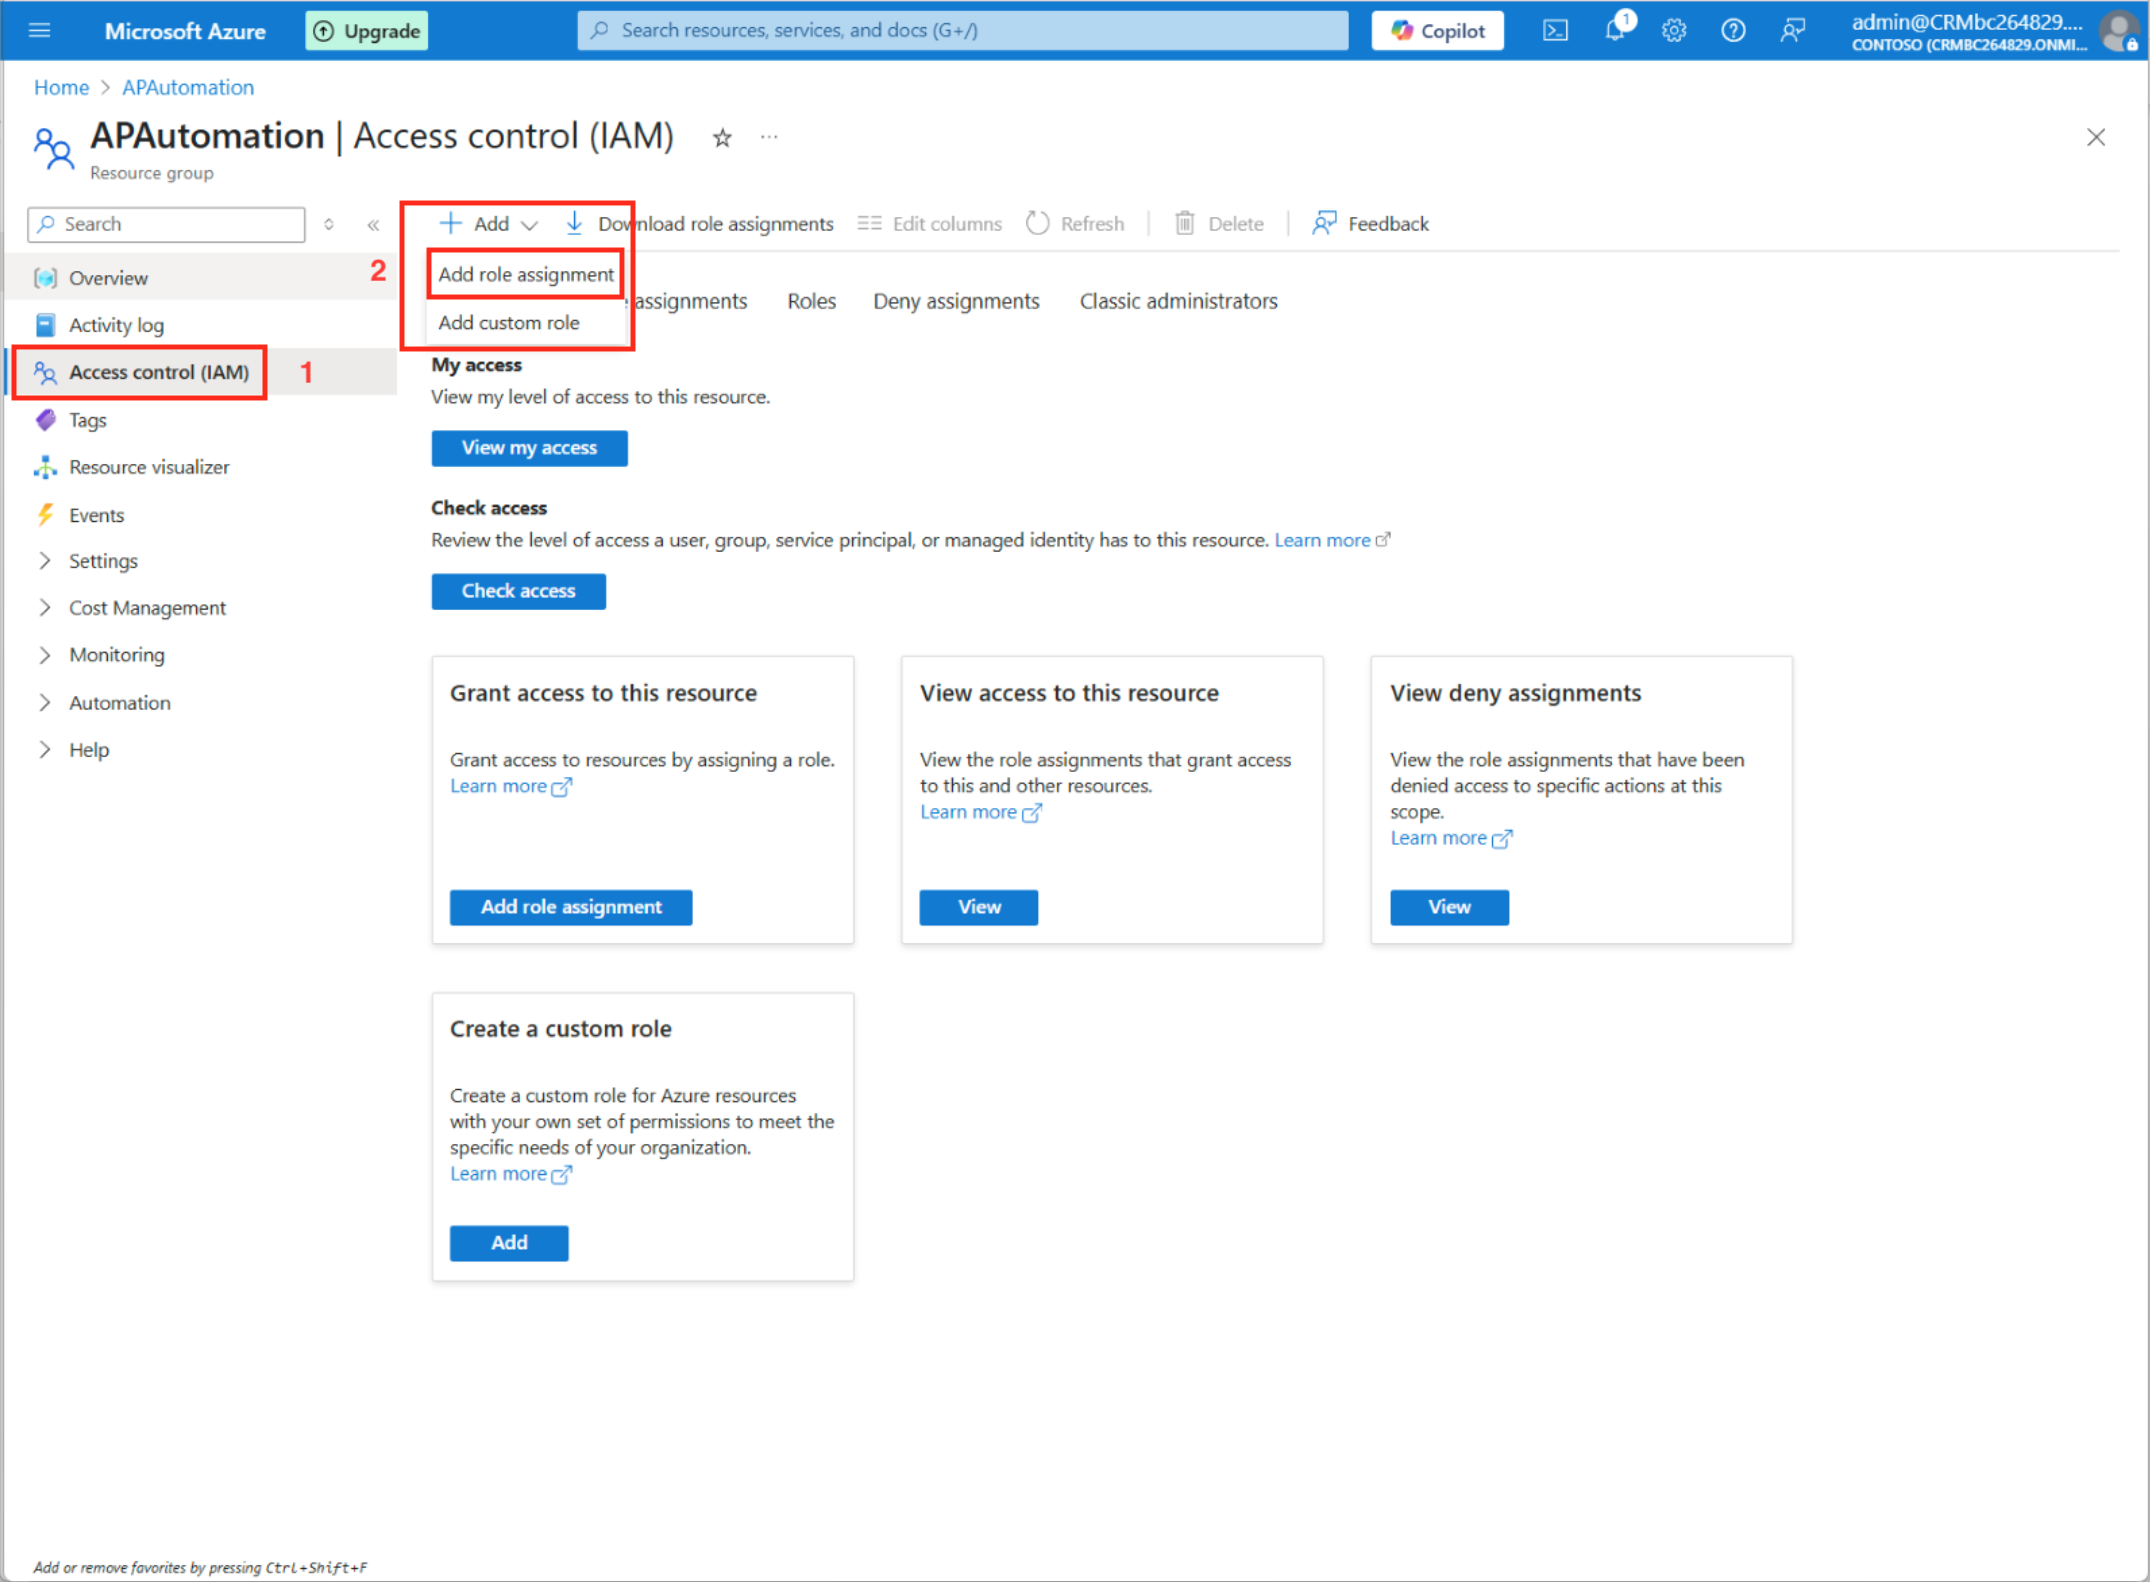
Grant the new user you created (from admin.microsoft.com) Contributor role access at the Resource Group level to ensure full access to storage resources using the admin account.
Go to Home > (user name)
-
From the main menu, select Access control (IAM).
-
Click Add to expand and select Add role assignment for Resource Group access.
-
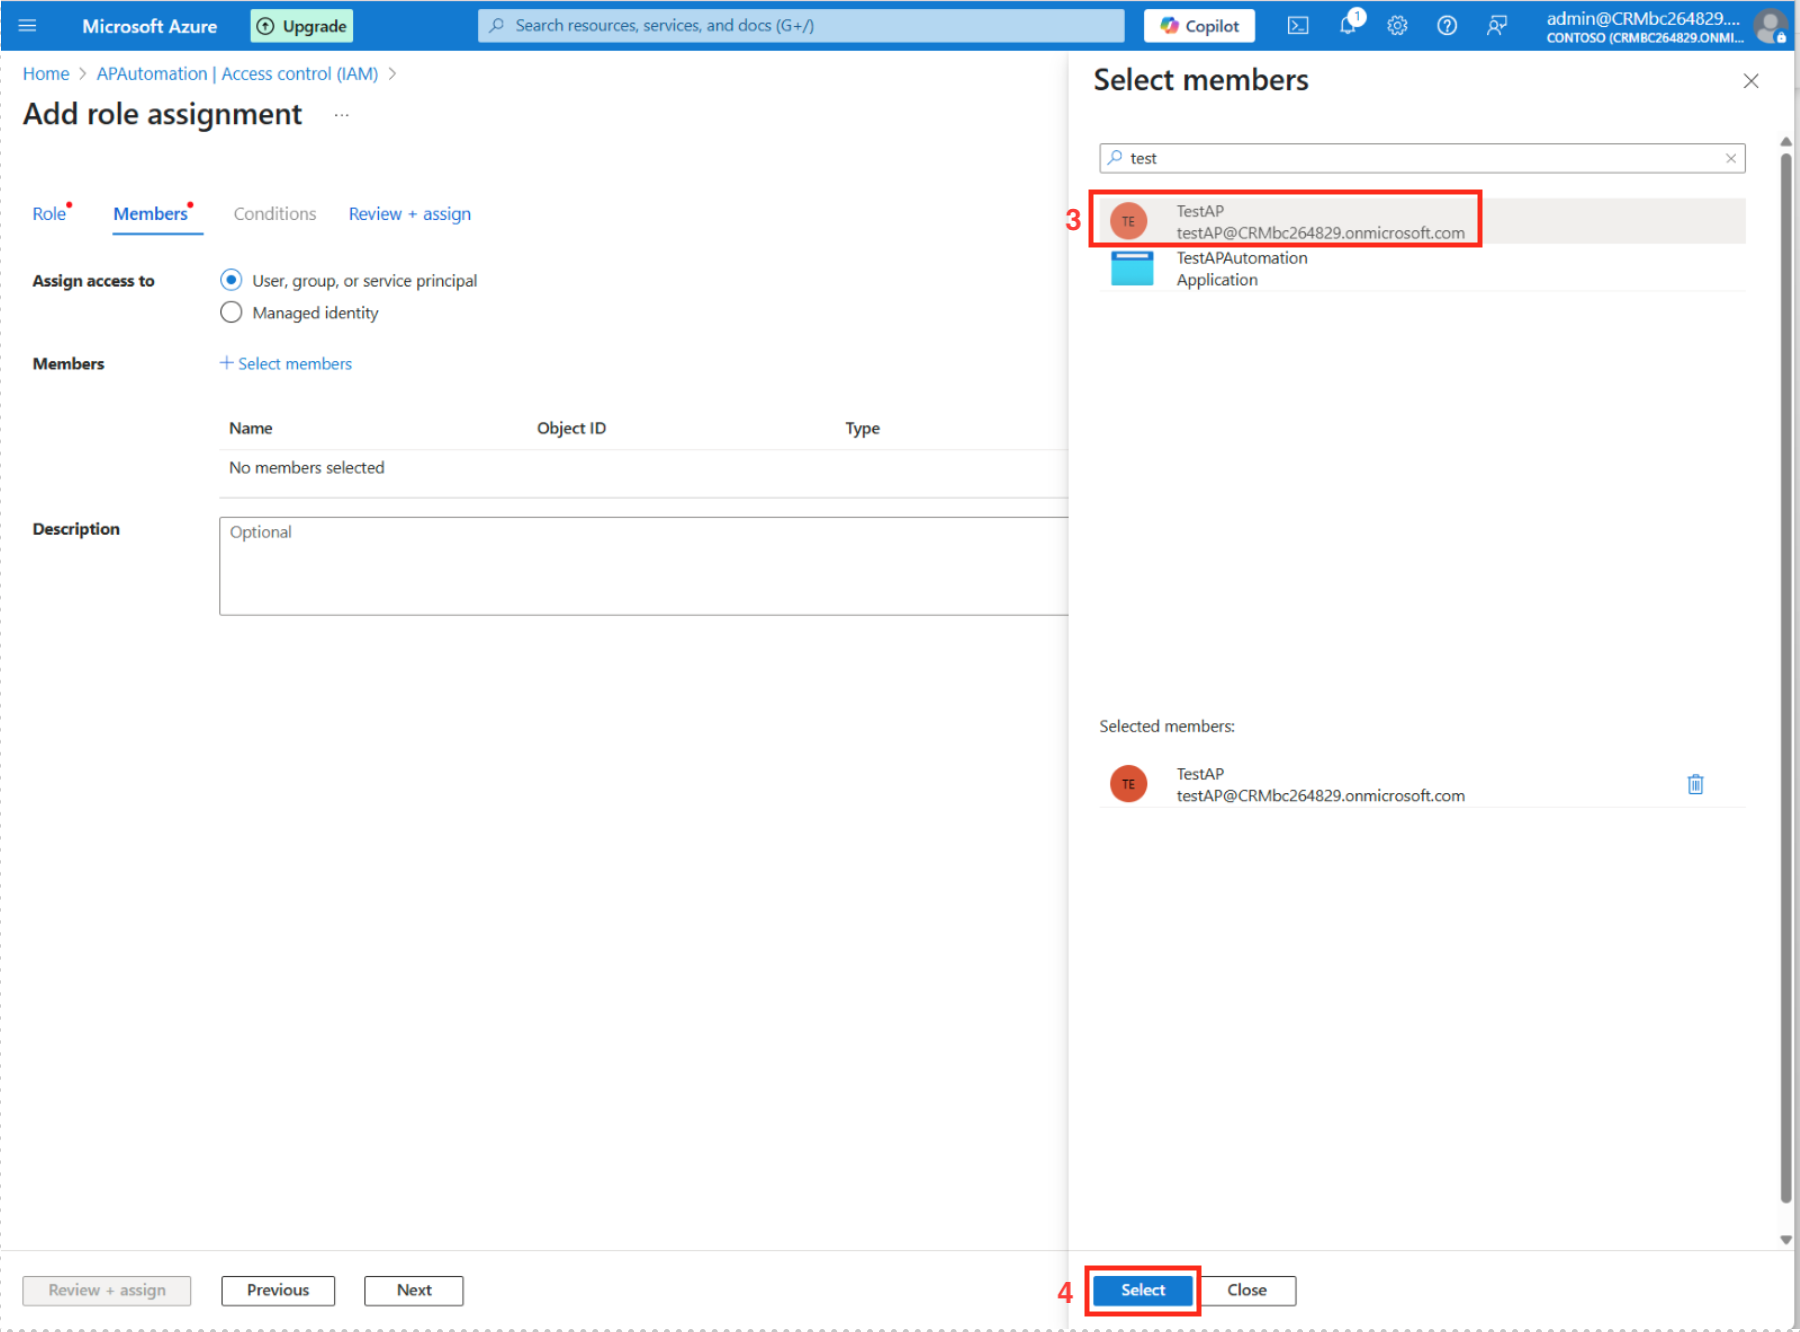
Select the user under Select Members. You will now see it under Selected Members:
-
Click the Select button to continue.
Test the Storage Account
Using your newly created account, check if you can see the contents of the Resource Group.
-
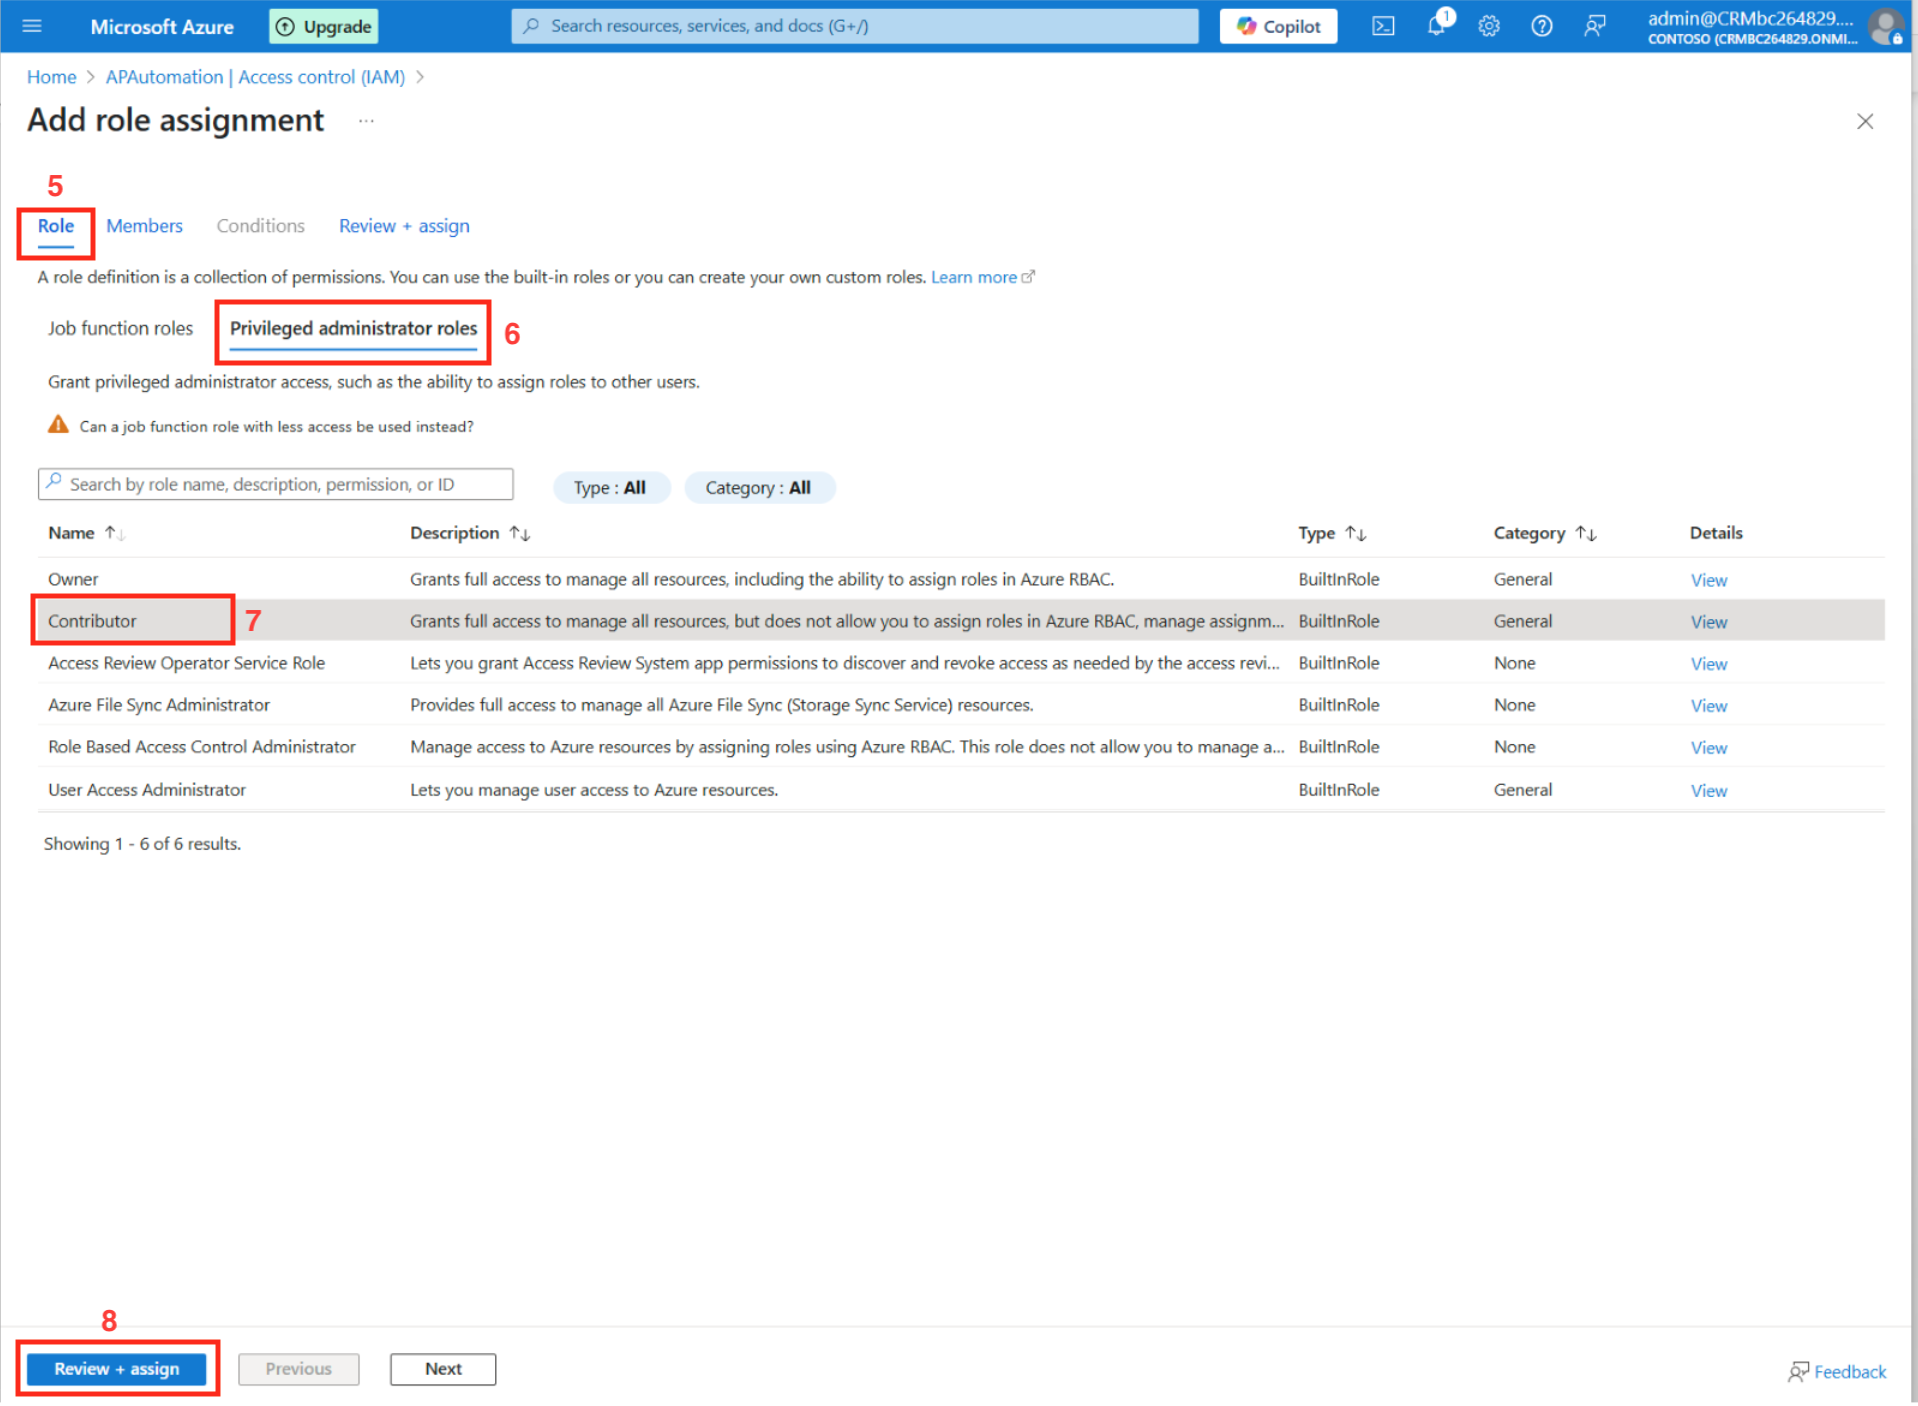
Under the Add role assignment, go to the Role tab.
-
Select Privileged administrator roles.
-
Check for Contributor role.
-
Click the Review + assign button to complete the configuration.
Generate Shared Access Signature (SAS)
Go to the container that you built under Storage accounts (Home > Storage accounts > (name of your container) and go to the settings section for Shared access signature (SAS) to generate Shared Access Tokens.
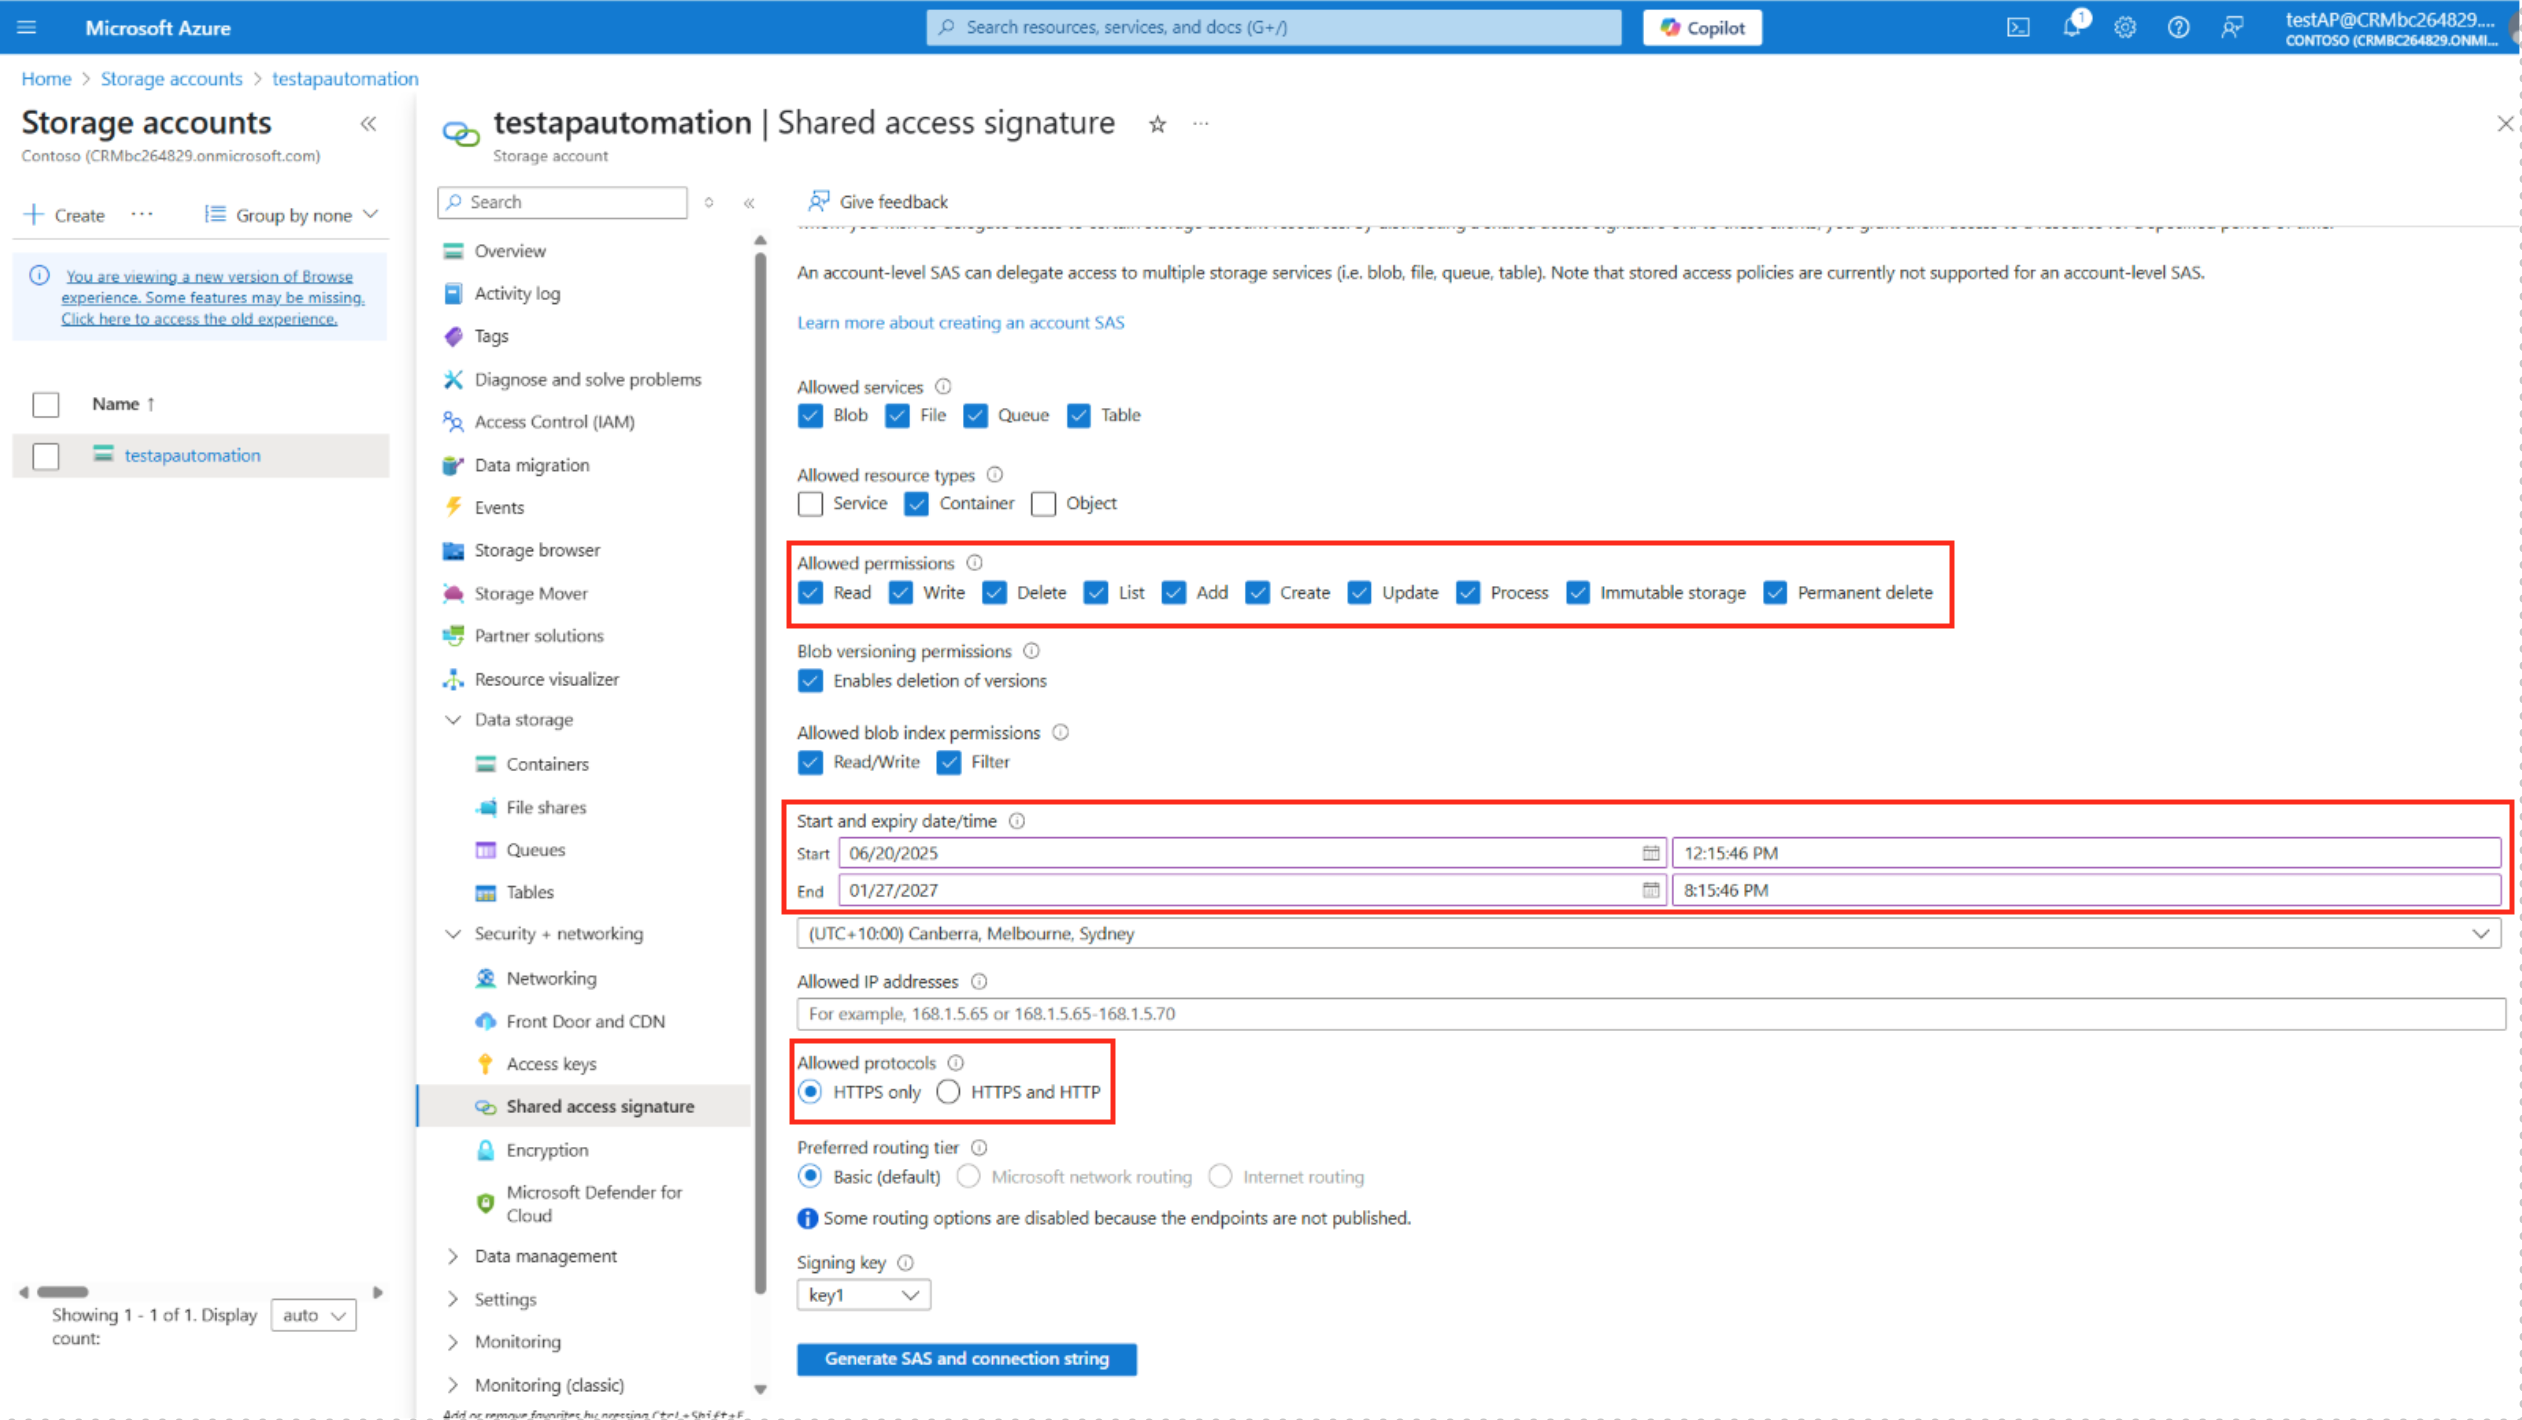
Check all the permissions (all checkboxes ticked) in Allowed permissions.
In Start and expiry date/time, make sure the expiry date covers a desirable length.
In Allowed protocols, you can select HTTPS only (highly secure), but if you have servers in a mixed environment, select HTTPS and HTTP (WARNING: HTTP is not secure).
Create Access Key
In the resource level, go to Security + networking > Access key, and create a new access key. Your Shared Access Signature (SAS) token is used for securely accessing Azure Blob Storage.
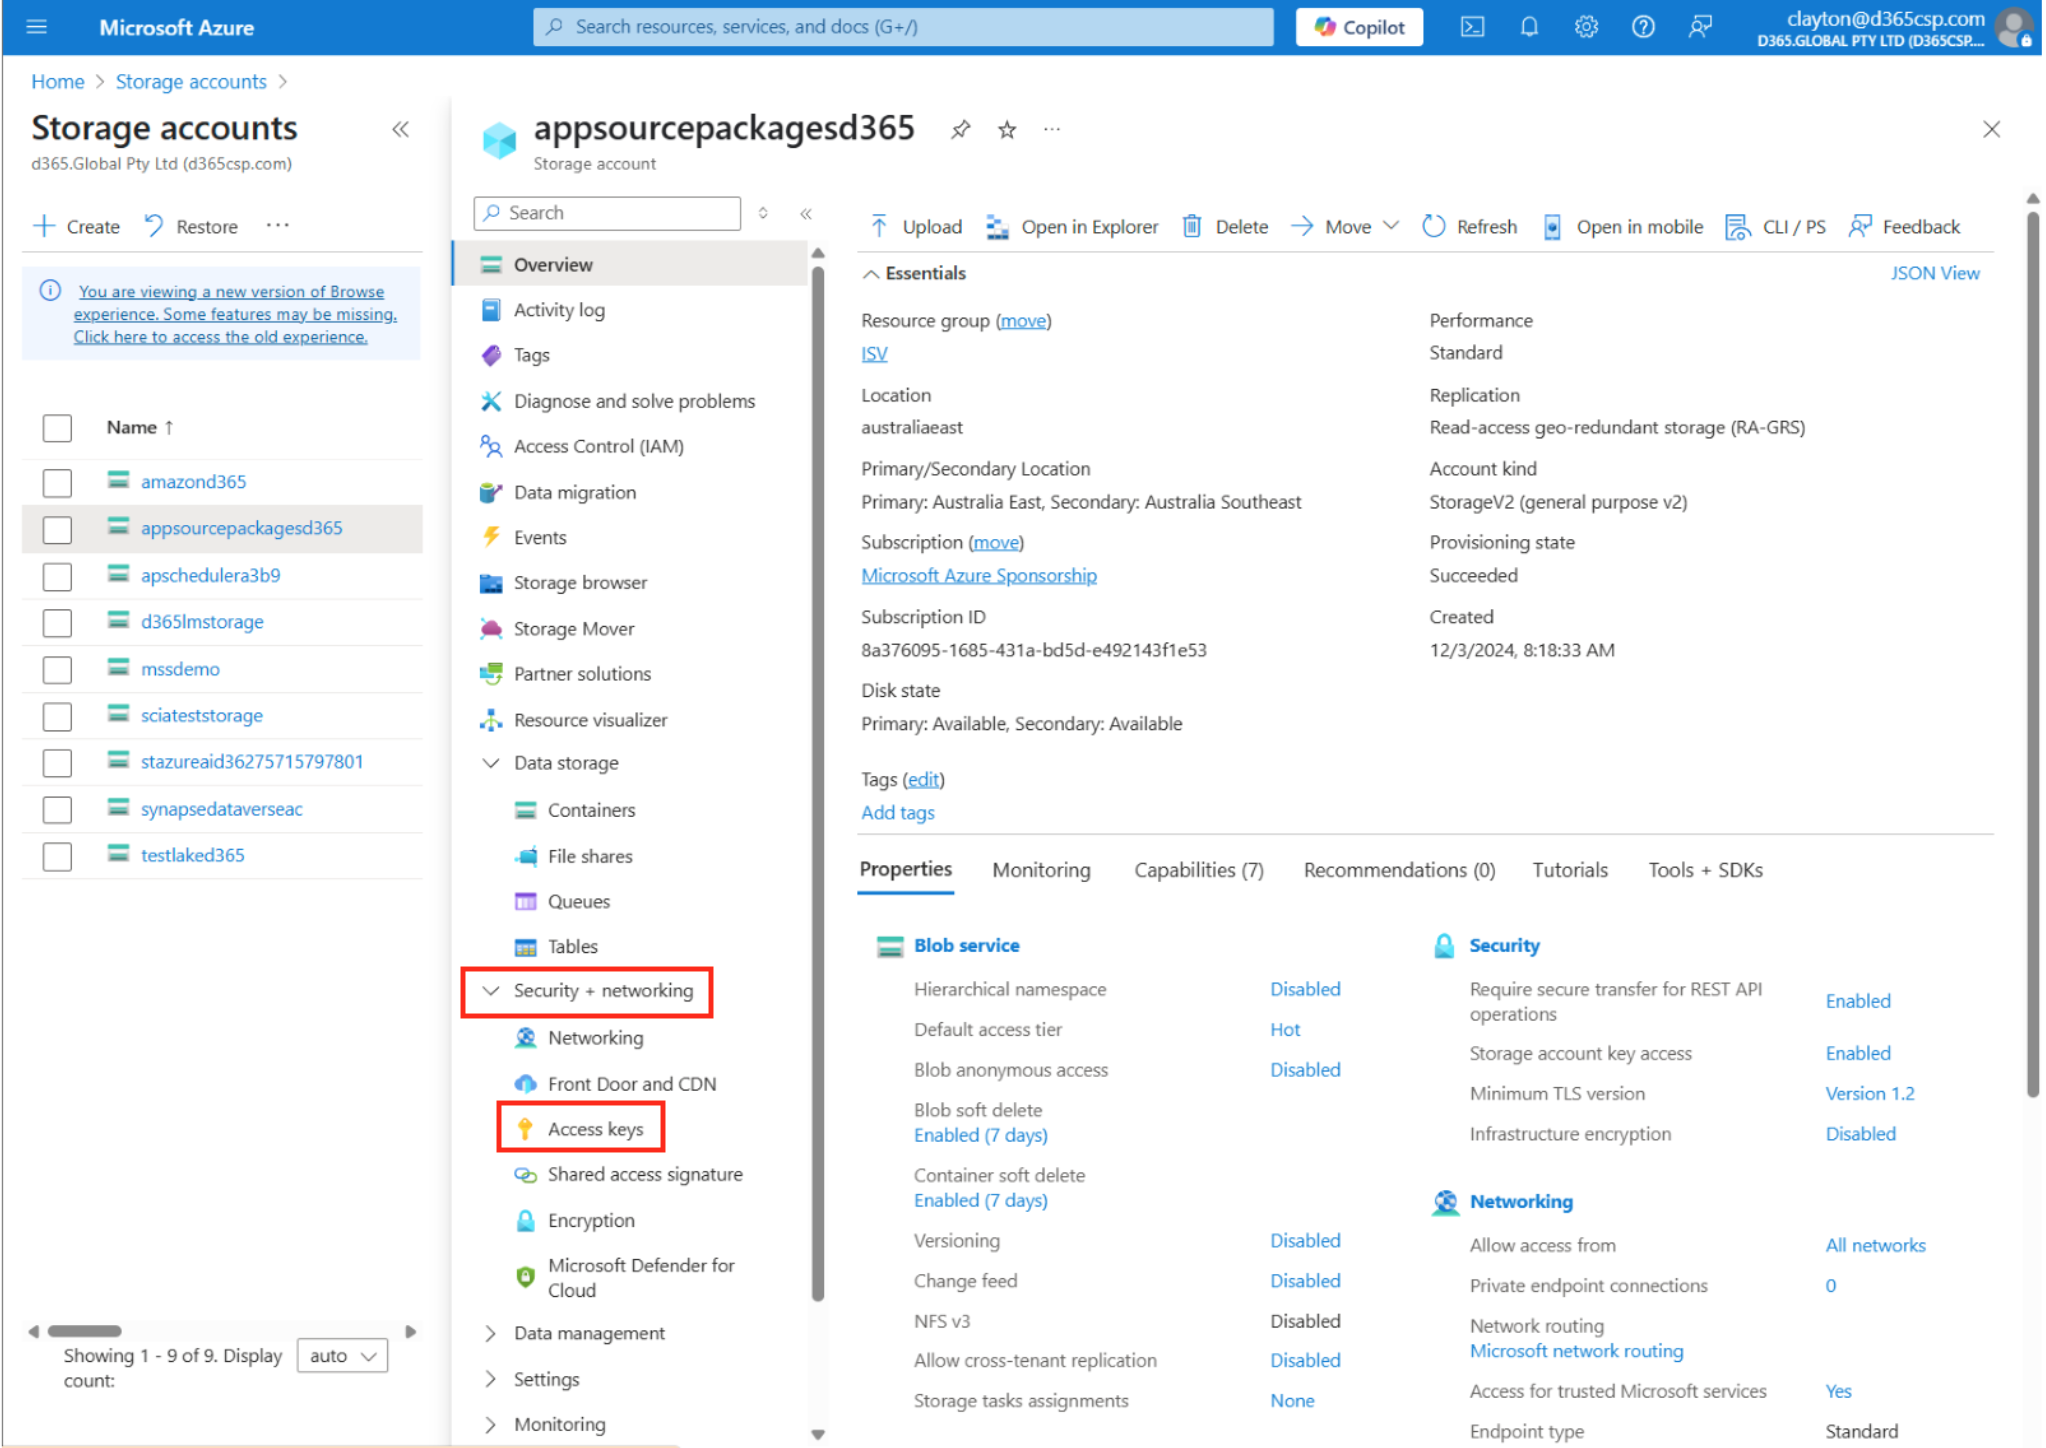
Ensure to store all these values securely so that it does not expose your access key.
This is the setting for the access key.
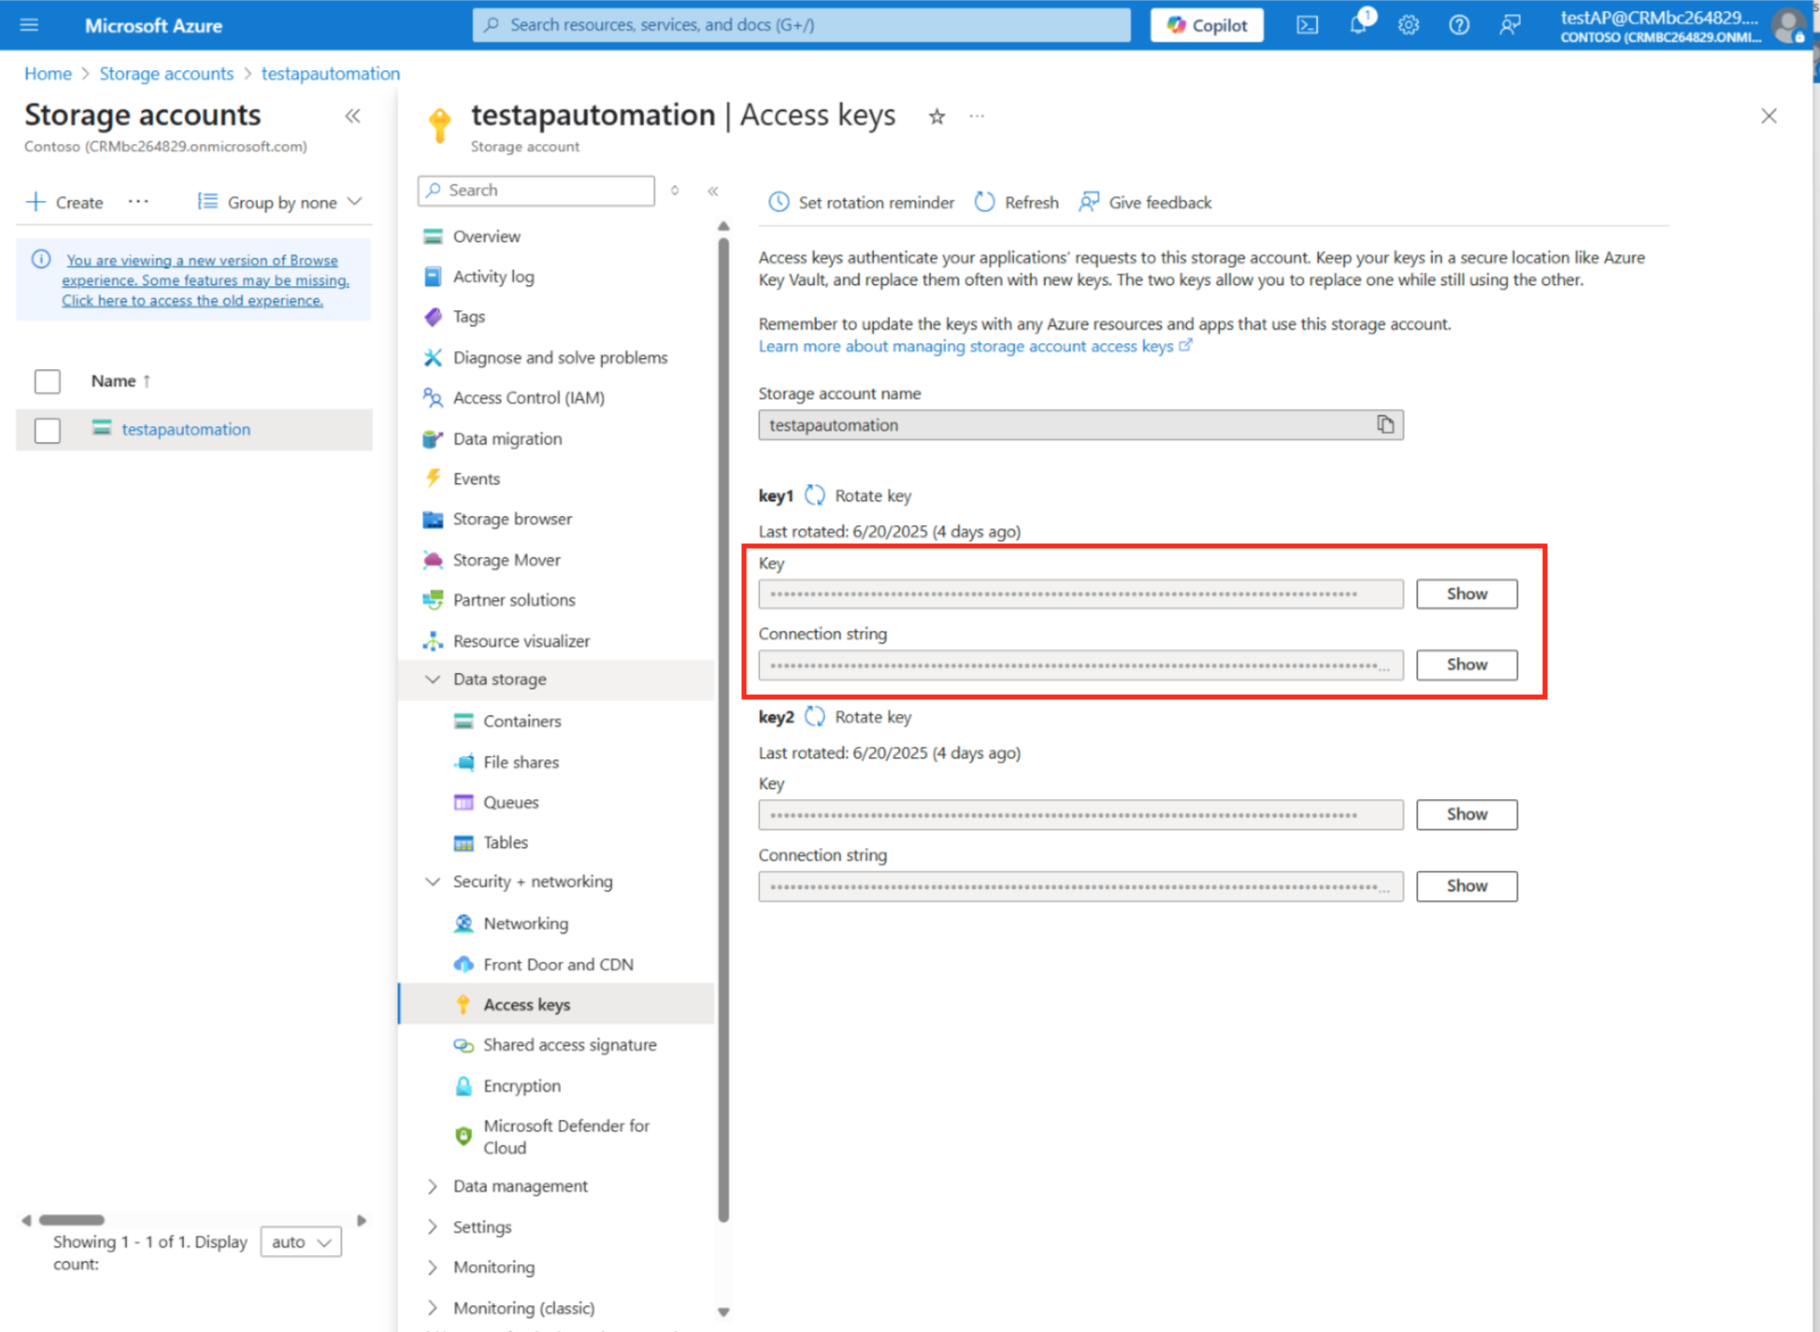
The access key token is a crucial security mechanism that grants controlled and time-limited access to your invoice files stored in Azure Blob Storage, enabling external or integrated AP automation services to securely process and manage those documents.
Configure Document Intelligence
We will now configure Document intelligence. This refers to the powerful capability to automatically extract, understand, and process data from various types of documents. Unstructured or semi-structured information is transformed into structured data for AP automation processes.
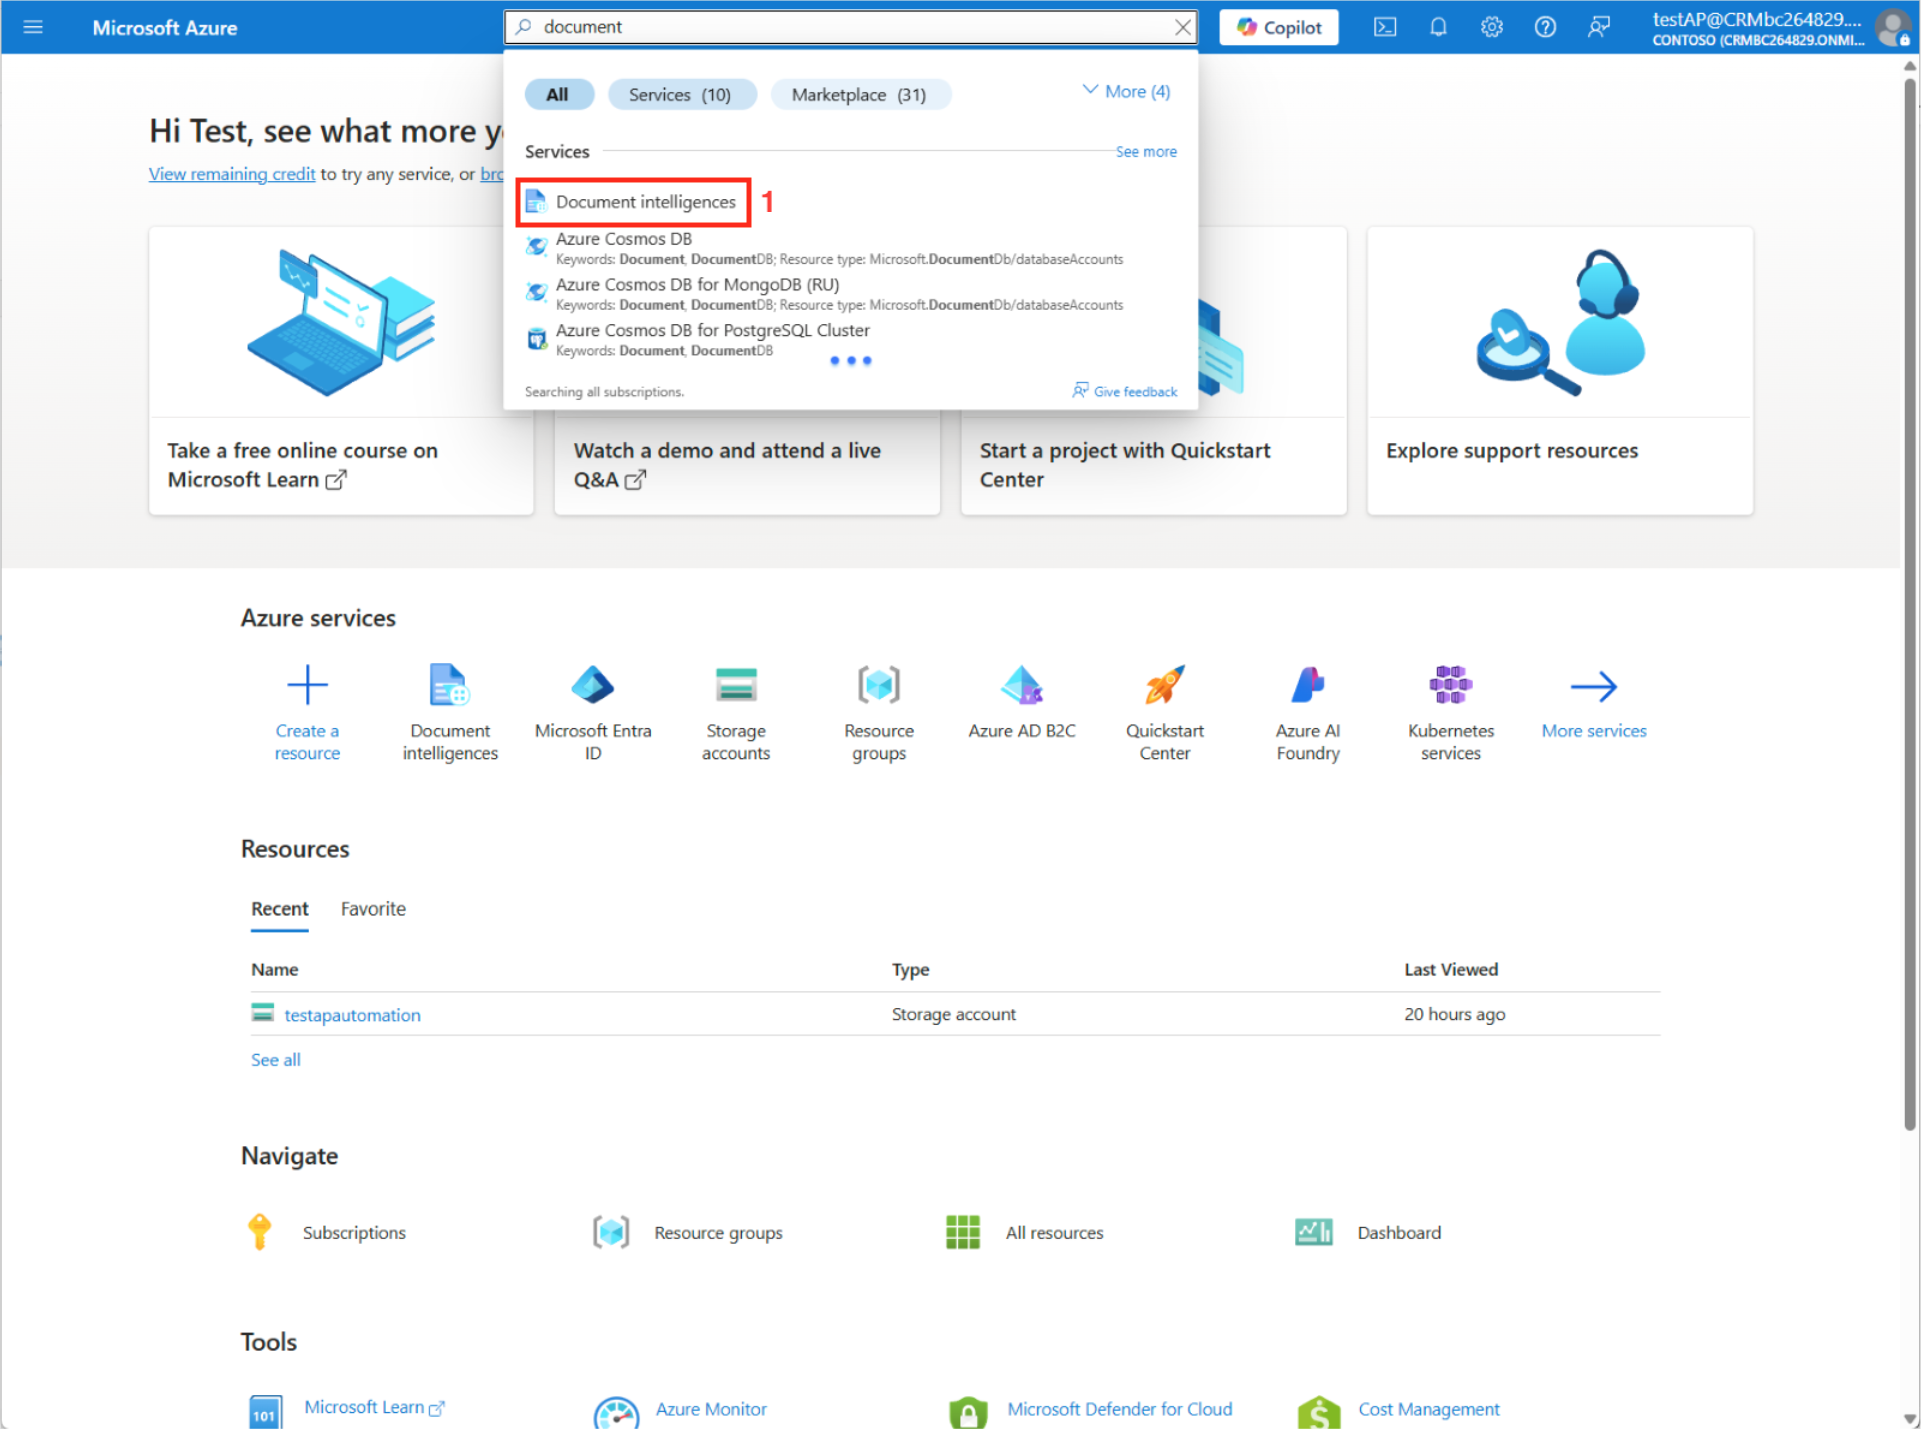
- In the document search bar in the Home menu, search for Document intelligence. (https://portal.azure.com/#create/Microsoft.CognitiveServicesFormRecognizer ).
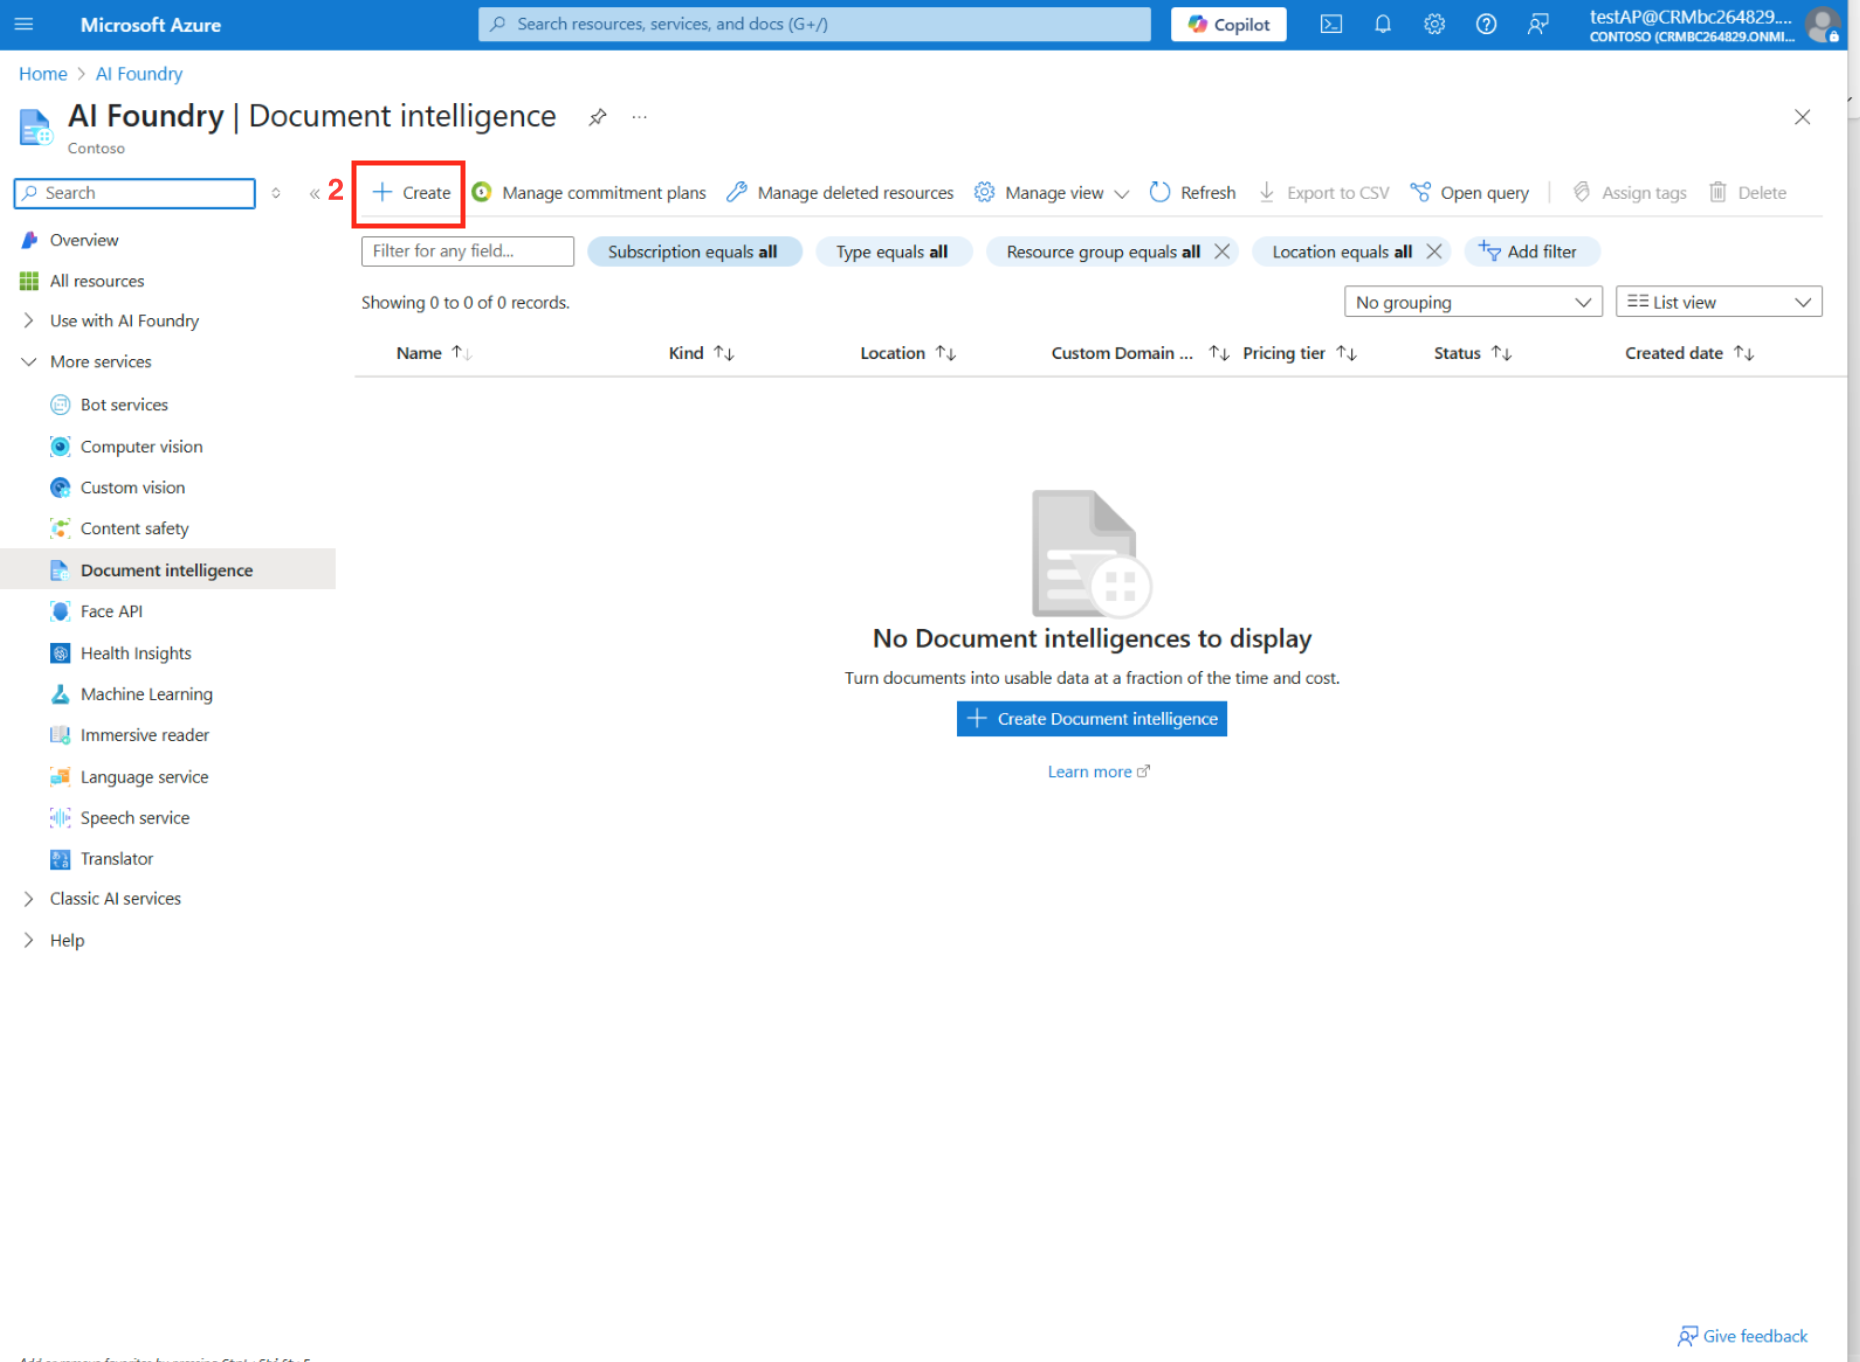
From the search, you will go to Home > AI Foundry under More services and Document intelligence.
- Create the Document intelligence resource and collect the required keys:
- Endpoint URL
- Ocp-Apim-Subscription-Key (Key 1 or Key 2)
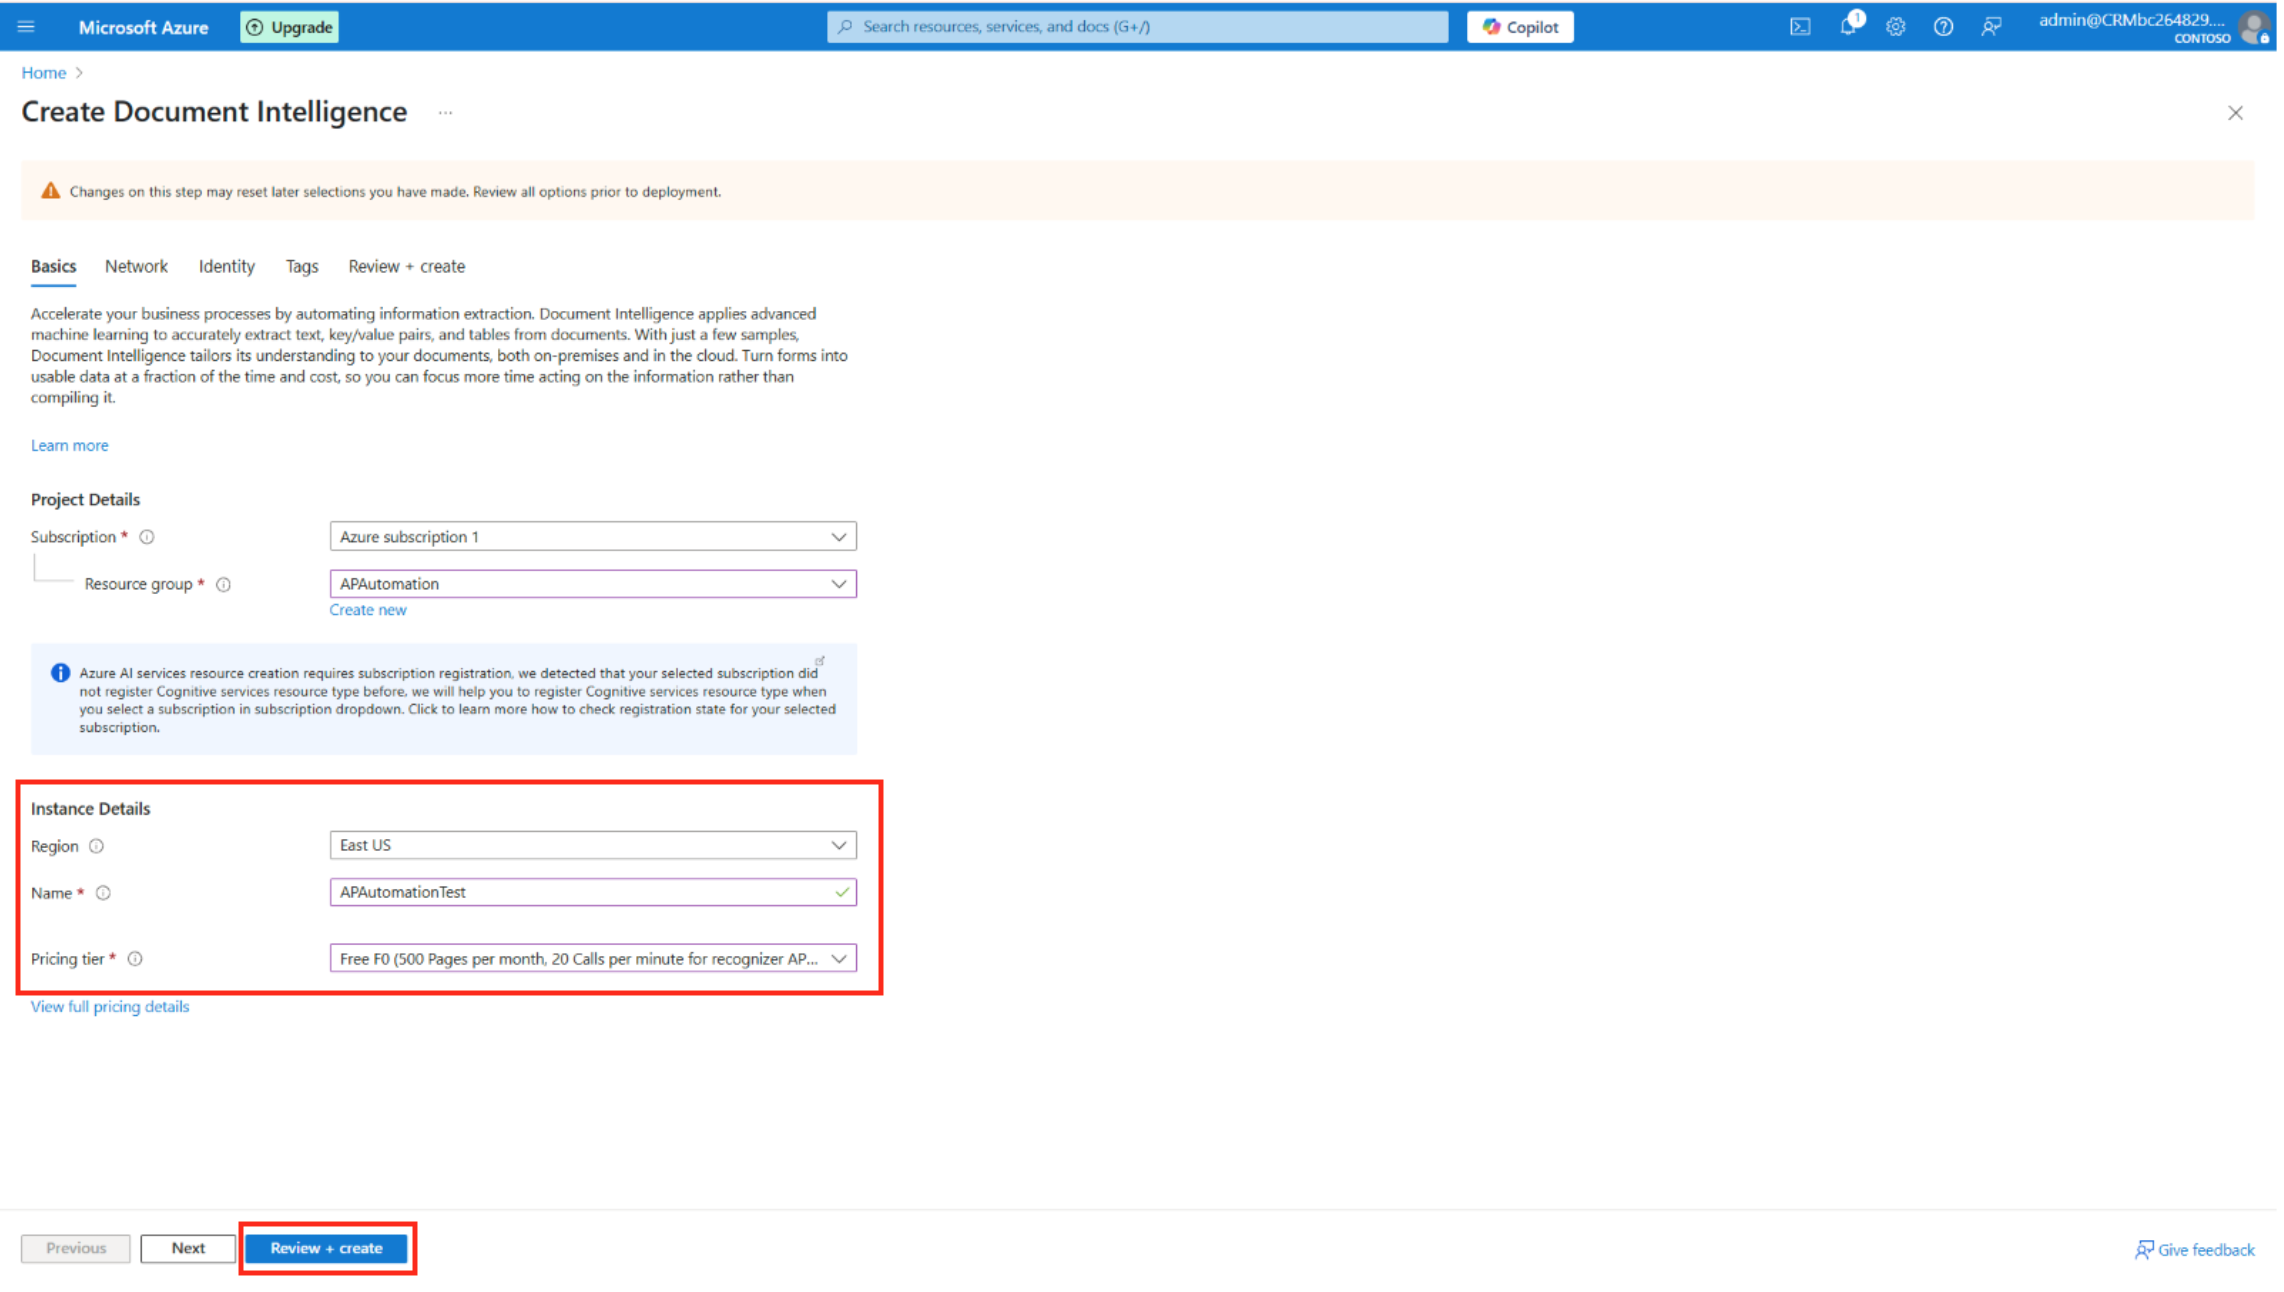
In the Instance Details section:
In Region, put in the closest location to you.
Type or select the Name of your instance.
In Pricing Fee, choose the Free tier first. When usage increases, use a paid tier.
Click the Review + create button.
Collected Information Review
At this point you should have collected the information from these environments:
- Endpoint URL
- Ocp-Apim-Subscription-Key (Key 1 or Key 2)
- Shared access tokens (SAS)
- Access key
- Shared Email Address
