Configure Storage
Configure Storage Type
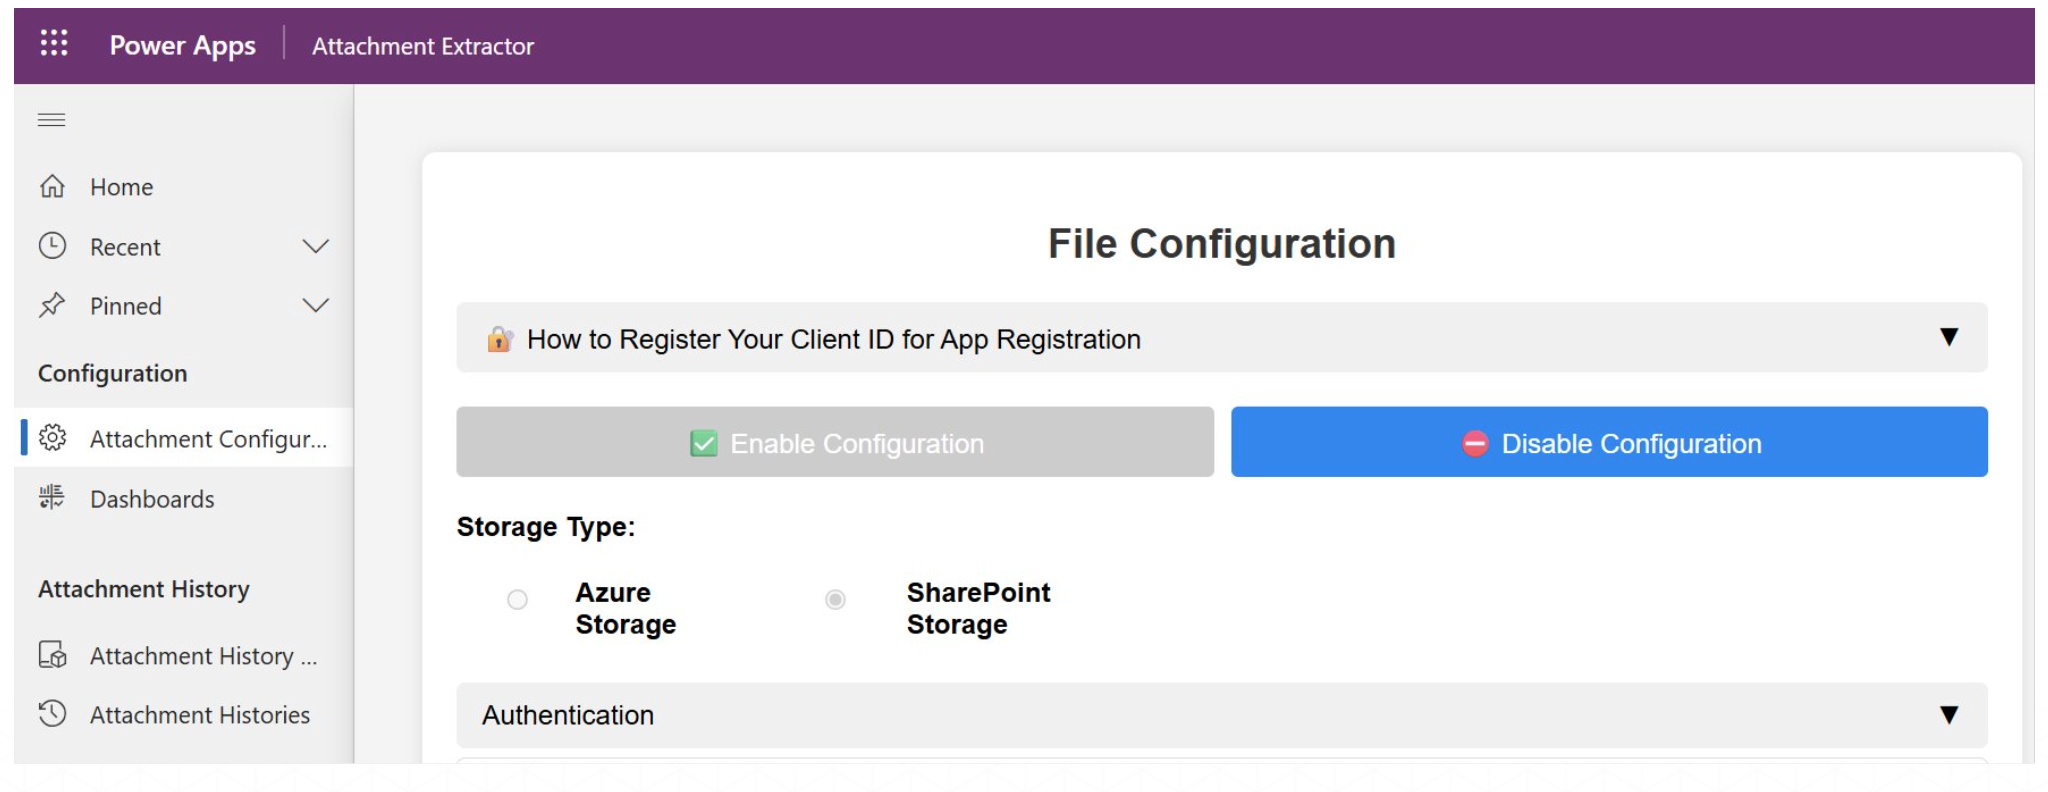
Once the solution is imported, perform the following steps to configure storage connection.
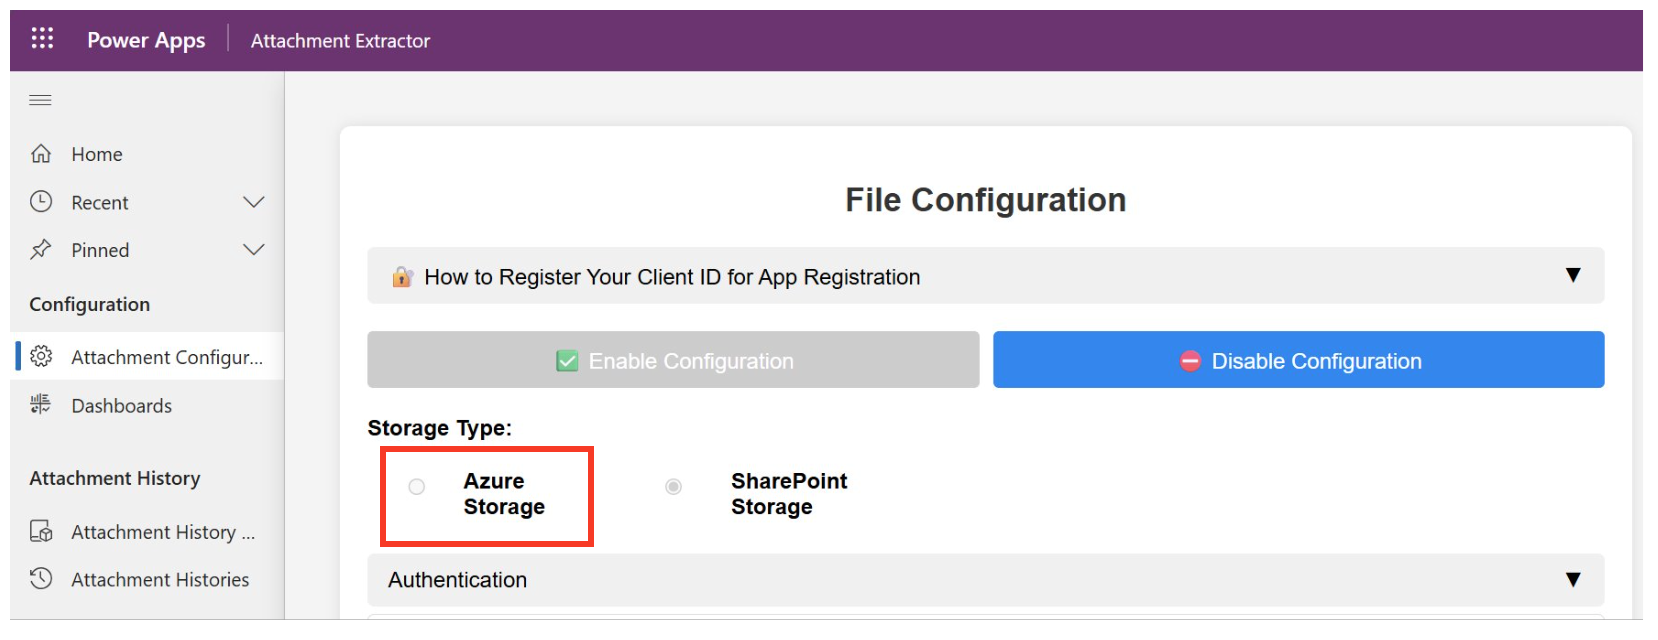
- Open Attachment Extractor App
- Click on Attachment Configuration page
- Choose the storage type: Azure Storage or SharePoint Storage.
Configure SharePoint
Enable SharePoint Storage option to configure SharePoint as the storage type.
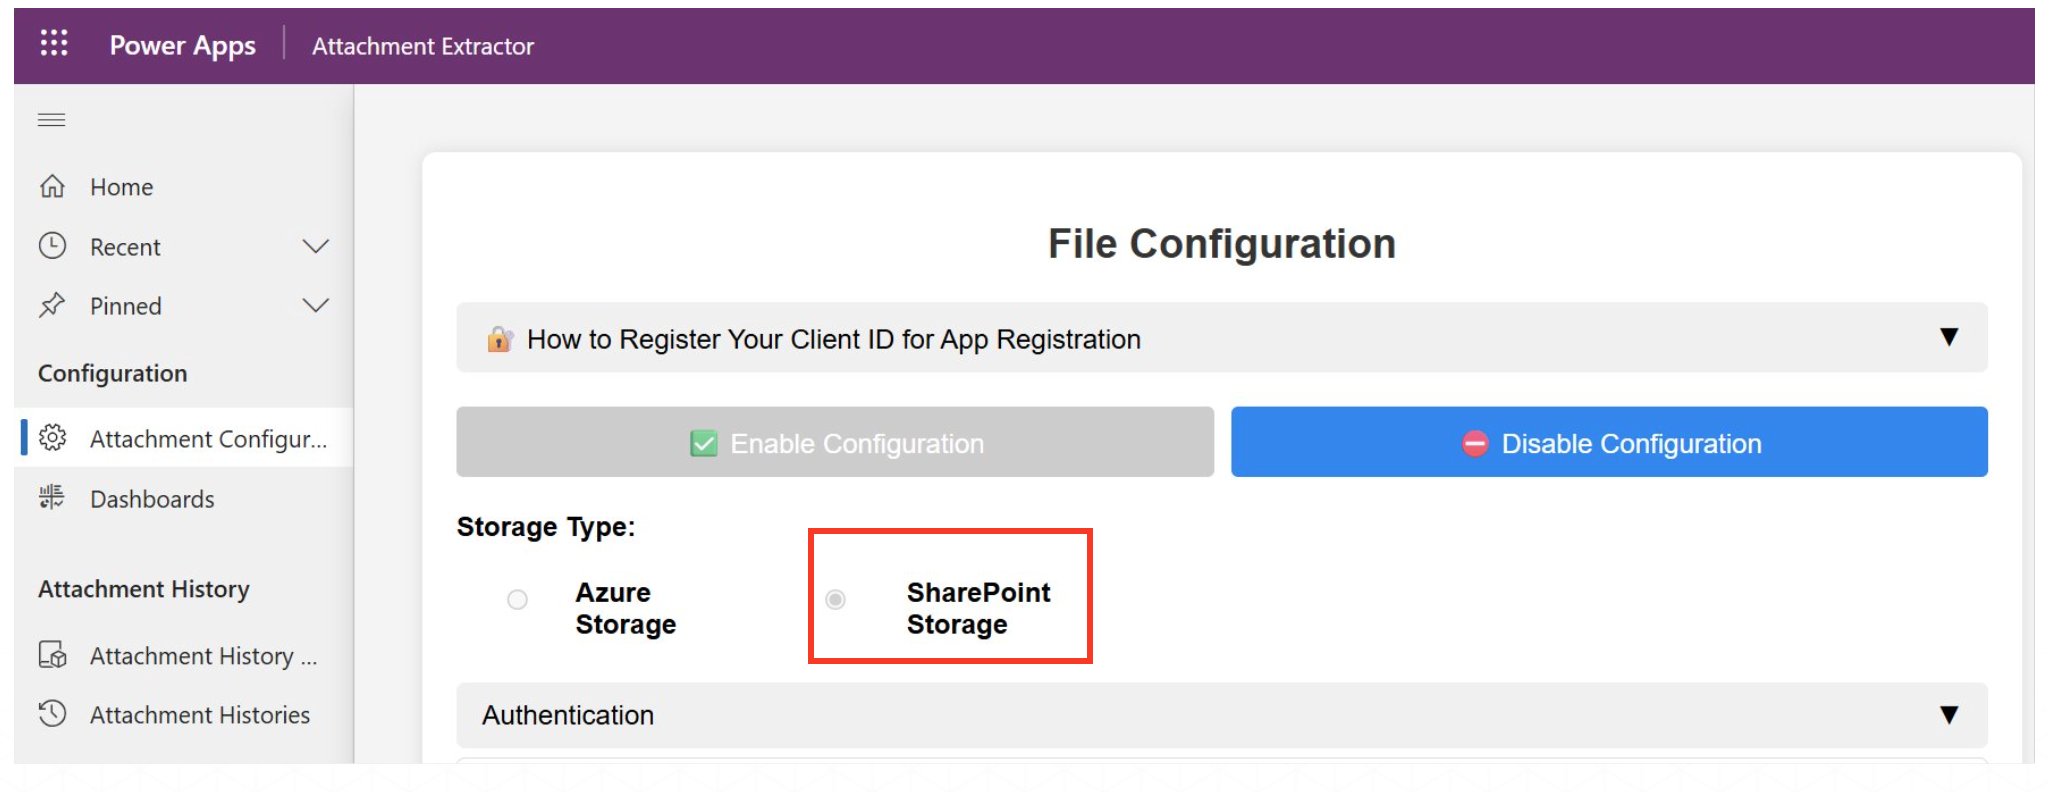
The following steps are required to complete the configuration process for SharePoint Storage.
- Authentication
- Azure SharePoint Configuration
- Additional Configuration
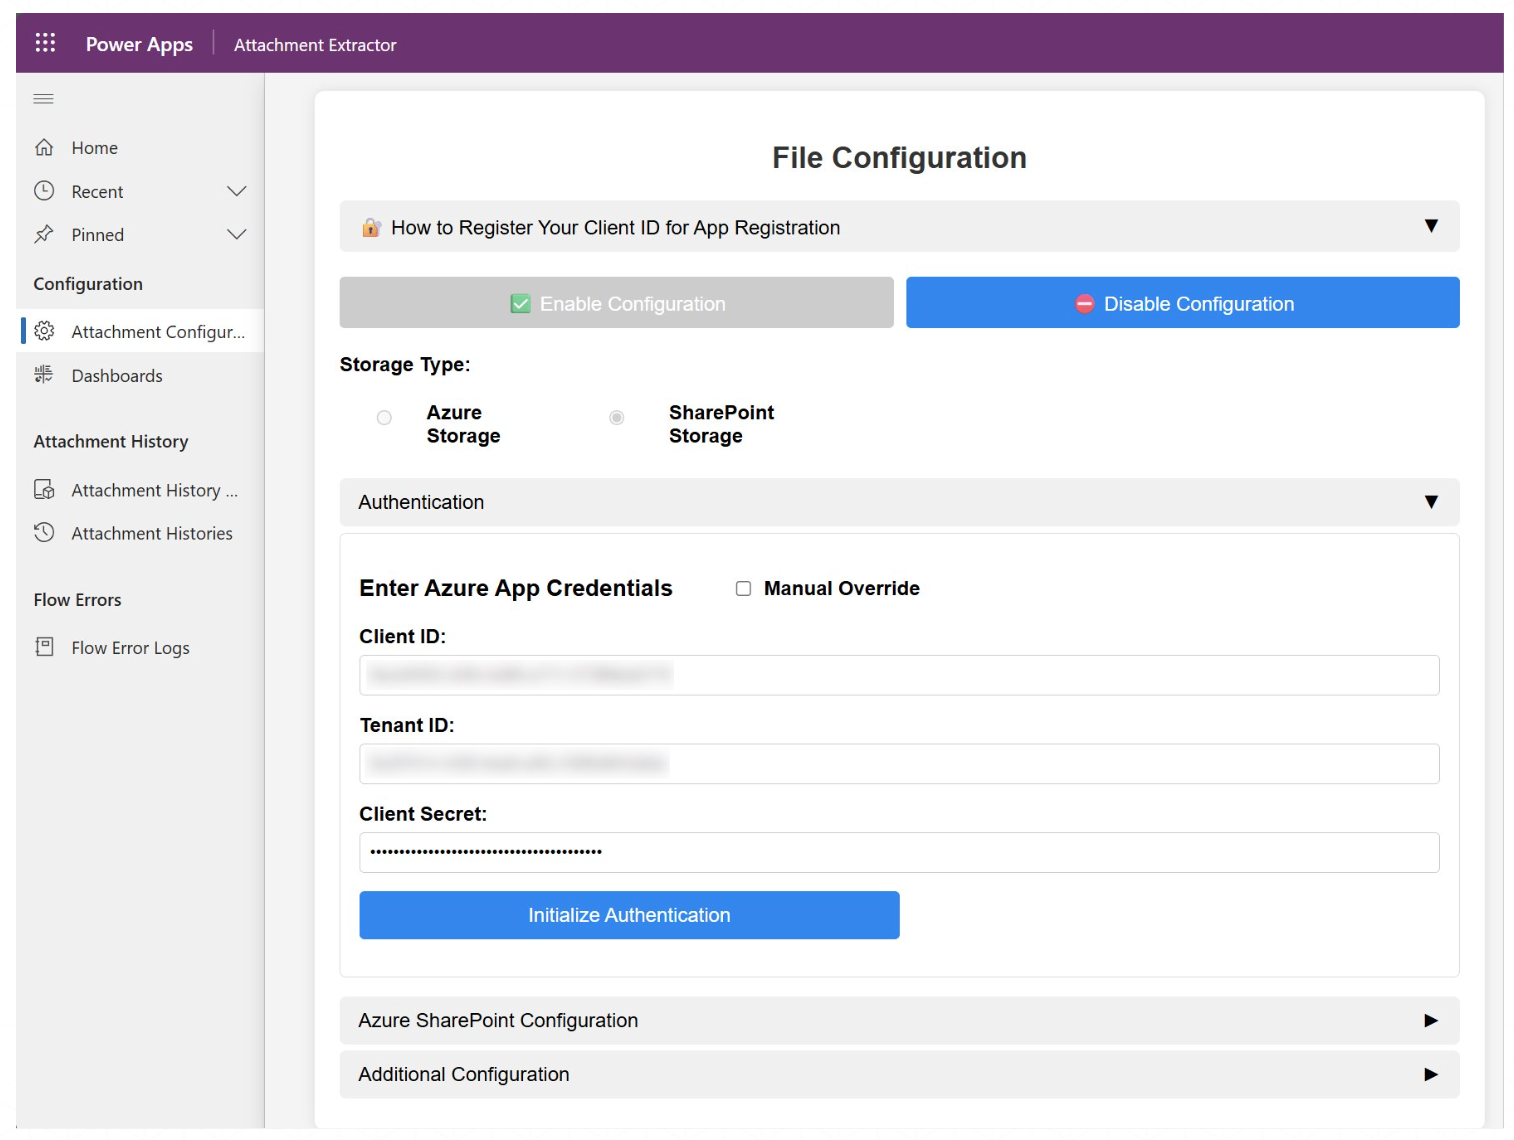
Authentication
For Authentication, enter Azure App Credentials such as:
- Client ID
- Tenant ID
- Client Secret
If not already registered, you can get the credentials by registering the app for SharePoint with required permission and then enter the required information.
Configure Credentials (Part 1)
In this section, we will configure the SharePoint credentials.
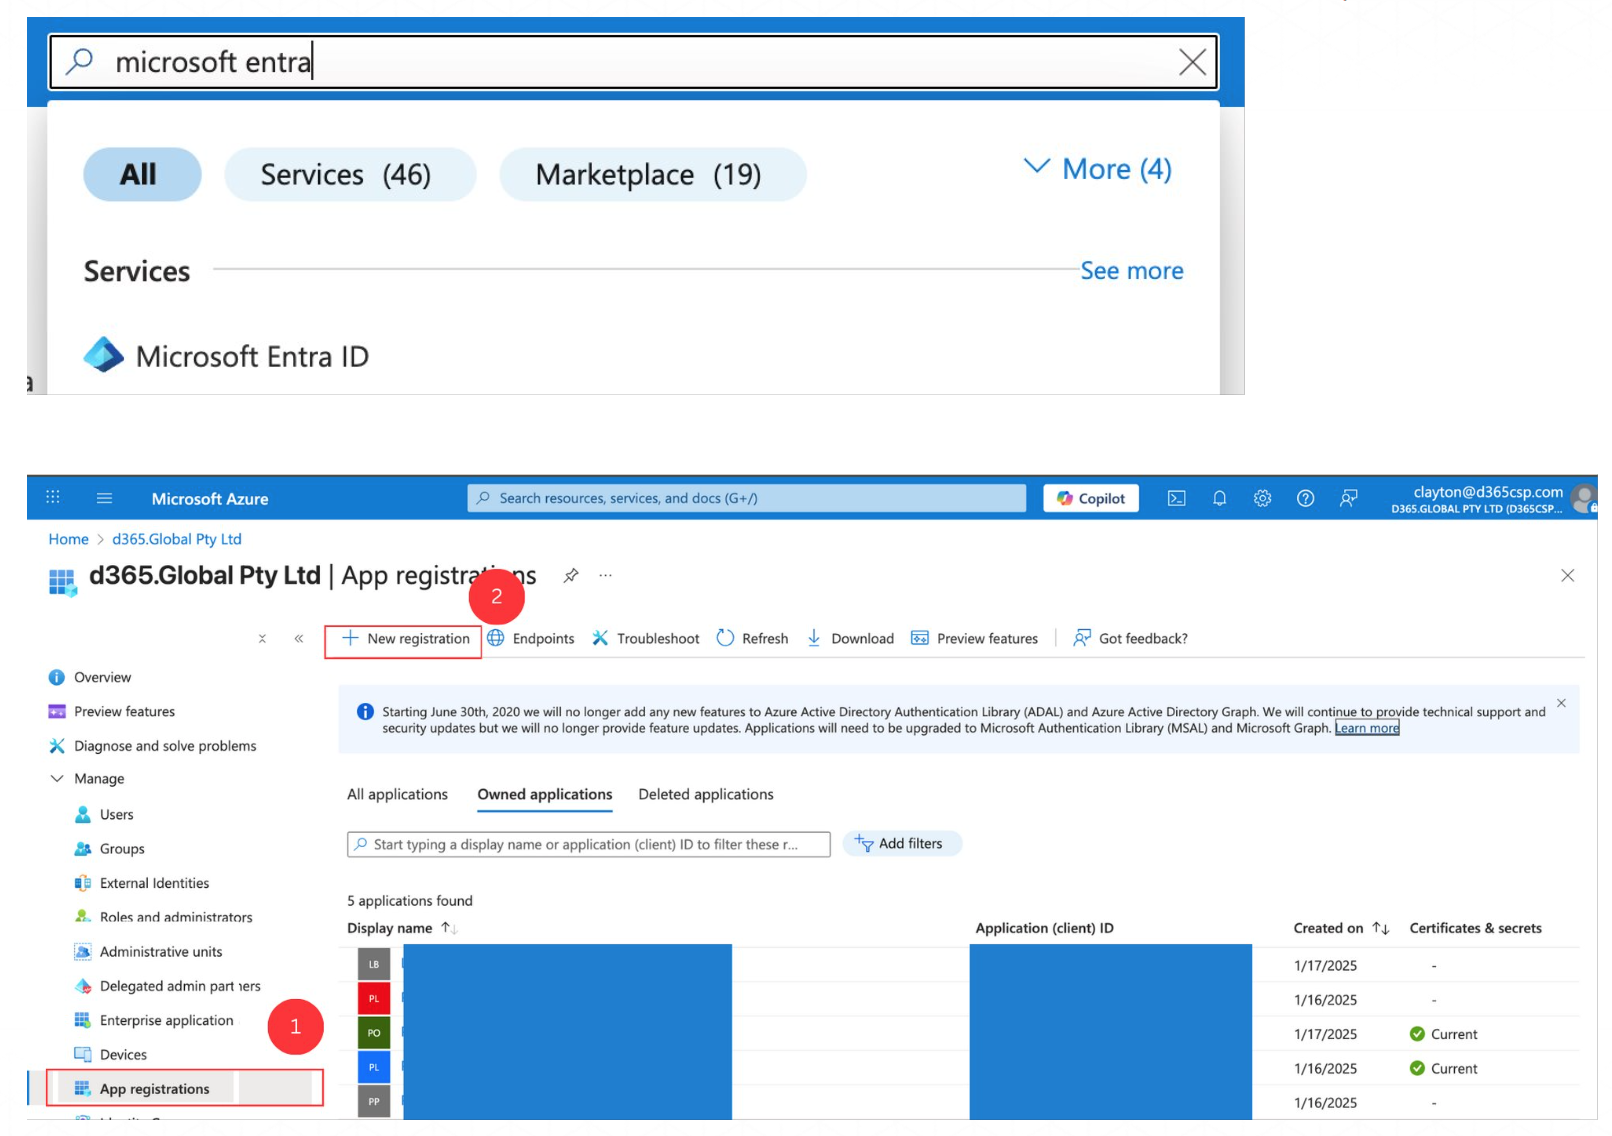
- Search for Microsoft Entra ID in portal.azure.com.
- Select the manage dropdown tab and select the app registration.
- Create a new registration or use an existing registration.
Configure Credentials (Part 2)
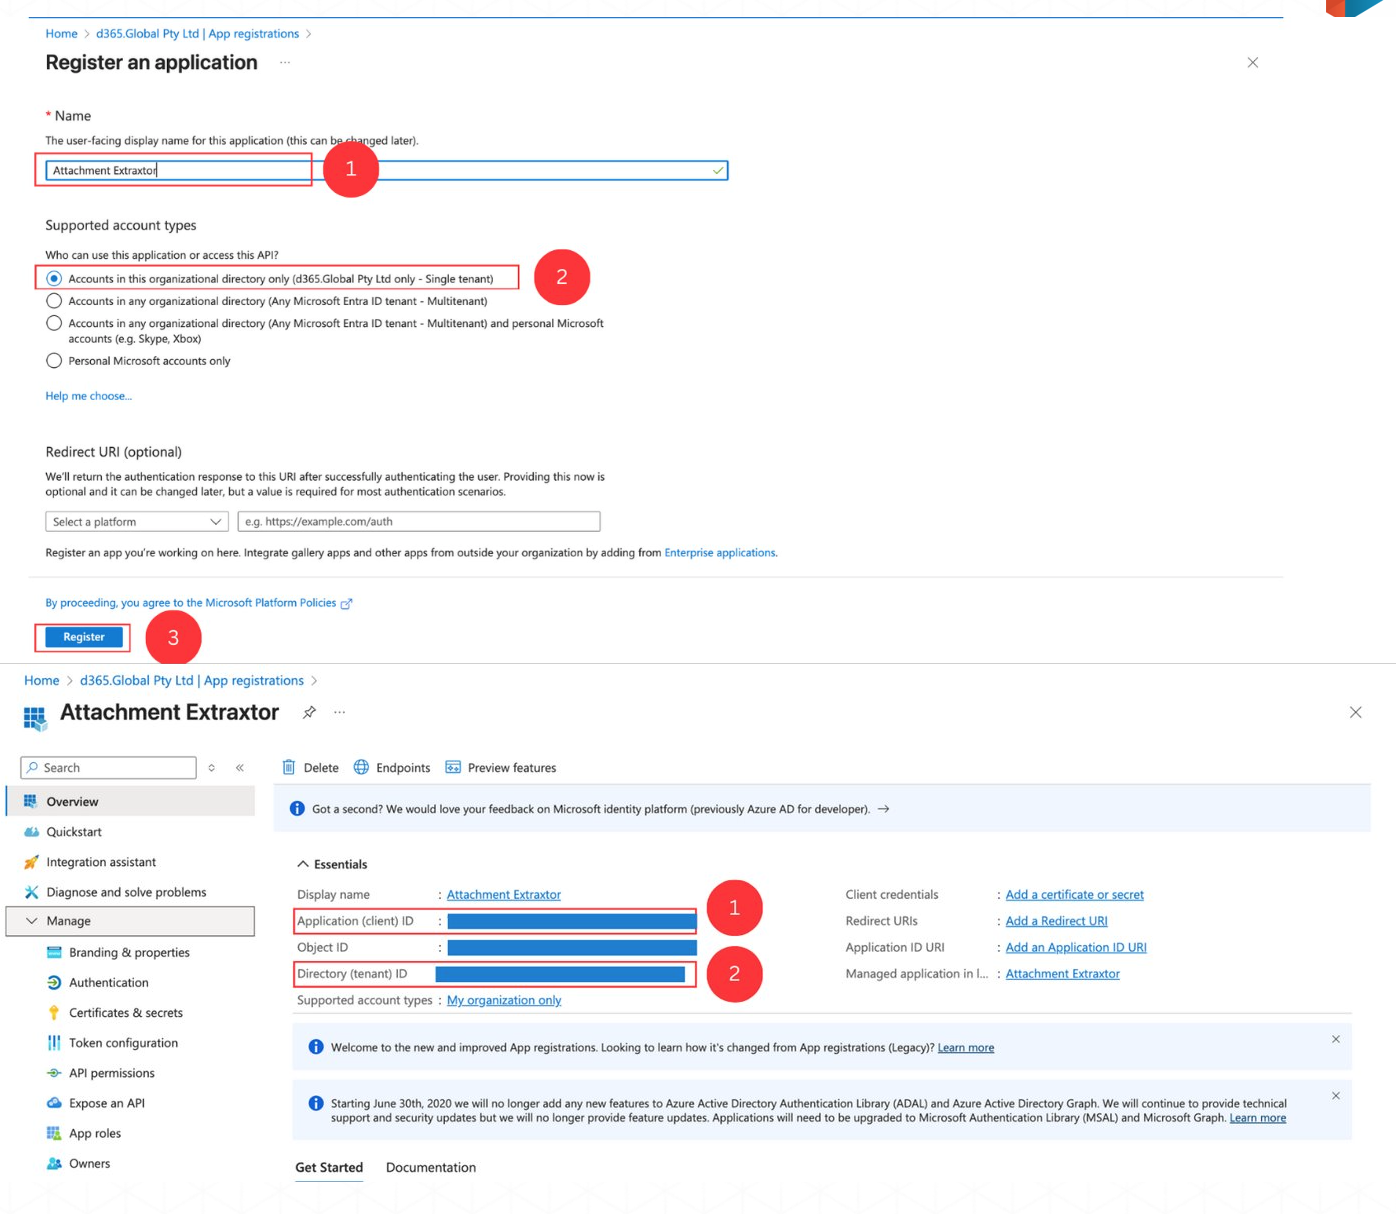
- Enter the name for the app registration that will be easy to remember.
- Select the single tenant option for the supported account types.
- Click the Register button.
- Once it has loaded, copy the (1)client id and (2)tenant id and save it somewhere for reference.
Configure Credentials (Part 3)
- Once the client id and tenant id is saved, head to the certificates and secrets in the manage dropdown.
- Click Create new secret and in Add a client secret enter a description that makes sense. Make sure to put a long expiry date and click the Add button.
- Save the client secret value, since it will only be shown once. Store it somewhere safe for future reference. Handwritten note or a secure external drive are some recommended options.
- Once finished, head to the API permissions and enter the Microsoft Graph in Microsoft APIs.
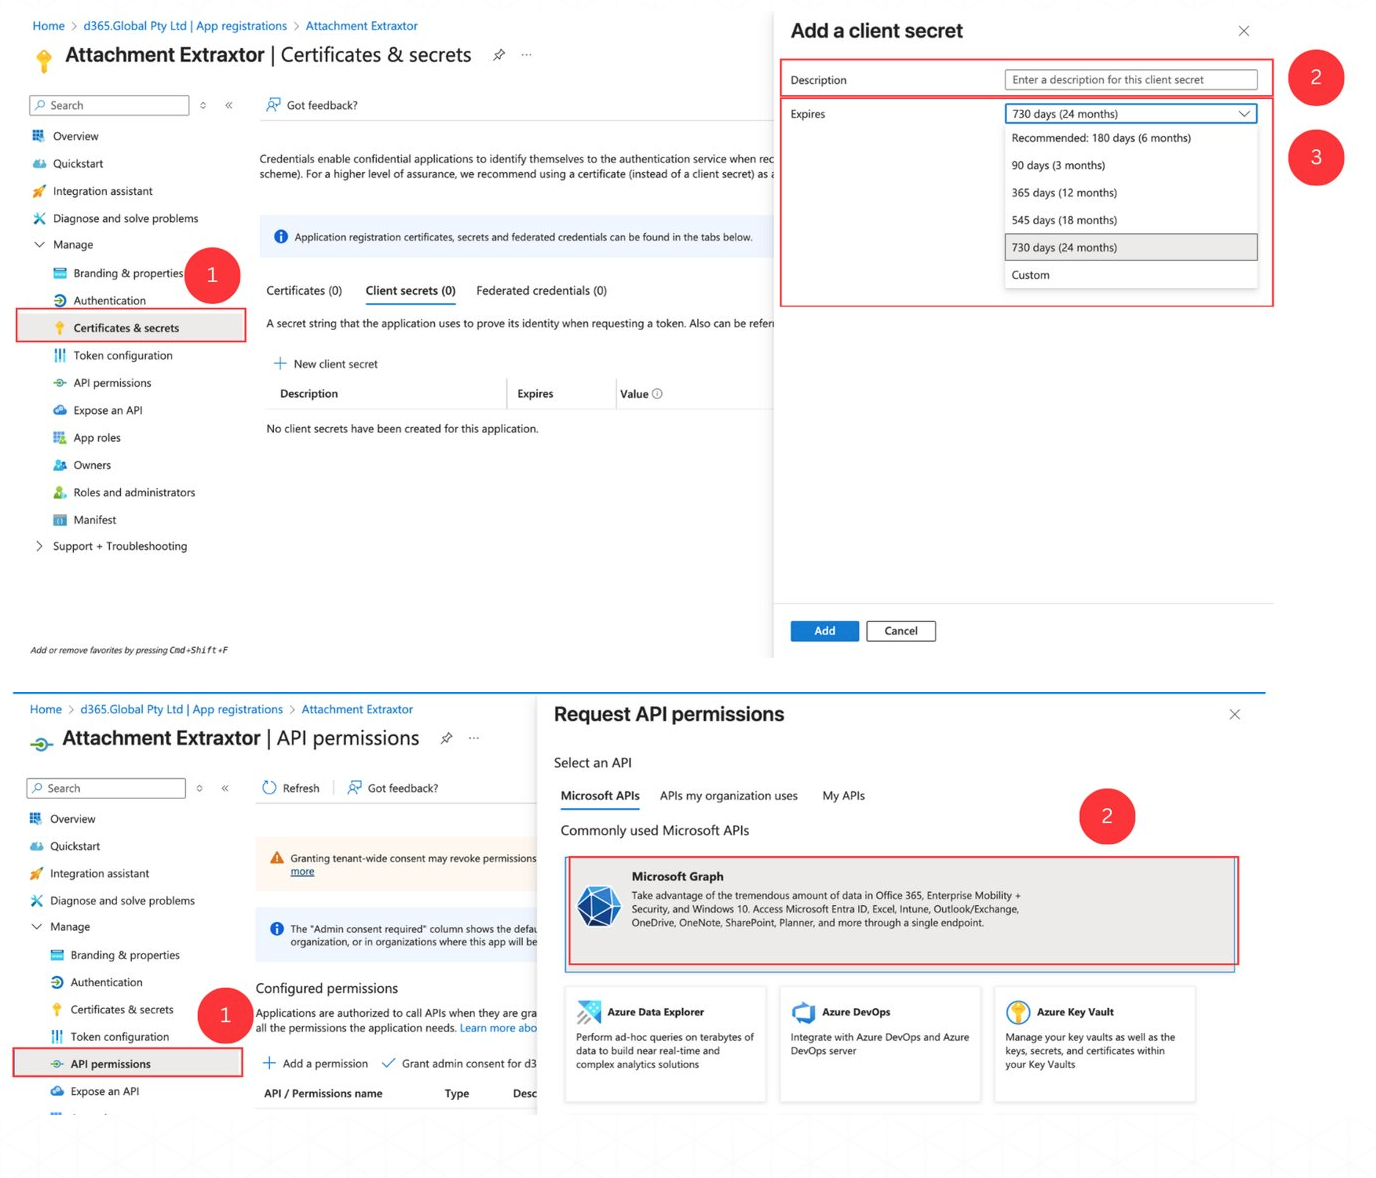
Configure Credentials (Part 4)
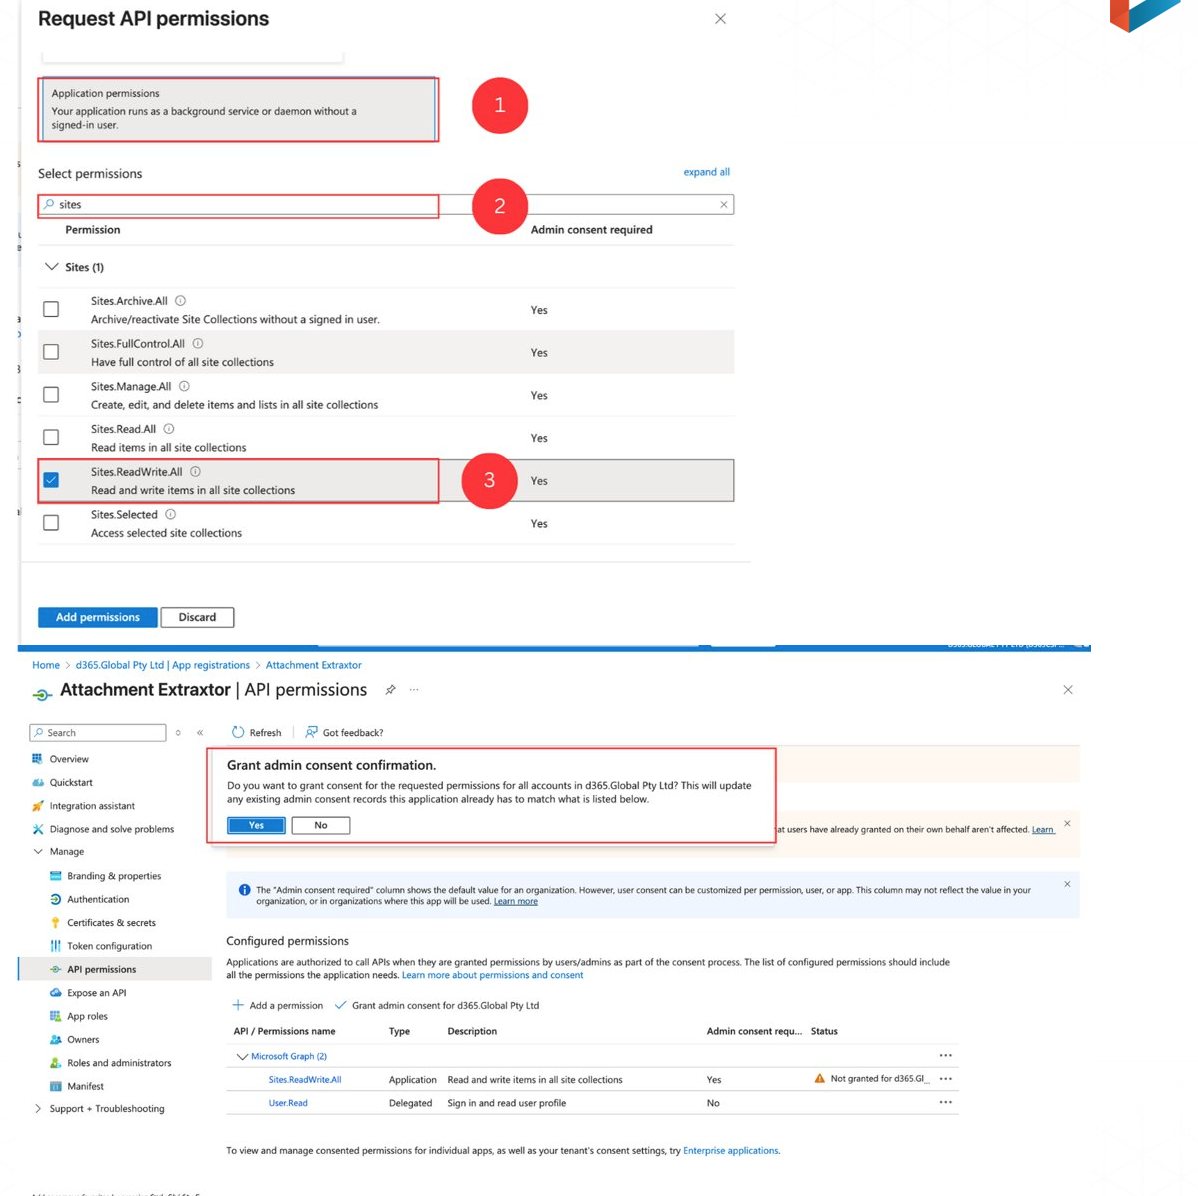
- Select the application permission for the Microsoft Graph.
- Search for sites and in the drop down select Sites.ReadWrite.All, and add permissions.
- Once completed, click Yes in the Grant admin consent confirmation and wait for your IT admin to grant you the permission.
Configure Storage Connection
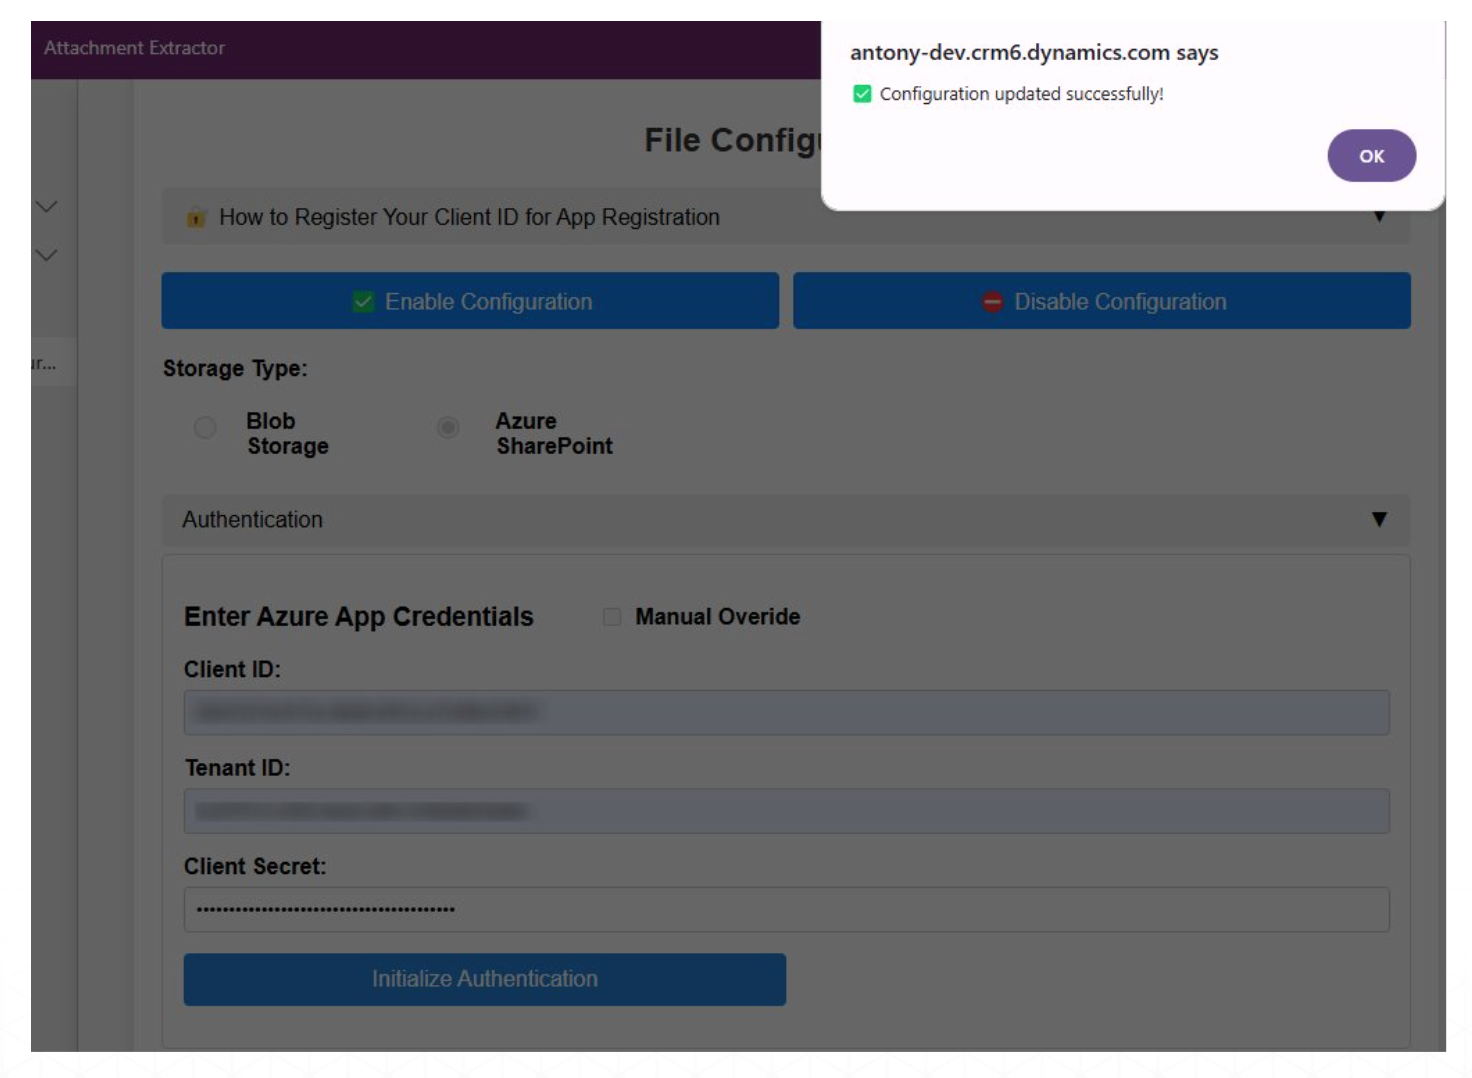
Once all details are entered, Click on Initialize Authentication and wait for the configuration alert message to pop up and click OK.
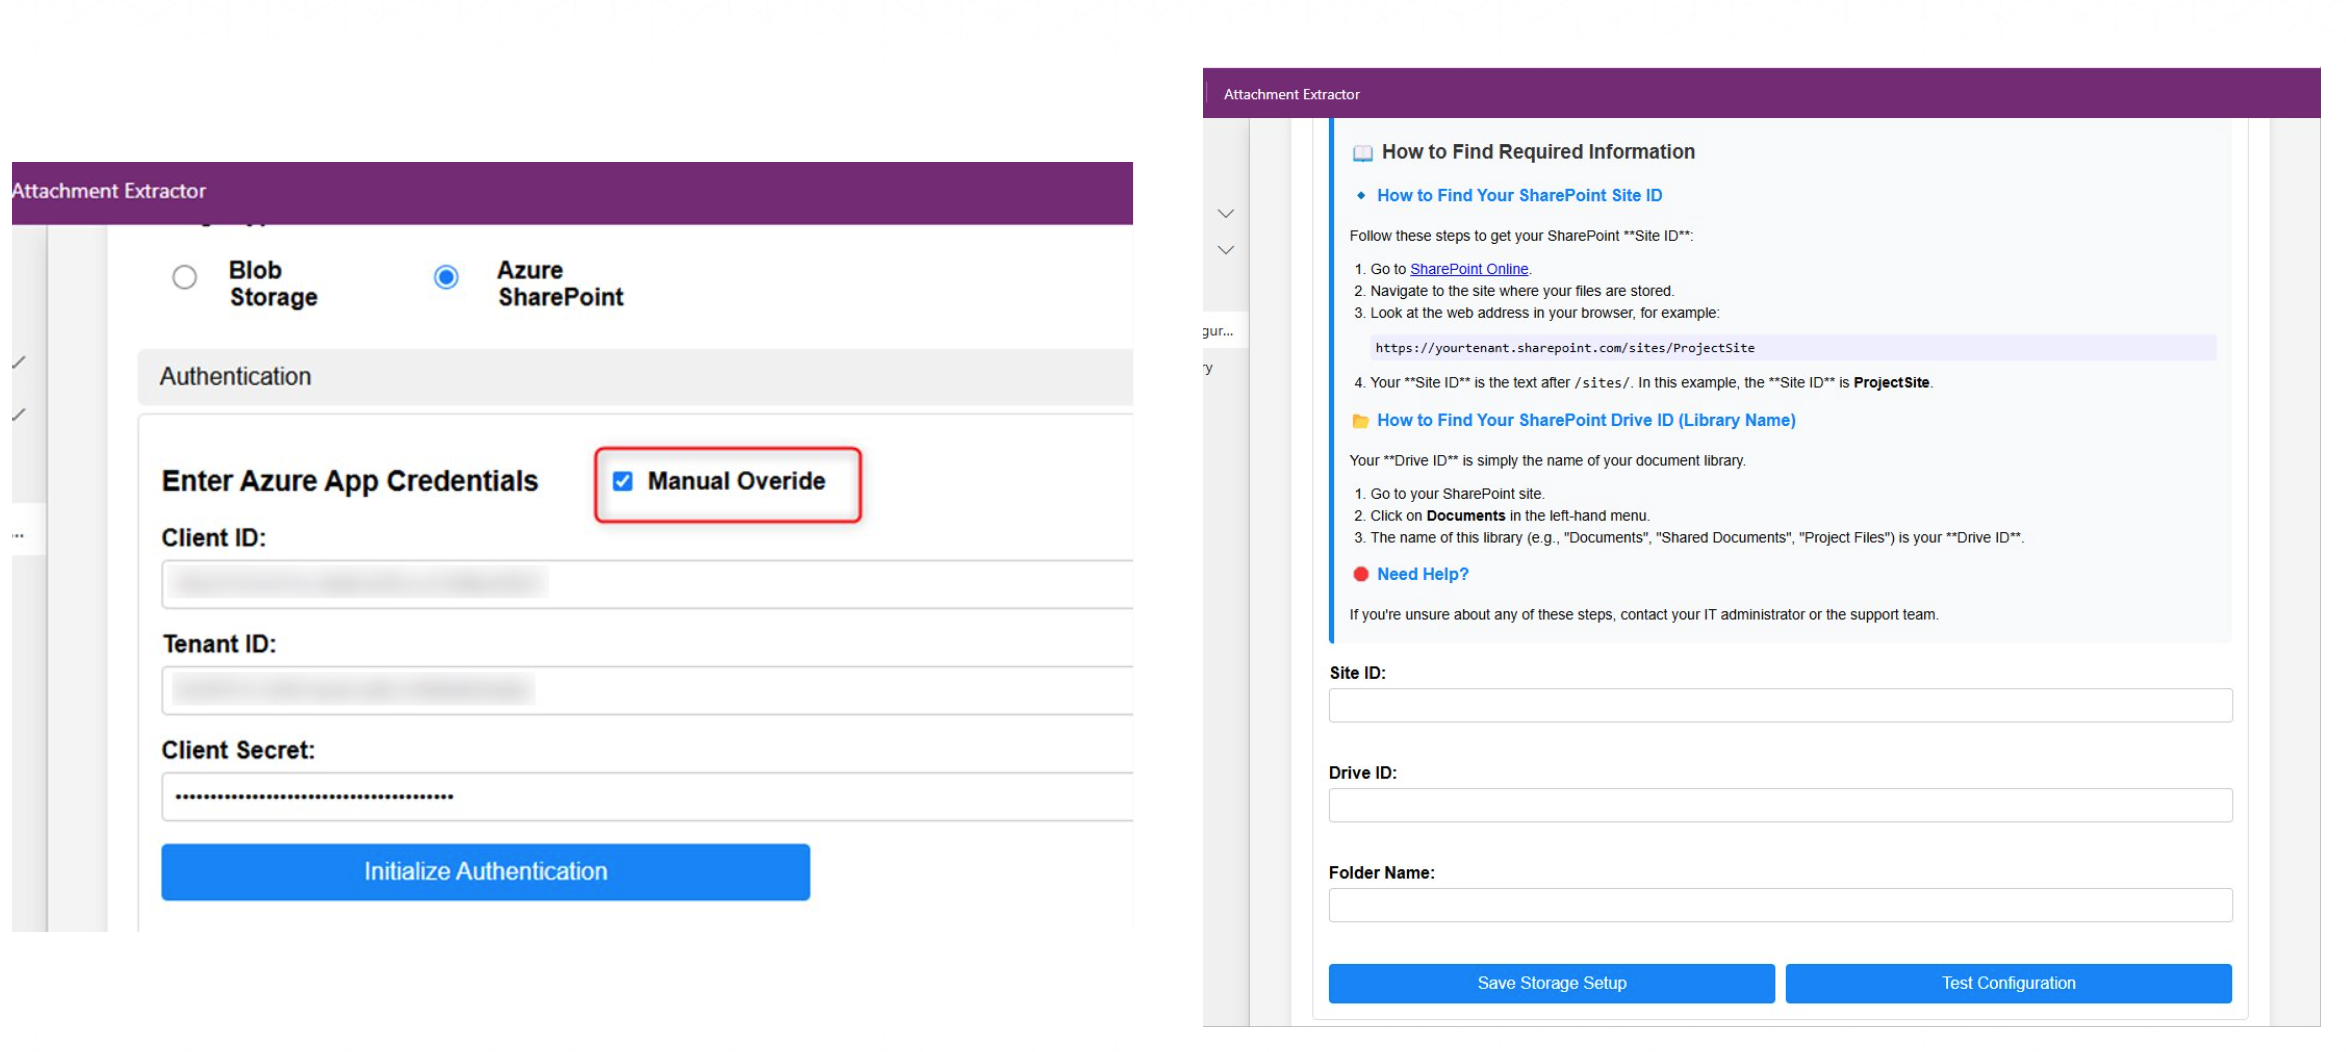
After a successful configuration, for the Azure SharePoint Configuration step, either select:
- SharePoint Site
- SharePoint Drive
- Folder Name
OR
Click on Manual Override and enter:
- Site ID
- Drive ID
- Folder Name
Click on Save Storage Setup and wait for alert message.
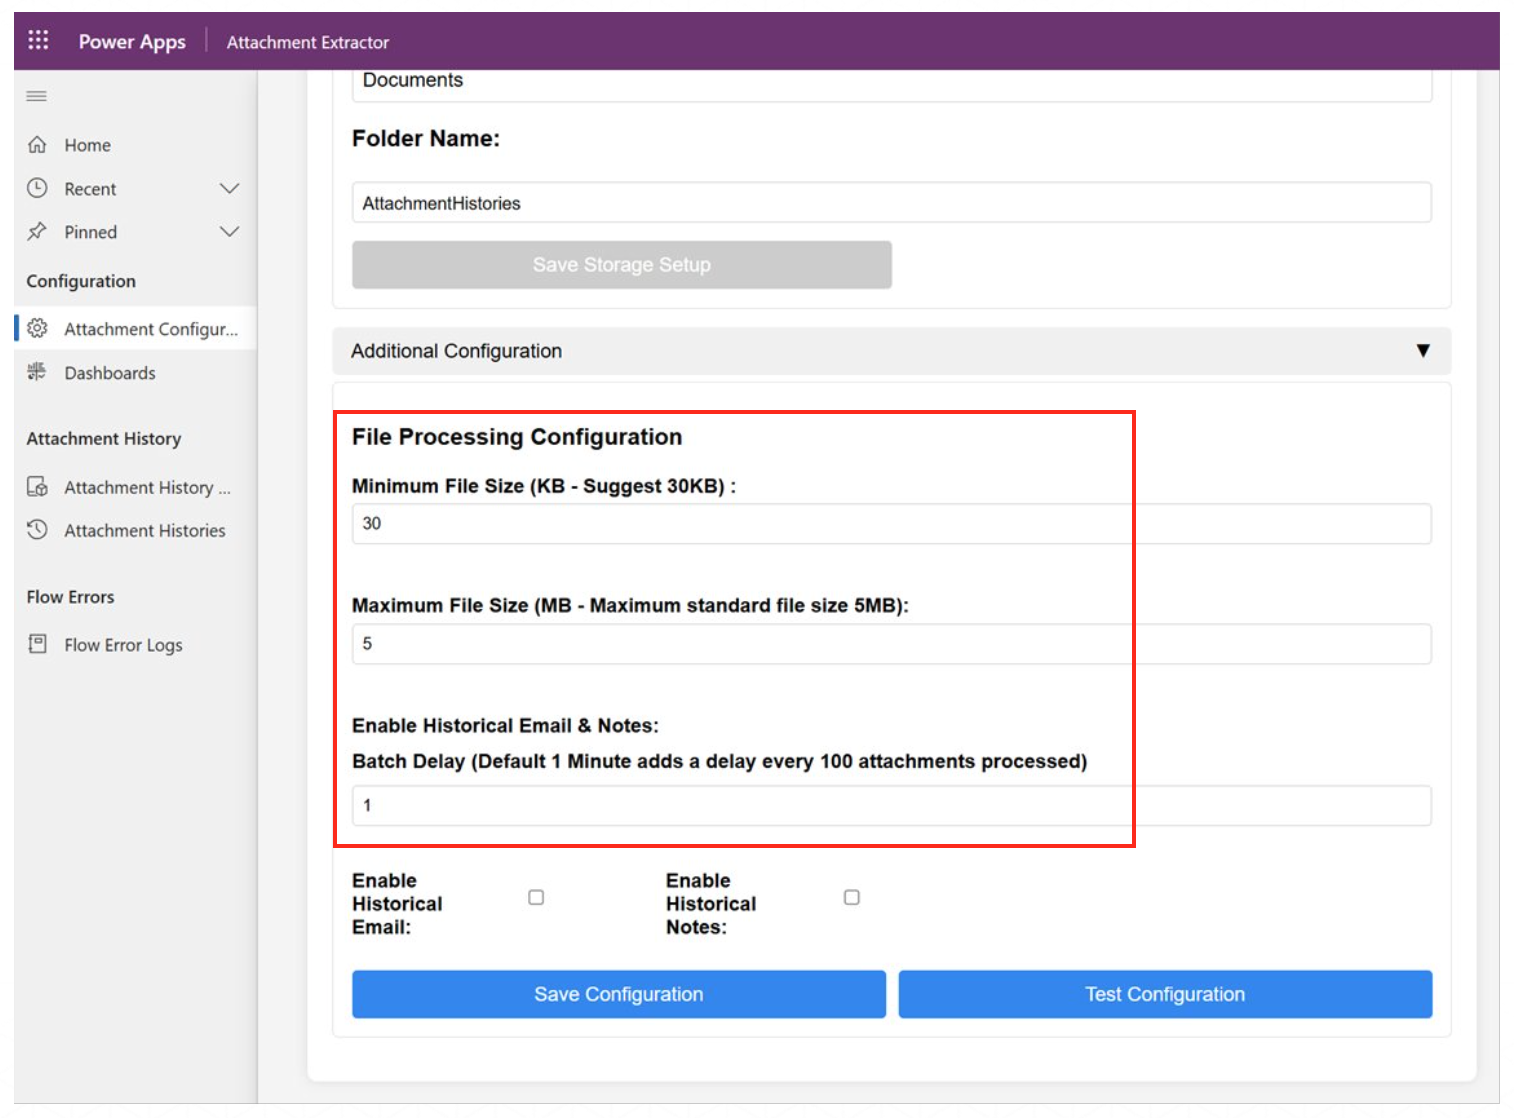
After successful storage setup, we need to enter additional file processing configuration details such as:
- Minimum file size
- Maximum file size
- Batch Delay
Enable Historical Email/Notes to retrieve configuration data based on details entered.
Configure Azure Storage
Enable Azure Storage option to configure Azure as the storage type.
If Azure Storage is selected, follow the configuration steps using the following information:
- Storage Account
- Container
- SAS Token
Complete the remaining steps similar to the SharePoint configuration process.
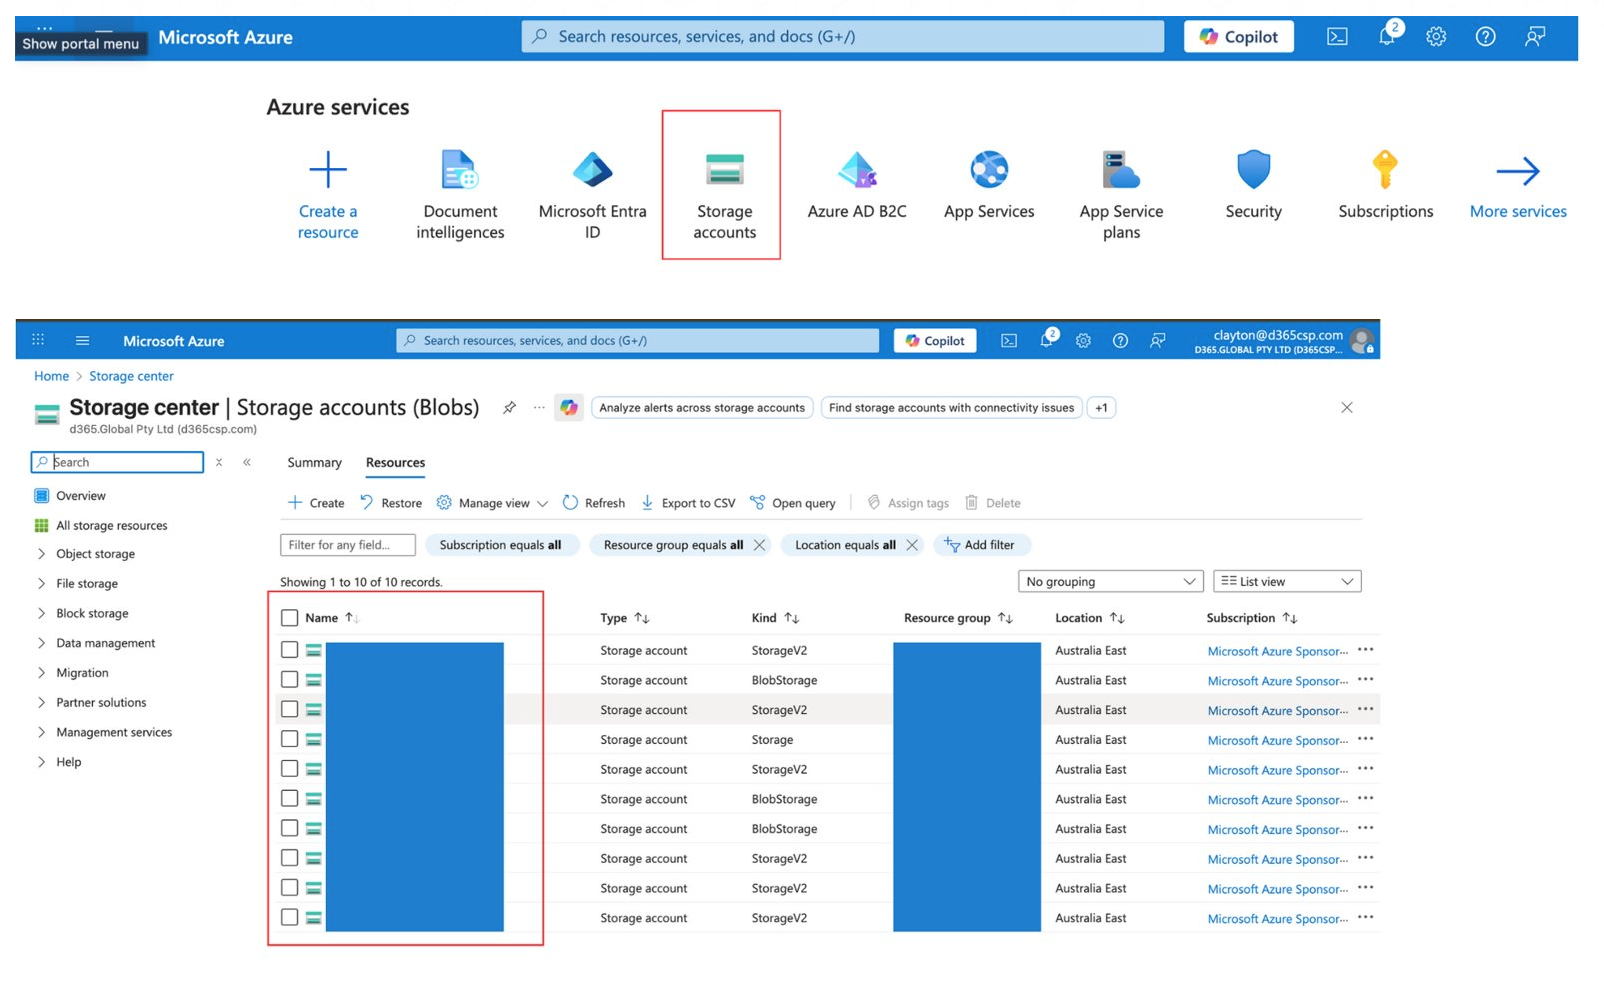
Configurre Azure Credentials (Part 1)
- In Portal.azure.com search for the storage accounts and select it.
- Once selected it will showcase all the storage accounts that are available, select the one you want to add the attachments to or create a new one.
- Save the name of the storage accounts.
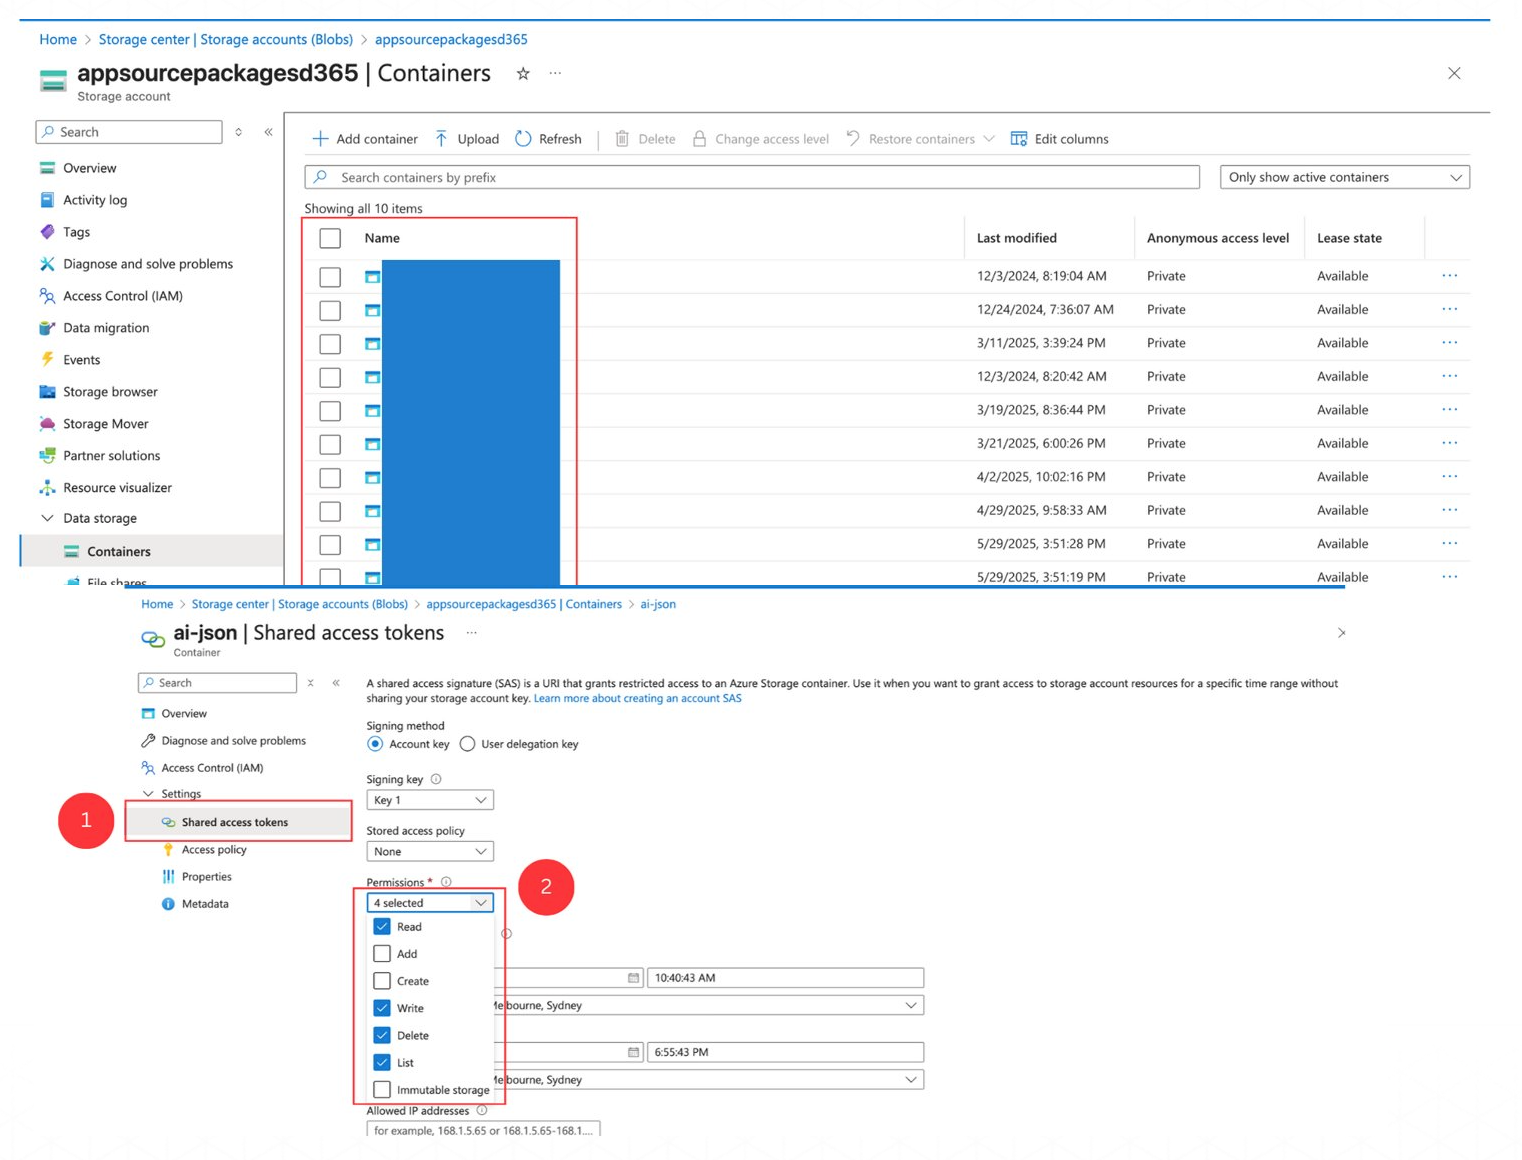
Configurre Azure Credentials (Part 2)
- After selecting the storage accounts, on the left menu select the data storage drop down and select containers.
- Select the container you want to use to store the files or create a new one.
- After clicking on the container in the left menu there will be a drop down settings and select the Shared access tokens option.
- Ensure in the permission select Read, Write, Delete and List.
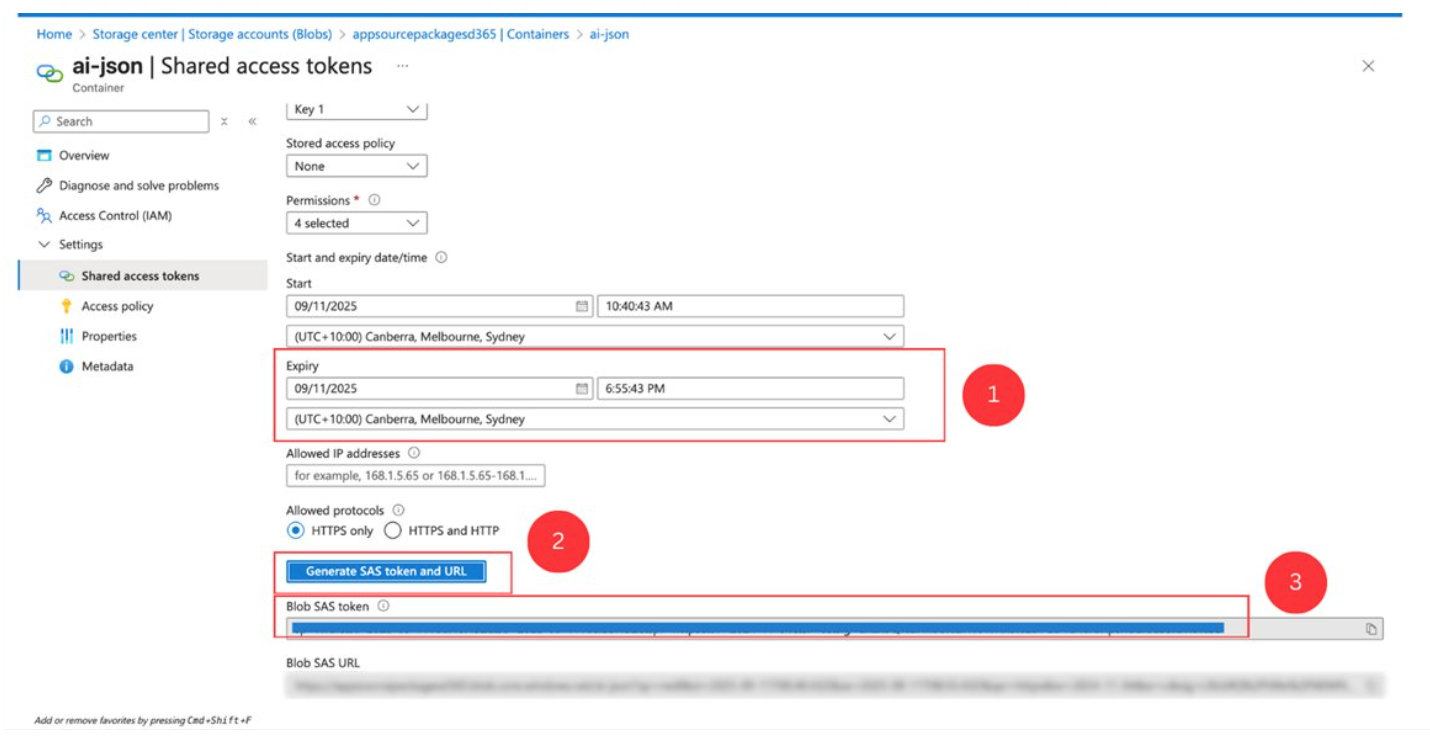
Configurre Azure Credentials (Part 3)
- Once the permission is set, make sure you set the expiry date to a long date.
- Click generate SAS token and URL and save the sas token.
- Save the storage account and container name as well to be used in the configuration.