3. Navigation
How to Navigate the Education Platform
3.1 Main Menu
The main menu provides access to various functionalities and modules within Dynamics 365.
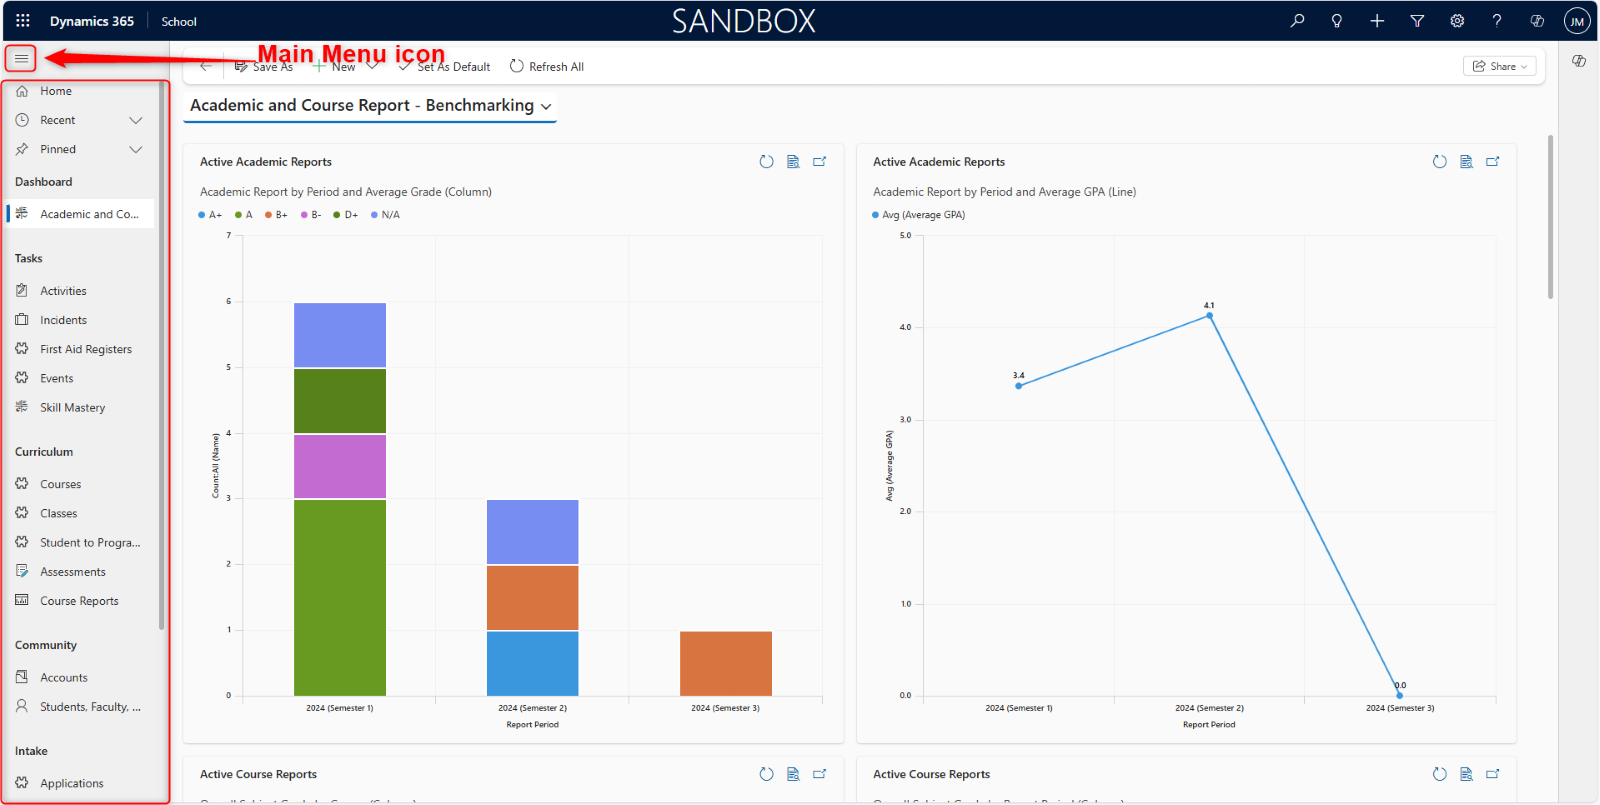
Once signed in, locate the main menu icon, typically three horizontal lines, or a grid-like symbol located on the upper left-hand side of the application window. Click on the main menu icon to expand.
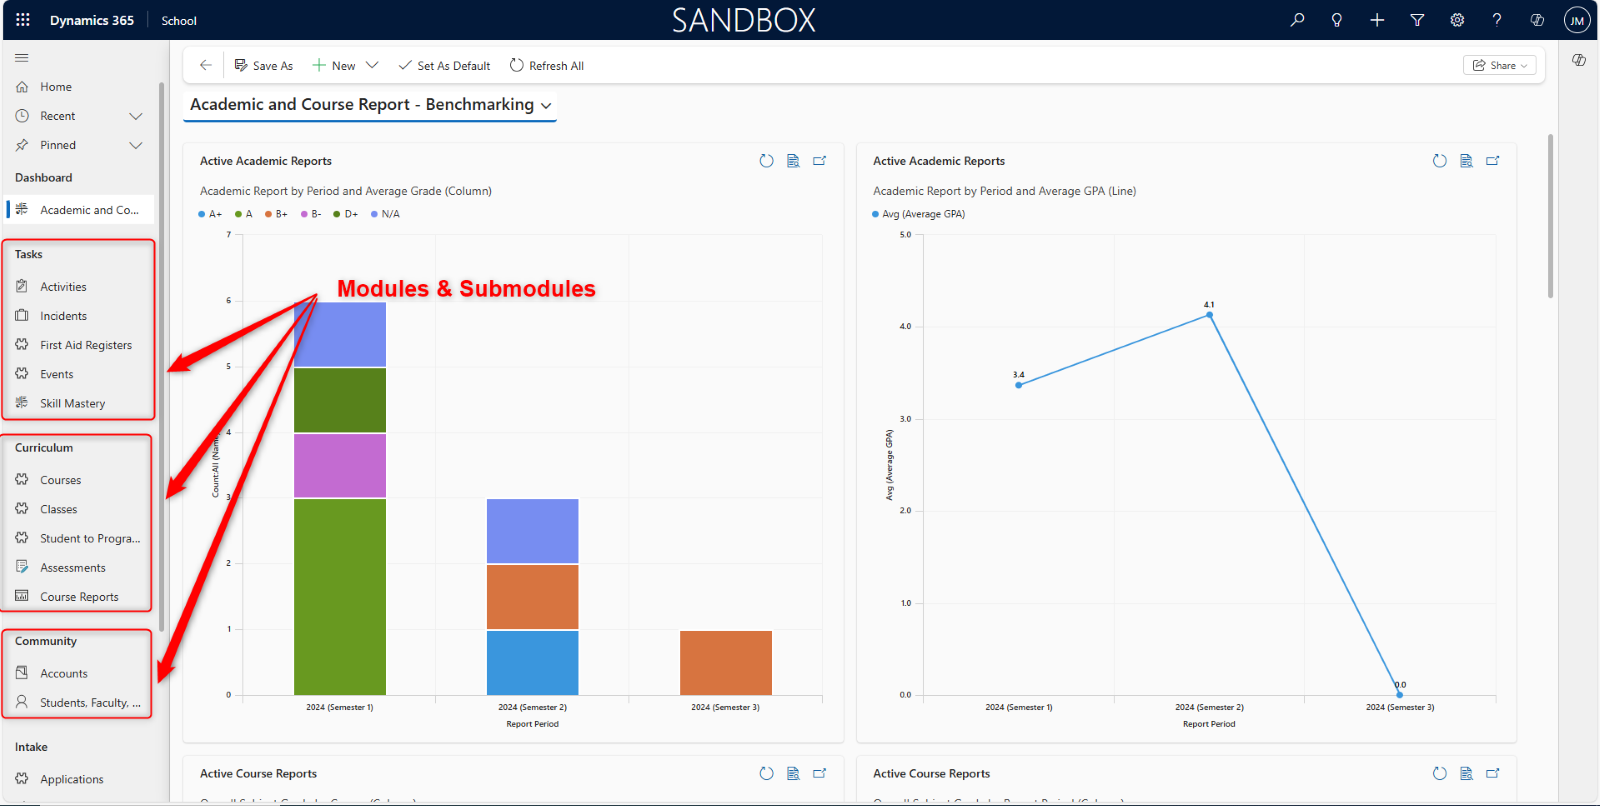
The main menu, once expanded, will display a list of available modules and submodules. Each module represents a specific area or functionality which is accessible to users (can depend on the user’s role).

3.2. Modules and Submodules
Modules are the primary categories of functionality, and submodules provide specific features under a certain category. From the expanded main menu, identify and click on the module relevant to your task to expand it and reveal any associated submodules.

The modules and submodules displayed may vary based on your user role and permissions. You will be granted access if you have permission for your account, based on your role.
3.3. Records, Forms & Entities
Records represent individual entities (e.g., students, parents), and forms are their visual representations.
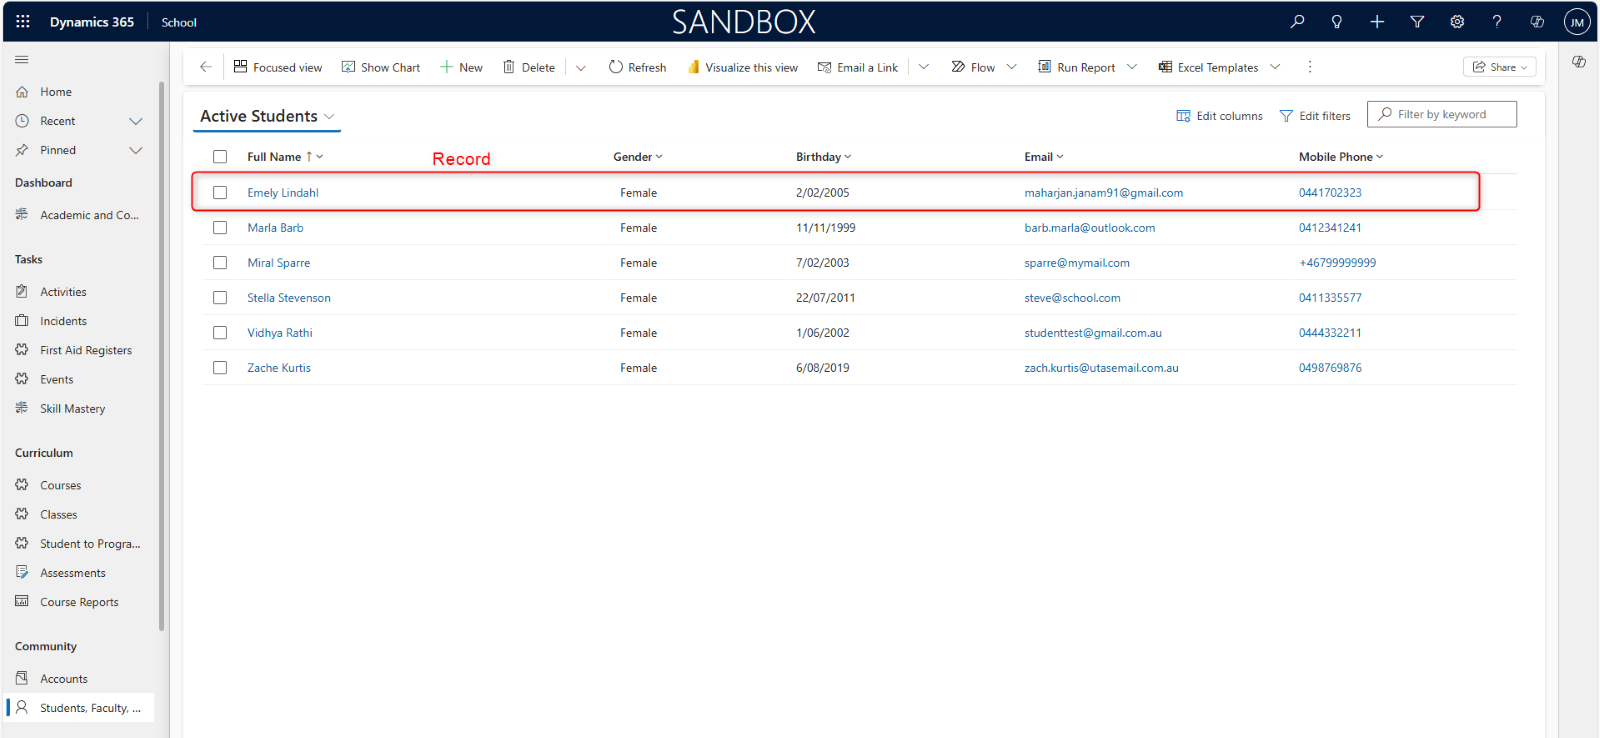
Within a module or submodule, locate the record you wish to view, edit, or create.
Click on an empty white space near the record to avoid opening the wrong one.

A Record is a single instance of an Entity. Think of an Entity as a table in a database (like “Contacts” or “Accounts”), and a Record as a single row in that table. Each record represents a unique item, person, or organization that you are managing within the system.
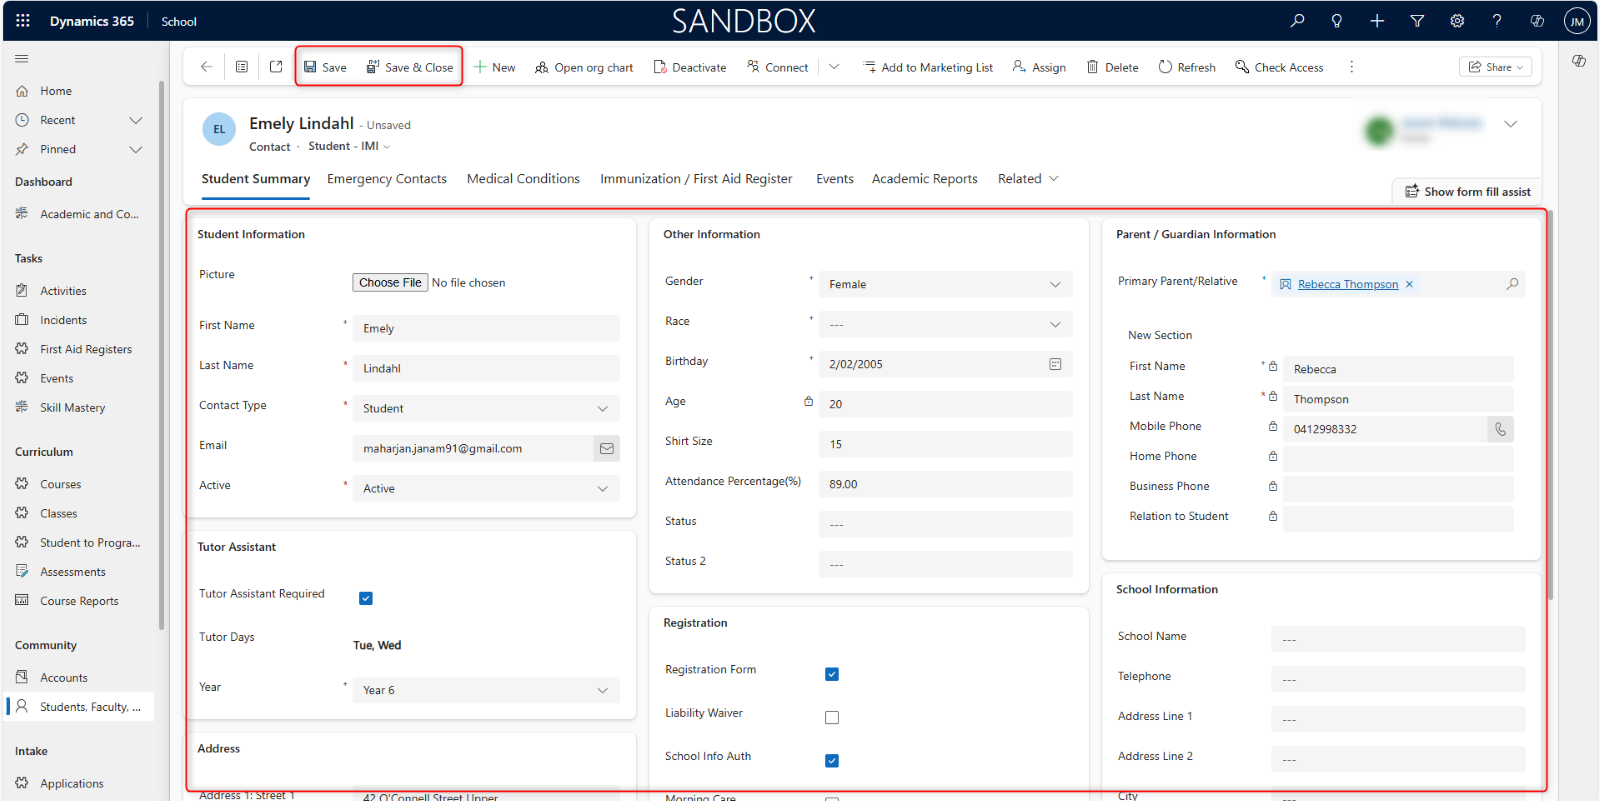
A Form is the primary user interface component used to view, create, and edit individual records. When you open an Active Students record, for example, what you see is the Account Students form.
Click on the record to open its associated form, which displays detailed information (For example, the student record).
In the form you will see many fields. You can add or change information in this section.
To save changes made to the record, click the Save or Save & Close button within the form.
